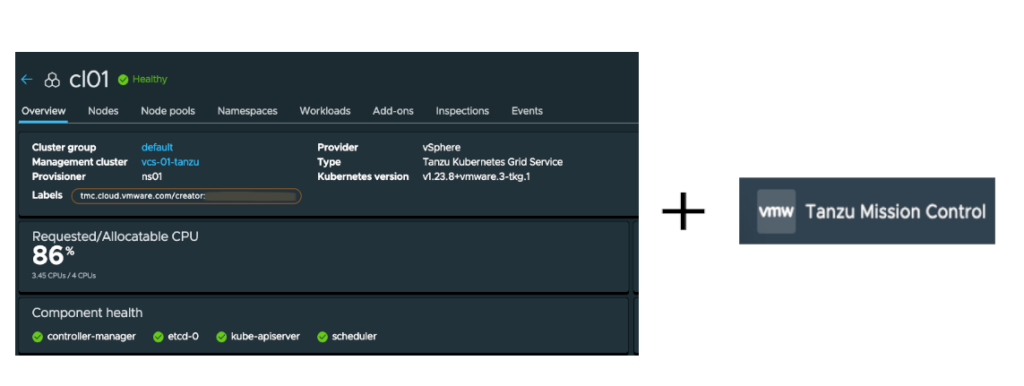
Tanzu Mission Control is a powerful tool. You can use it to manage your Kubernetes fleet. One of the basic functionalities is creating a Kubernernetes cluster. You can achieve this on the on-premise vSphere infrastructure or in the public cloud (AWS or Google Cloud).
In this tutorial, you can find instruction how to provision TKG cluster on the VMware cluster.
Requirements:
- Configured vSphere with Tanzu
Look at my previous posts to learn how to enable it (here I use vSphere with Tanzu + AVI LB):
vSphere with Tanzu + AVI Load Balancer
vSphere with Tanzu + HAProxy - Access to the Tanzu Mission Control
- Configured Management Cluster in the TMC. Instruction is here: https://vmattroman.com/how-to-add-supervisor-cluster-to-the-tanzu-mission-control/
- Firewall rules and ports. Be sure to open the right ports and all network traffic to the *vmware.com site – https://ports.esp.vmware.com/home/Tanzu-Kubernetes-Grid+Tanzu-Mission-Control
1. Creating vSphere namespace
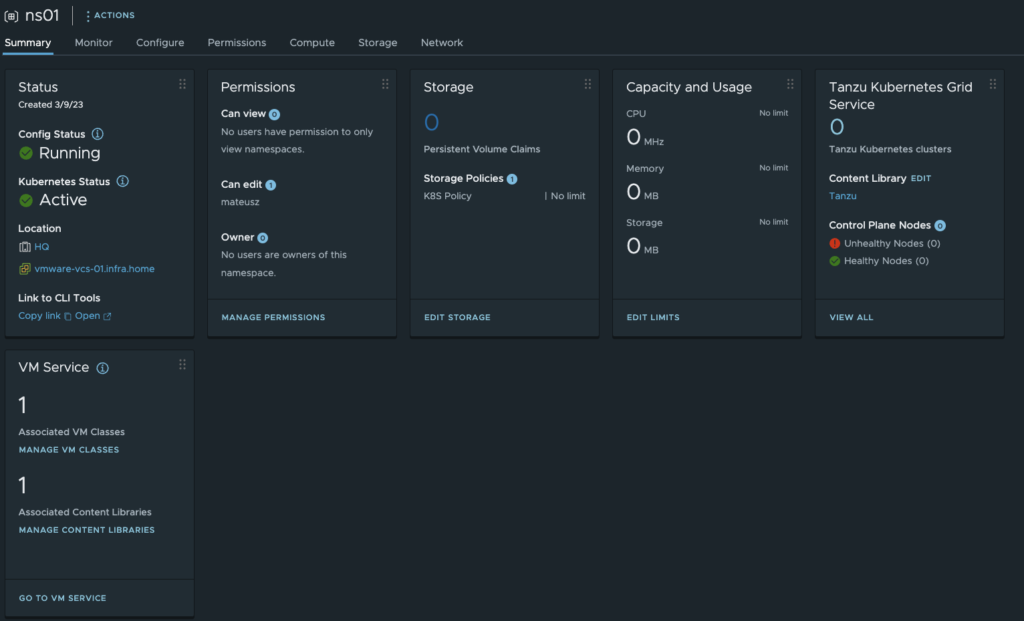
At first, we need to create vSphere namespace to prepare space for the TKG cluster deployment.
1. In vSphere Client choose Menu -> Workload Management, change to the Namespace tab and choose Create namespace button. Choose Cluster and type a Name.
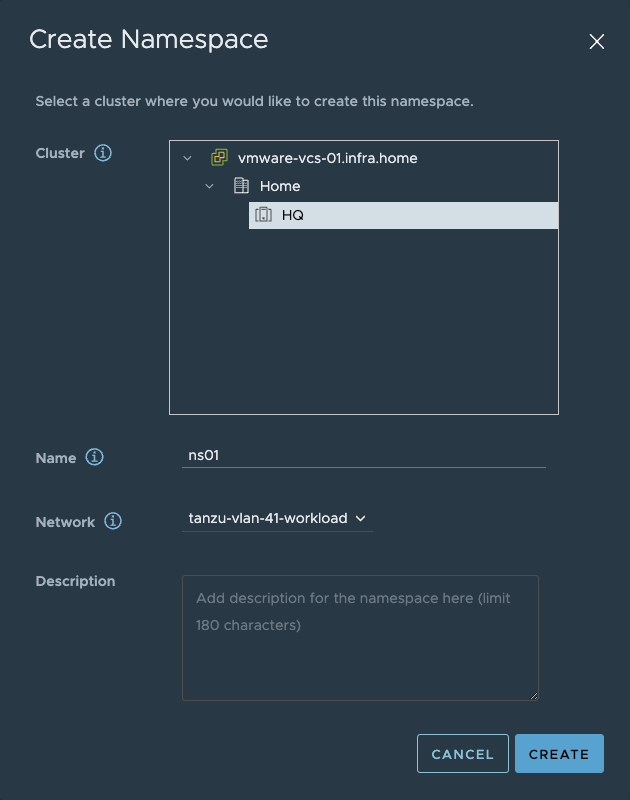
2. Configure Permissions, choose Storage Policy and select VM Class or classes.
2. Creating TKG cluster
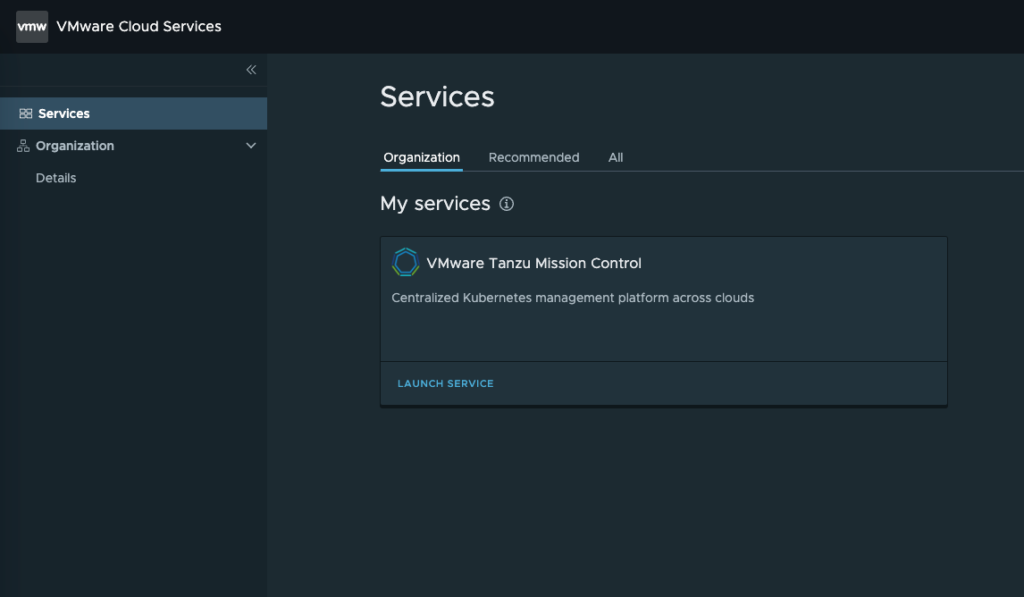
1. Go to the https://console.cloud.vmware.com/ and type your username and password.

2. From the next screen, choose Launch Service below VMware Tanzu Mission Control.
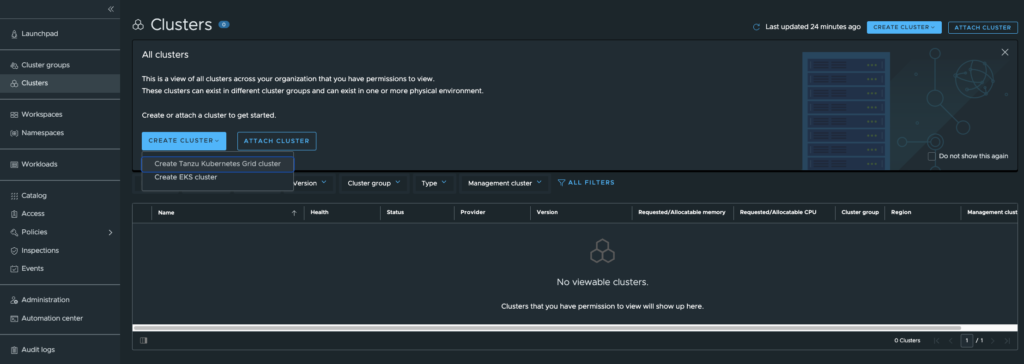
3. From the left pane choose Clusters tab. Then, choose Create Cluster and Create Tanzu Kubernetes Grid Cluster option.
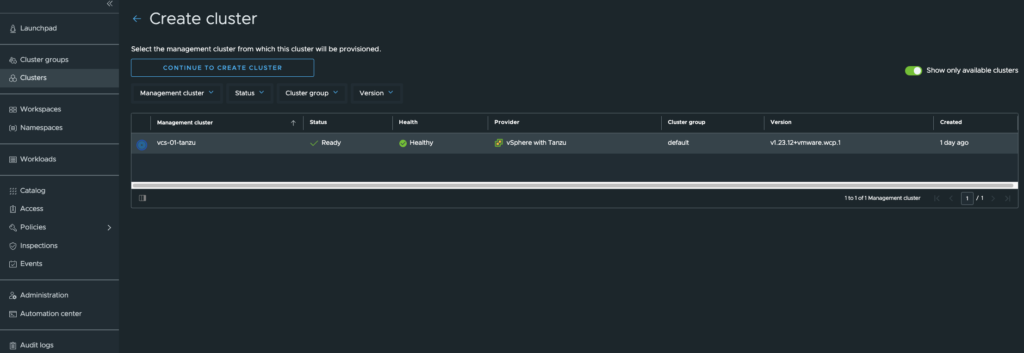
4. Choose vcs-01-tanzu as a Management Cluster and press continue to create cluster.
5. Provisioner – This is a vSphere namespace list created in the vSphere. Choose “ns01” and
click Next.
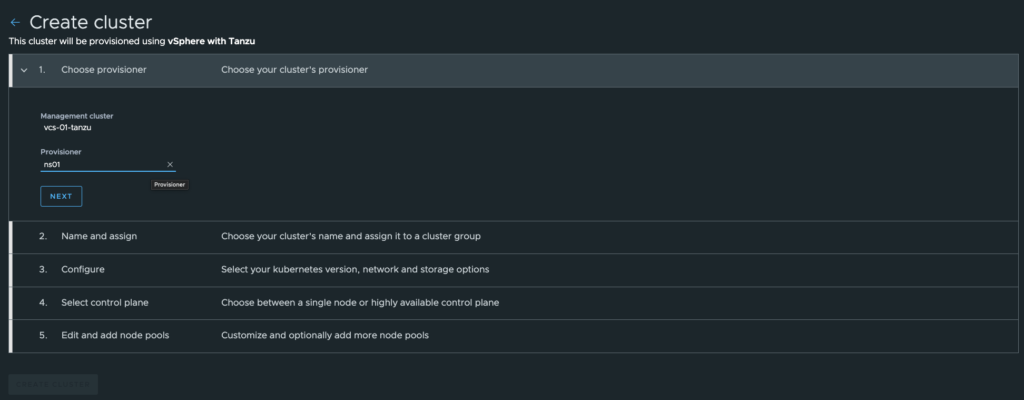
6.
Cluster name – name of your TKG cluster. This value is a part of the full name of the control plane node. For example: cl01-control-plane-[random_values]
Cluster group – in my case is a default one. You can create another cluster group and put cluster(s) there. More details about cluster groups you can find here: https://docs.vmware.com/en/VMware-Tanzu-Mission-Control/services/tanzumc-getstart/GUID-07782073-0803-4D93-9F27-D2F6EF2EBBAC.html
Description & Labels values are optional. Labels can make life easier, especially if we have many management clusters, clusters, workloads etc. It helps to organize and identify your Kubernetes resources.
Click Next.
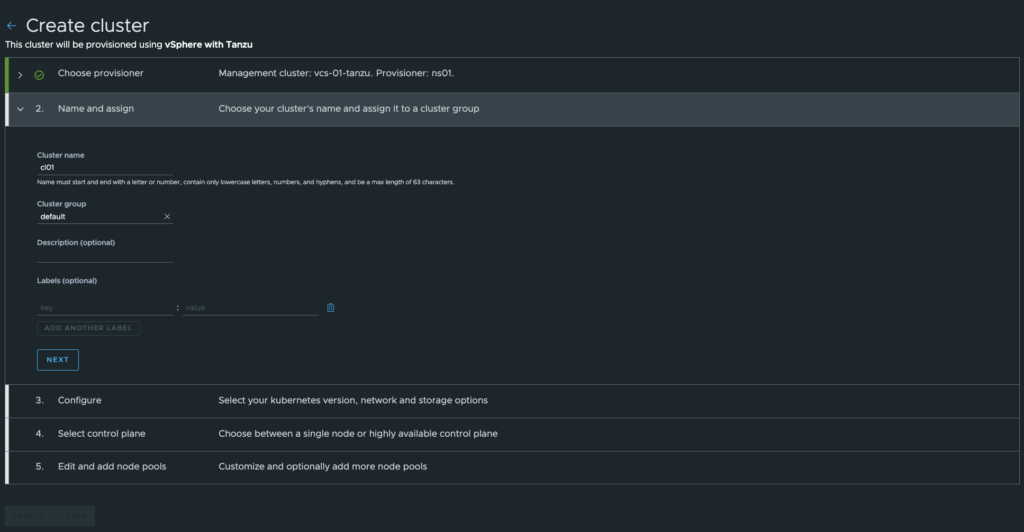
7.
Kubernetes version – choose Kubernetes versions of your choice.
Pod and Service CIDR – these are CIDRs to which the pods and services will be connected inside the cluster.
Proxy configuration – if you have a proxy you can choose it here. But remember, to create proxy object earlier: Administration->Proxy configurations->Create Proxy Configuration
I my case, this setup don’t need a proxy.
Allowed storage classes (optional) – additional option to add storage class. You can leave as is with a default setting.
Click Next.
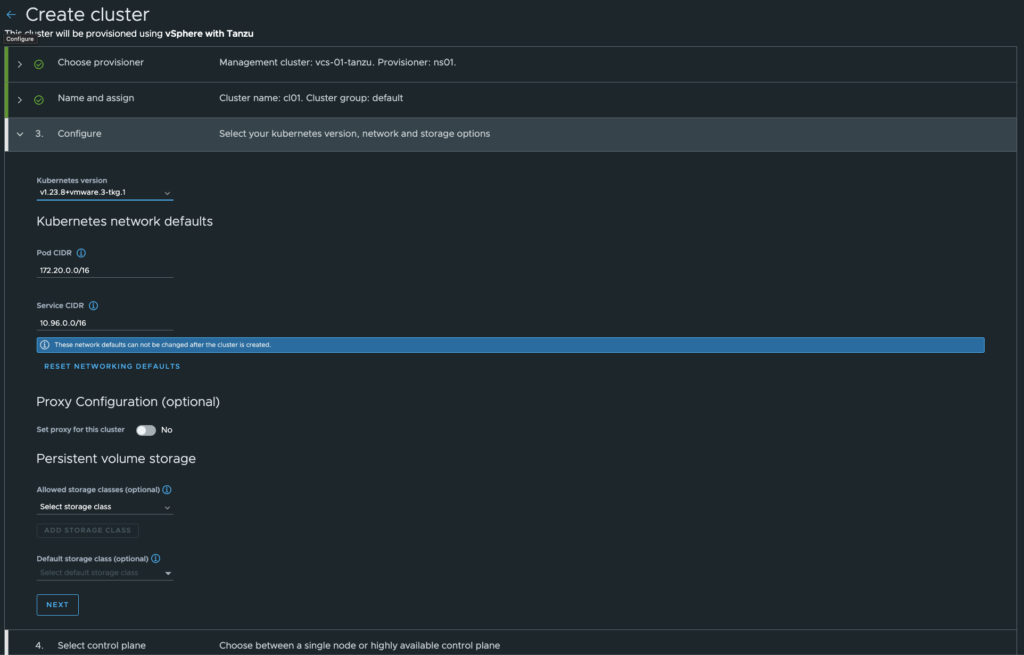
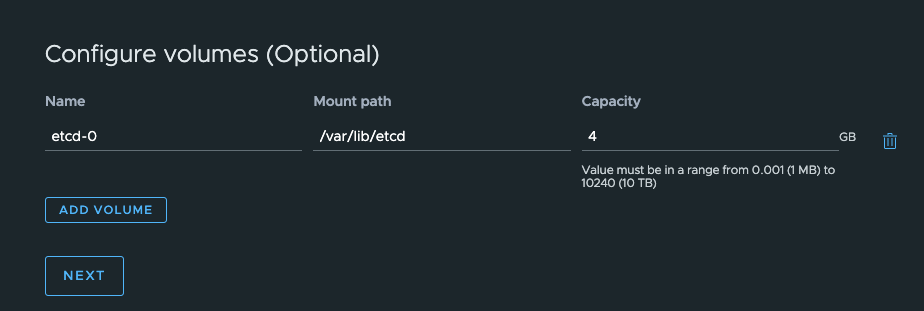
8. Now, select control plane configuration.
Single node – 1 control plane will be created.
High avaiable – 3 control planes will be created.
* if you choose add volume below Configure volumes there is an option, to create additional PVC attached to the cluster.
Click Next.
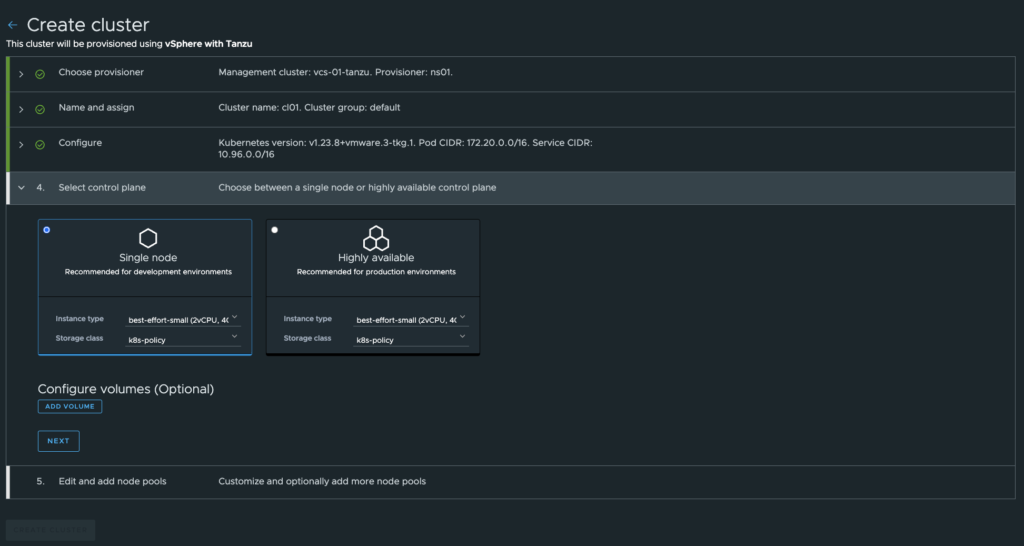
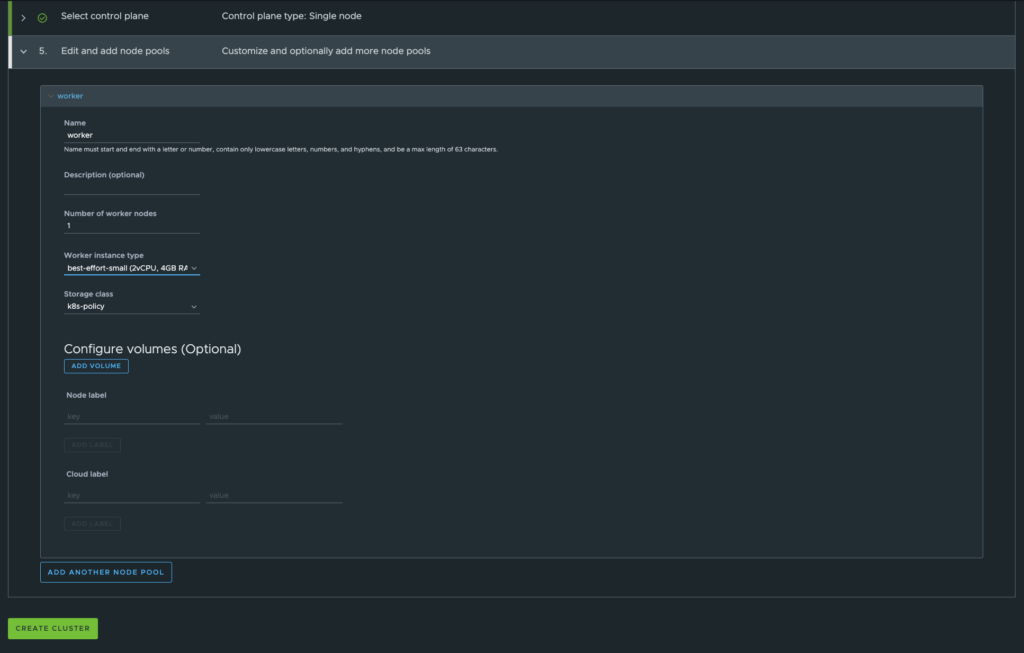
9. Last step – worker nodes confiugration.
Name – similar to the control plane name, this value is a part of the full name of the worker node(s). For example: cl01-[worker_name]-[random_values]
Number of worker nodes – choose desired number of the worker nodes.
Storage class – choose dedicated storage class.
Description & Labes – add it if you want.
* if you choose add volume below Configure volumes there is an option, to create additional PVC attached to the cluster.
Additionally, you can create another node pool with similar configuration like in the defualt one.
Click create cluster.

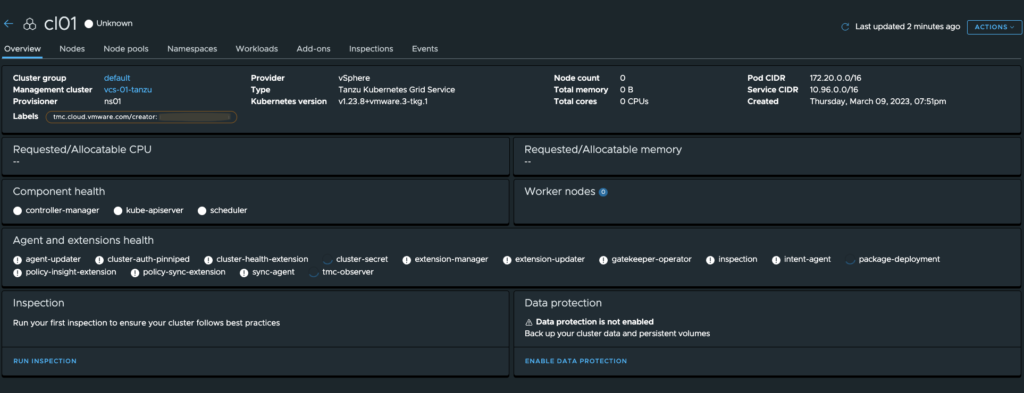
10. After a while, deployment will start. You can monitor a progress from the TMC or from the vSphere console. TKG nodes are created from the OVF images included in the local Tanzu Content Library.

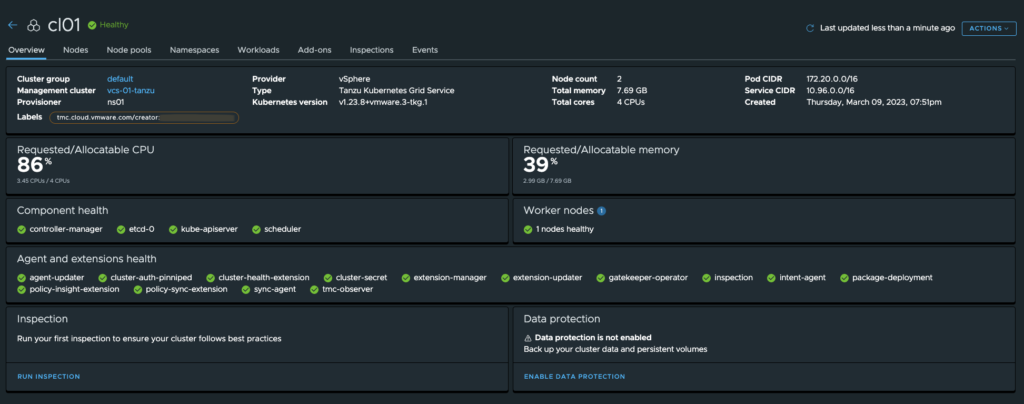
11. After a few minutes, cluster is ready! At below, there is a view from TMC console, vSphere console and from the terminal.


3. Remove TKG cluster
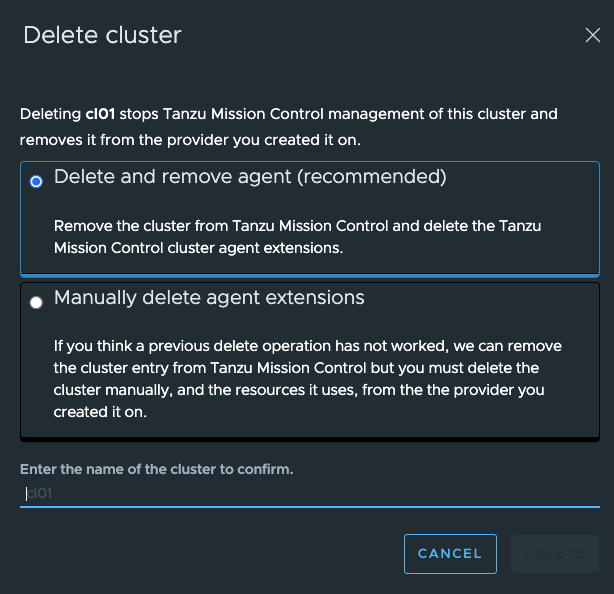
If you want to remove TKG cluster, do it through TMC console. Click 3 dots near TKG cluster name, choose Delete and select first option “Delete and remove agent (recommended)”
After that, TMC automatically remove cluster.

Summary
There are several methods of creating a TKG cluster. Using TMC is an easy a fast way. At this moment, you can easily manage your cluster. For example, increase number of worker nodes, setup backup or install applications from Tanzu Packages.


