Patching infrastructure is a typical administration task. To maintain and keep infrastructure secure and up to date, it’s important to install updates. Especially the critical ones.
There is a various ways to patch vCenter server. You can use it vSphere client, VAMI or ISO file.
Taking the opportunity that a new version of vCenter 8 ( https://docs.vmware.com/en/VMware-vSphere/8.0/rn/vsphere-vcenter-server-801-release-notes/index.html ) appeared, I decided to write procedure how to patch it using ISO file and shell.
This post is a procedure how to patch from vCenter 8.0c to vCenter 8.0 U1. But, if you have, for example vCenter 7.0 U3k and want to patch to 7.0 U3l the steps are similar.
1. Downloading VCSA patch
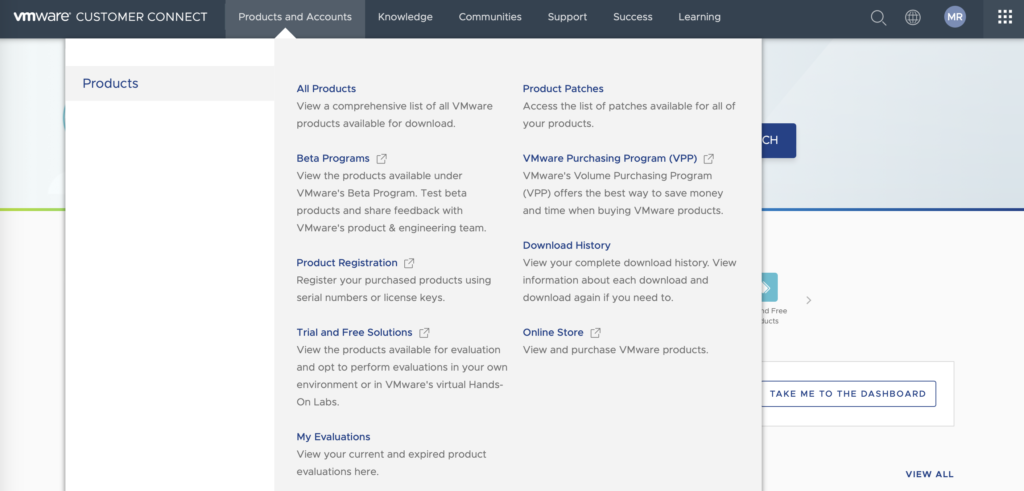
1. Log in to the https://customerconnect.vmware.com
From the upper menu, choose “Products and Accounts” and “Products Patches”.
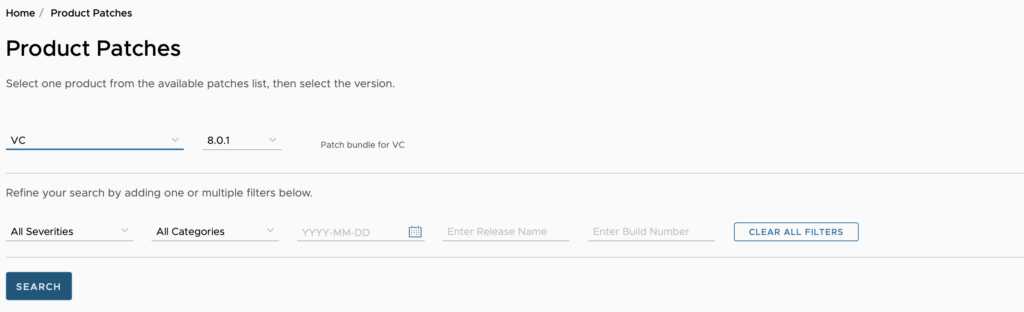
2. From the left drop-down list, choose “VC” which indicates with vCenter. Leave 8.0.1 version and click “Search” button.
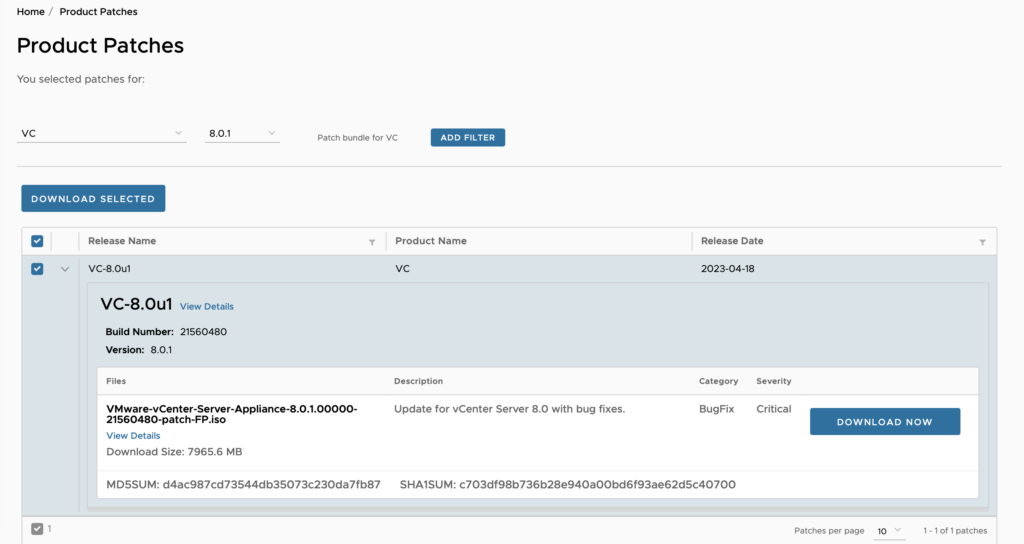
3. You should see list of all available patches. Check the last one with a name “VC-8-0u1” and download it. Remember, patch ISO file has “patch-FP” in the name.
2. Preparing to patch vCenter
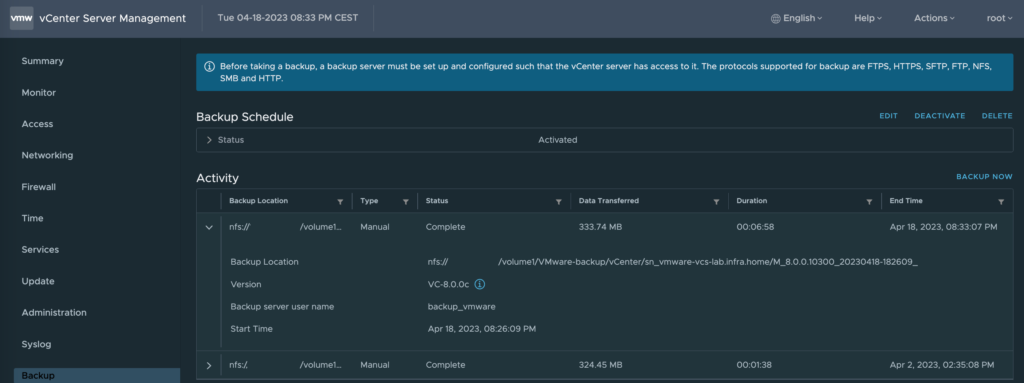
1. Create vCenter on-demand backup from VAMI (VMware Appliance Management Interface). You can access to it by https://[IP/FQDN of vCenter server]:5480
This is preferable way to make a safe file backup of the vCenter before any changes. If you don’t have any scheduled backup task, you can create it from “Backup” section.
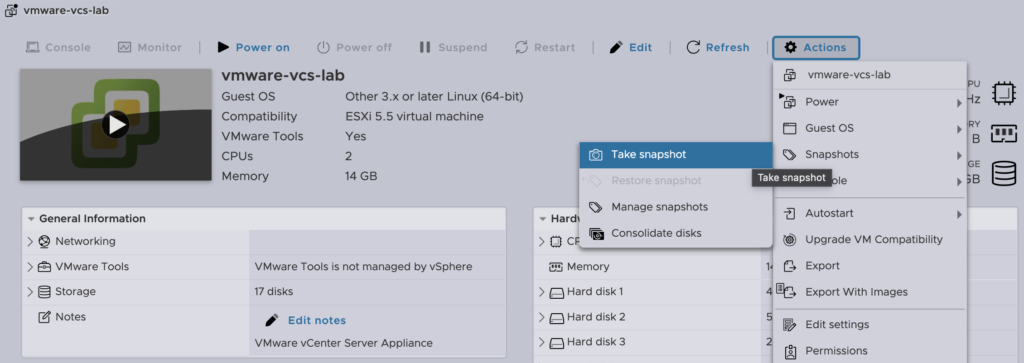
2. This step is optional. Apart from file backup with VAMI, you can create snapshot of the virtual machine. The good practice is, to shut down VM before take it. Log into the ESXi host where vCenter VM is. Choose Actions, next Take snapshot, provide a name and create it.
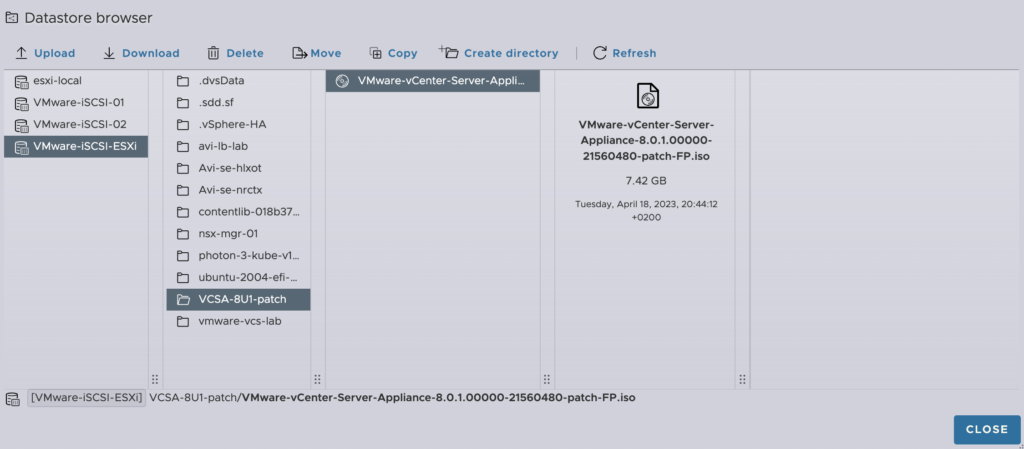
3. Upload VMware-vCenter-Server-Appliance-8.0.1.00000-21560480-patch-FP.iso to the datastore.
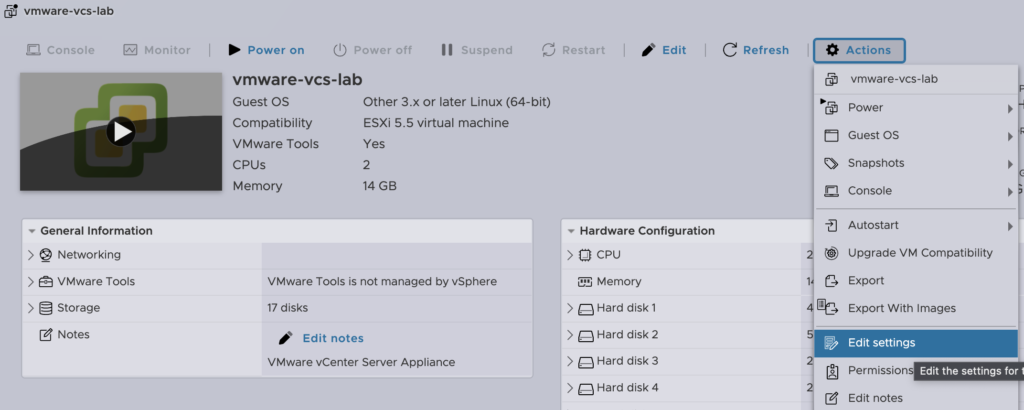
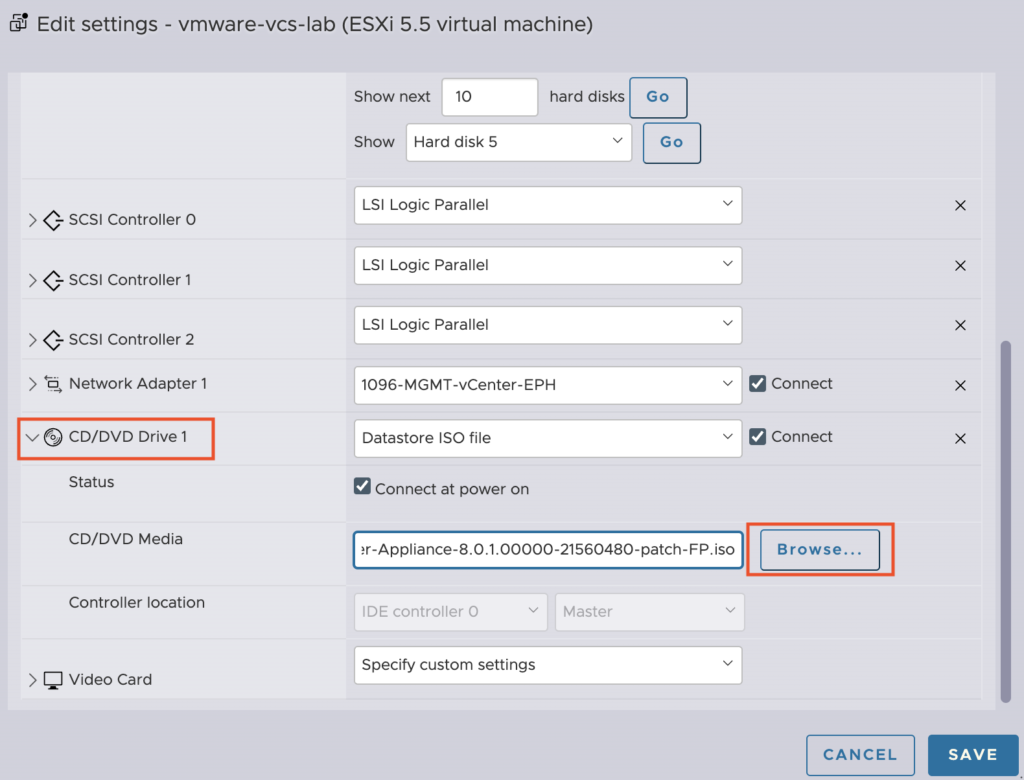
4. Click Actions and Edit settings on the vCenter virtual machine.
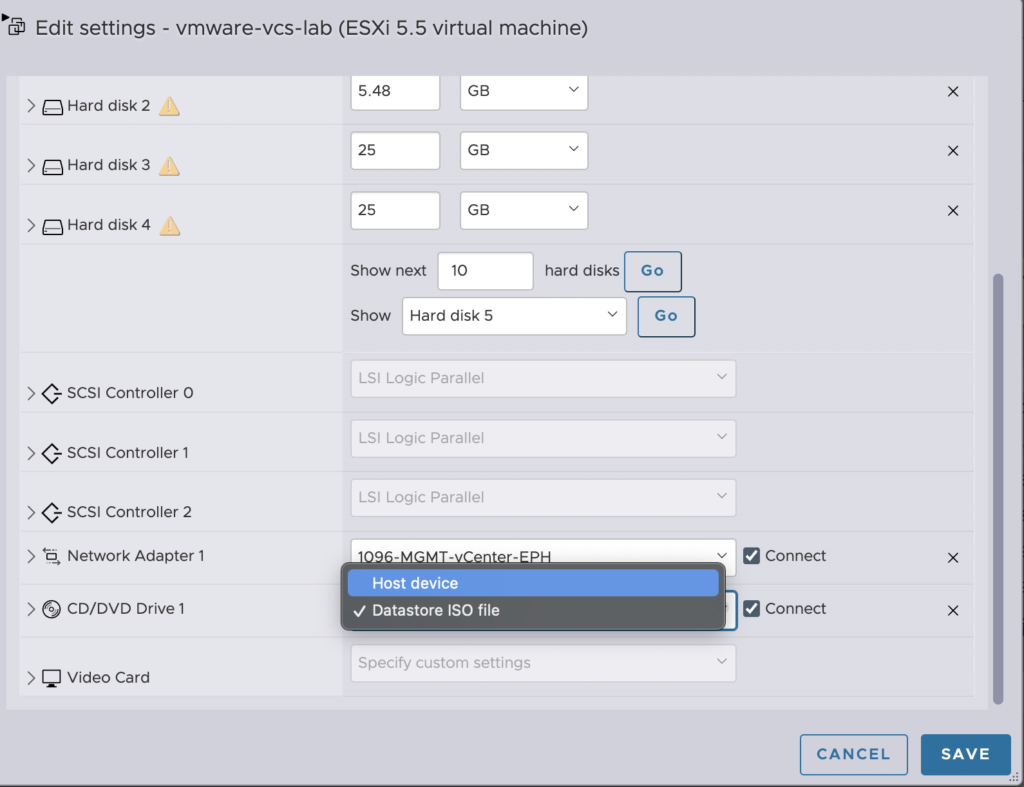
5. Expand CD/DVD Drive 1 on the left side. From the drop-down list in this row, change Host device to Datastore ISO file. In the CD/DVD Media line, choose Browse button and find uploaded ISO file. Check Connect, Connect at power on and click Save.
Power ON virtual machine.
3. Patching process
- When vCenter will be ready, log in via ssh with a root account.
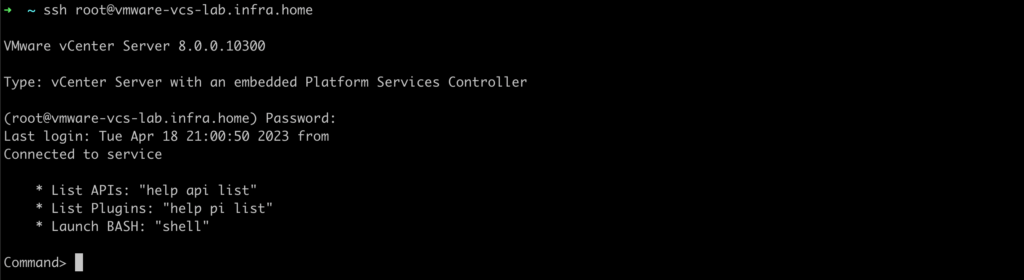
2. Type a command as below and begin.
–acceptEulas flag is optional, this avoid manually accepting Eulas in this step.
The process begin with a staging. This a preparation before patching, checking requirements, included in ISO packages etc…
software-packages stage --iso --acceptEulas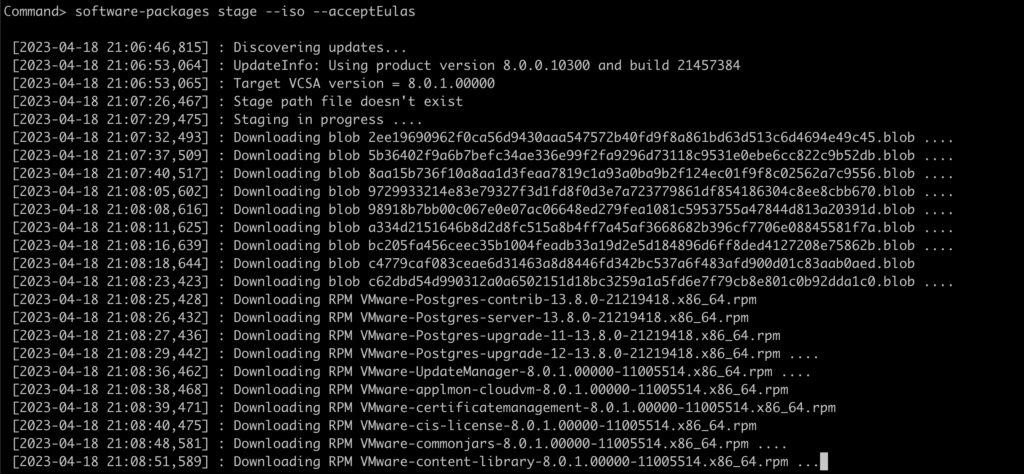
3. After a while, staging process end with a “Staging completed successfully” information.
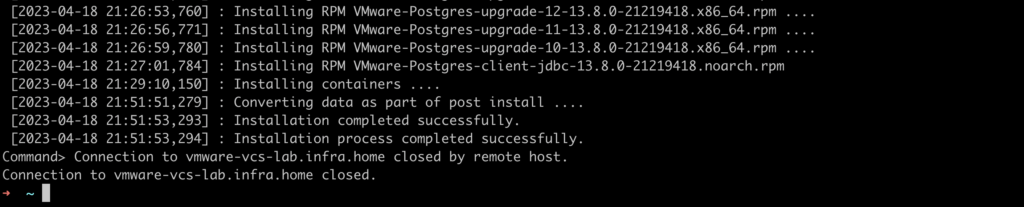
Now, it’s time to start patching process. Type a command as below.
The process can take about 30-40 minutes.
software-packages install --staged
4. And it’s done!🥳
vCenter was successfully patched to the newest version!
After that, virtual machine was automatically rebooted.
4. Cleaning
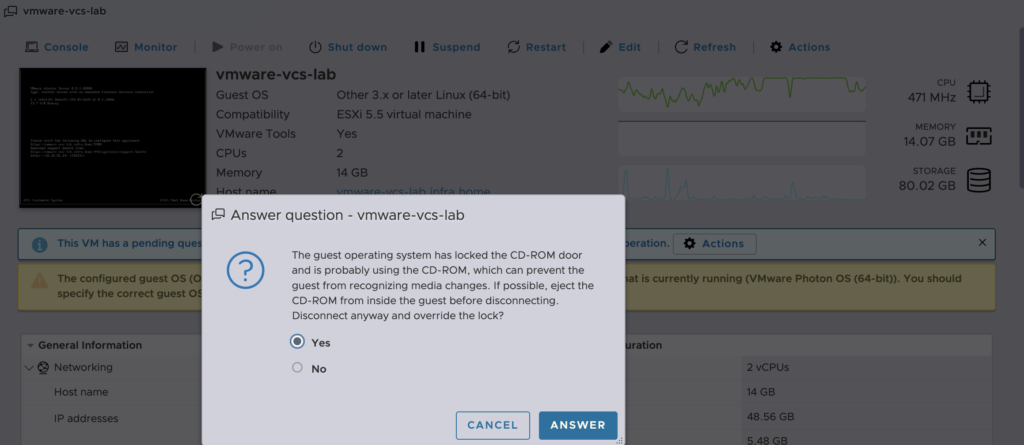
1. The good practice is to detach ISO from the vCenter server. Just change option from “Datastore ISO file” to Host device and save it.
2. If this kind of message appears, choose “Yes” to eject ISO from VM.
The good practice is to keep snapshot 1-2 days after patching. If nothing wrong will happend, delete it.