Depending of the project requirements, clients or developers need a big Kubernetes nodes like 32 vCPU and 128 GB of RAM or smaller with only 2 vCPU and 8 GB of RAM. But, what happens if there are not available pre-defined specific node size?
There are some cases when clients want to have nonstandard Kubernetes node sizes specific to they applications or needs. And than, VM Classes come with help. VM Class is definition of a Kubernetes node size, which we can use. This template includes CPU/Memory configuration and percentage of Reservation of this parameters.
In this post, I will show how to easily create custom VM Class in the vSphere with Tanzu environment.
Requirements:
- Configured vSphere with Tanzu
vSphere with Tanzu + AVI Load Balancer
* In this post I’m using vSphere 8 instead of vSphere 7 as in the link above. But don’t worry. Configuration of the Workload Management and VM Class is very similar.
1. vSphere namespace
At first, we need existing or a new vSphere namespace. In that case, I’m going to create a new one.
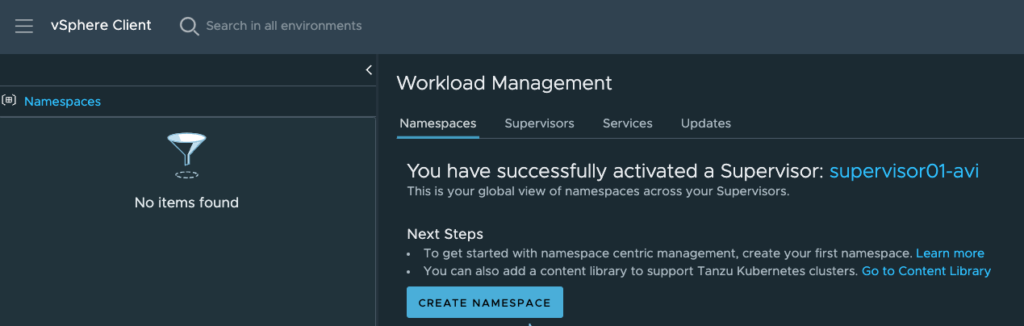
1. In vSphere Client choose Menu -> Workload Management, change to the Namespaces tab and choose Create namespace button.
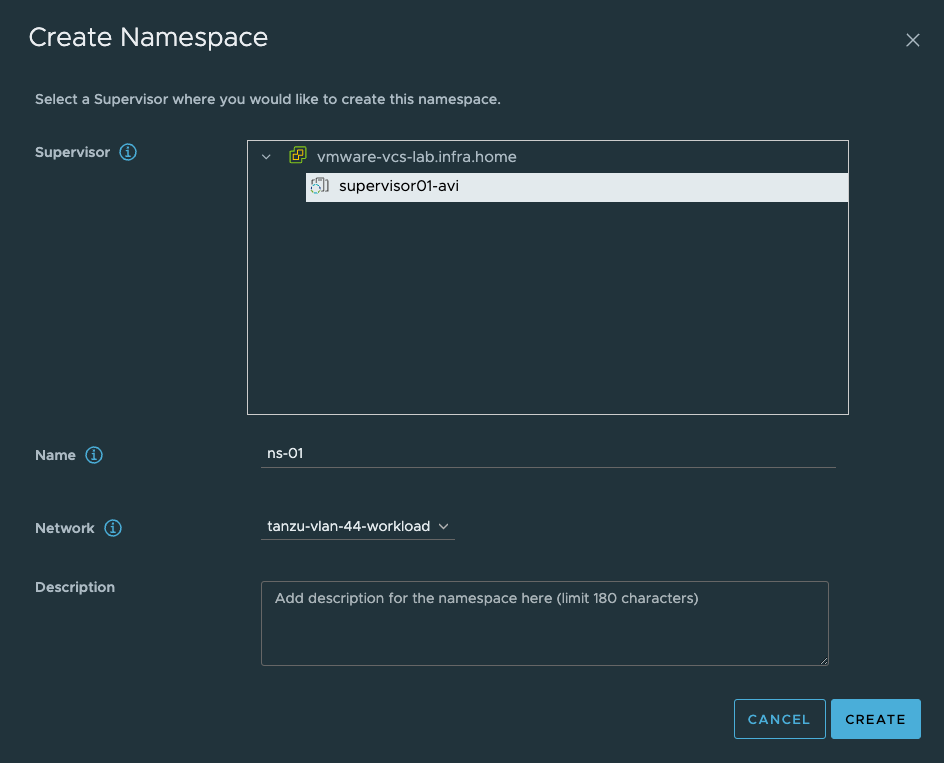
2. Choose your Supervisor and enter a Name to the namespace. Leave Network as is and choose Create.
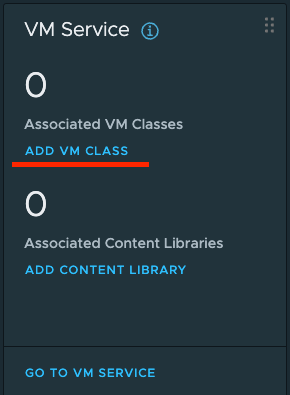
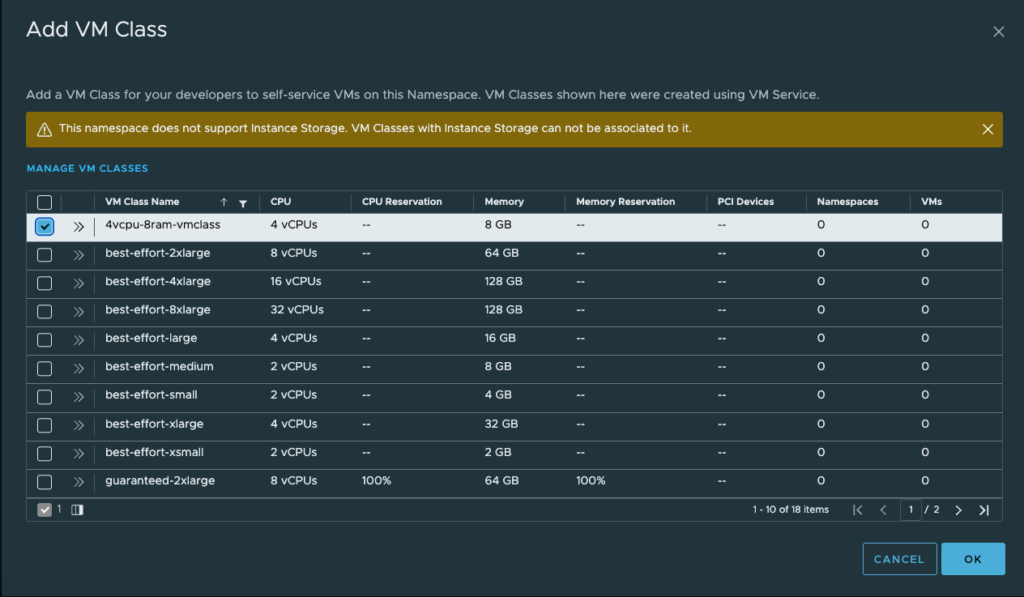
3. After that, you’ll see overview of the vSphere namespace. Add Permissions and Add Storage. After that, under VM Service click Add VM Class to see all available VM Classes (node templates).

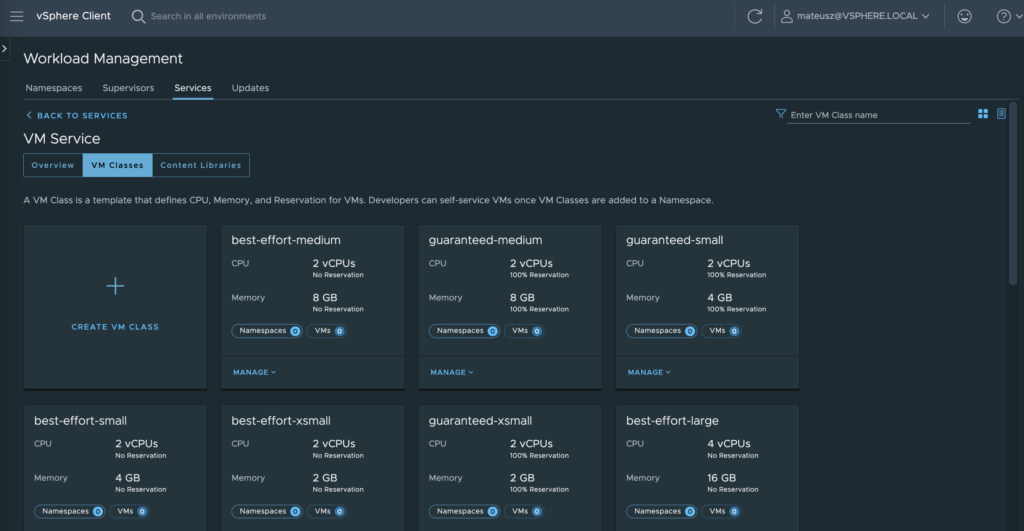
4. From this window choose Manage VM Classes.
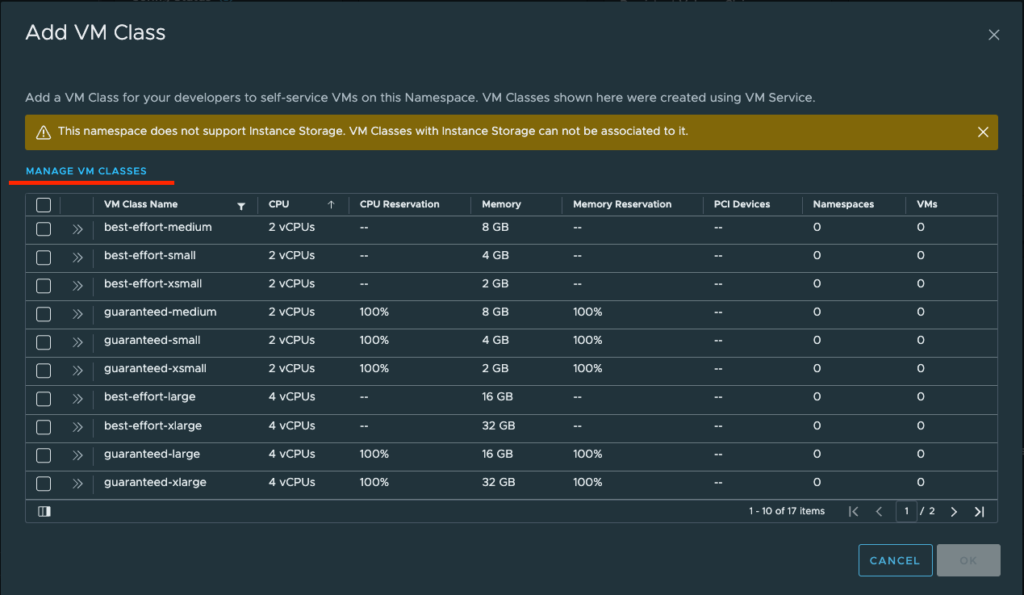
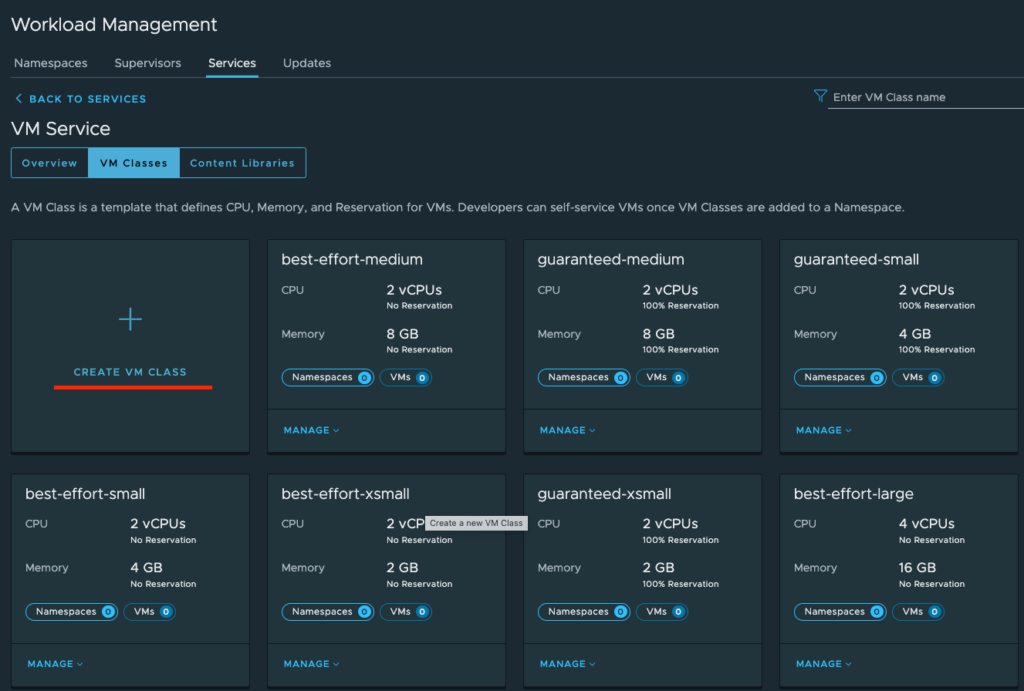
5. In this section there are all (out of the box) VM classes which we can use to deploy TKG clusters. To create new, click Create VM Class button.
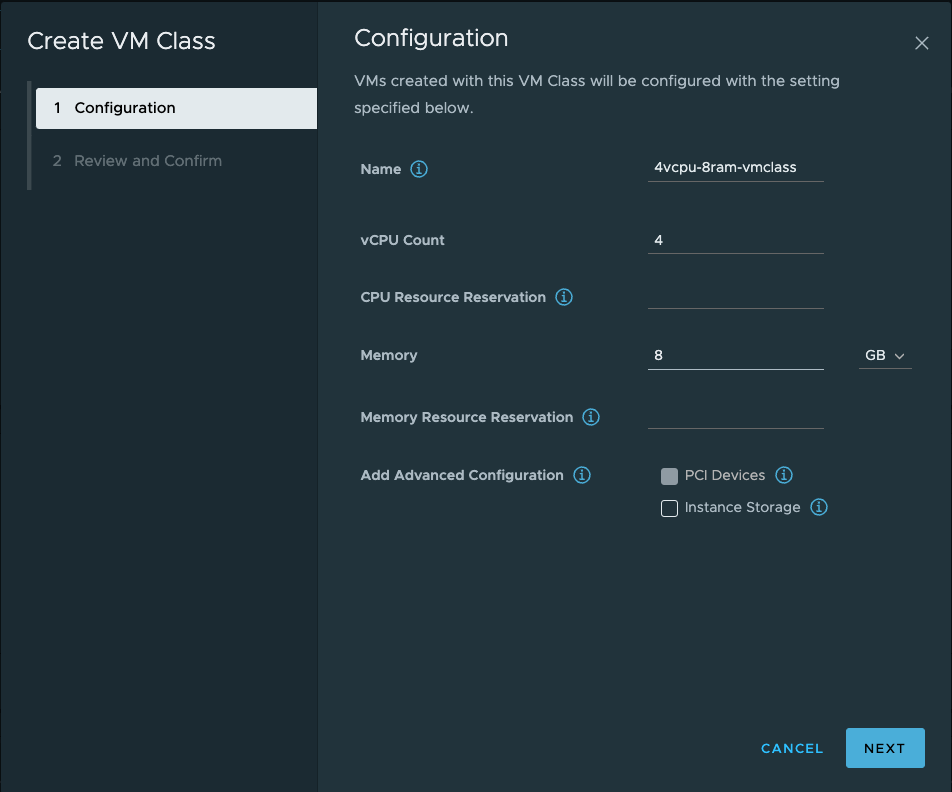
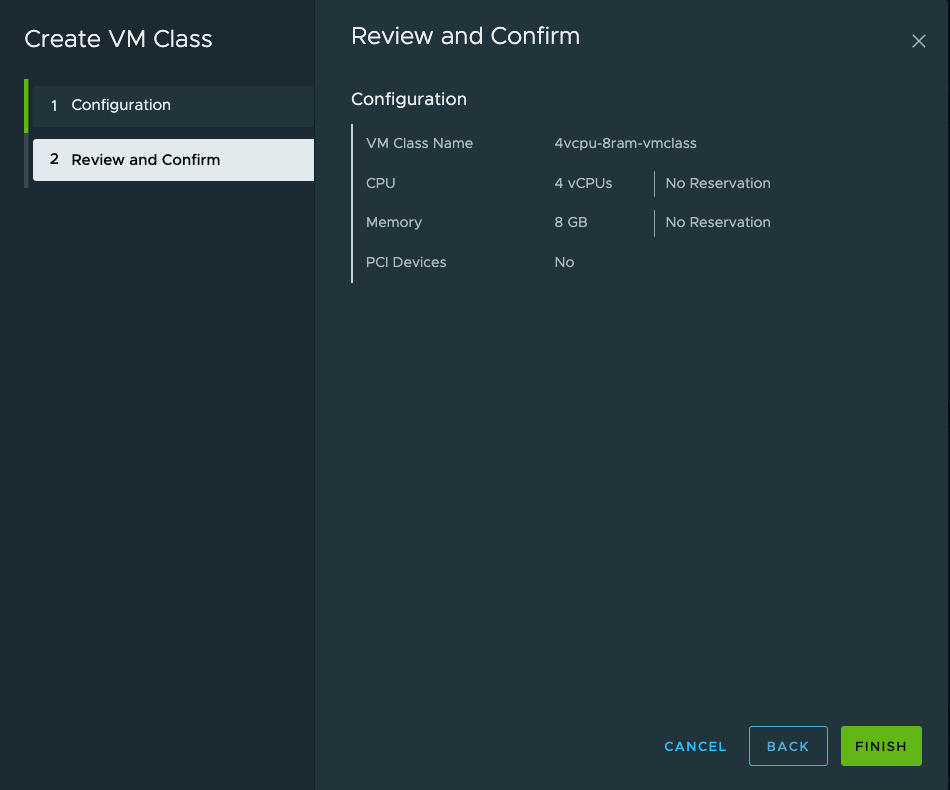
6. Now, you need to specify a few things:
– Name of the VM Class
– vCPU Count – 4 vCPU in my case
– CPU Resource Reservation – provide in % if you need it (no reservation in my case);
– Memory – 8 GB of RAM in my case
– Memory Resource Reservation – provide in % if you need it (no reservation in my case)
– Instance Storage
Click Next, review summary and Finish configuration.
7. Now, when you look at the VM Class list in you vSphere namespace, new one will be available. Tick it to attach this class to the vSphere namespace.
2. TKGs cluster deployment
Now, we need to to create workload cluster. If you have access to the TMC (Tanzu Mission Control) or want to deploy cluster in a different way, go ahead. In this scenario, I will use simply yaml configuration file and apply it manually.
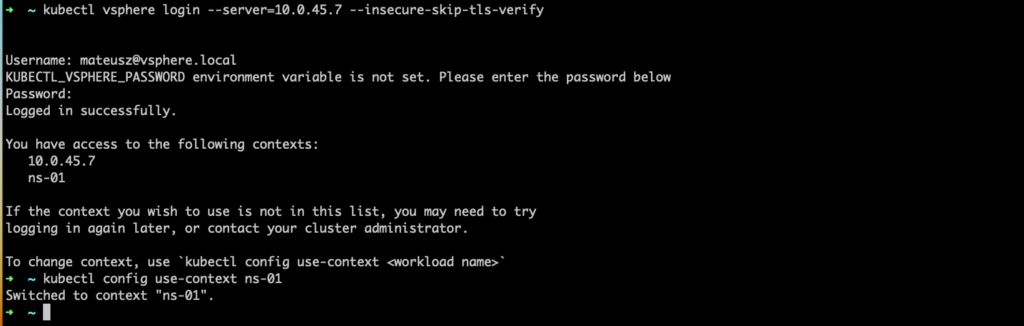
1. In the terminal window type a command:
kubectl vsphere login –server=[your Control Plane Node Address] –insecure-skip-tls-verify
Enter Username and Password.
Than, change context to the namespace ns-01 with a command:
kubectl config use-context ns-01
2. Create blank .yaml file. In my case it’s custom-cl01.yaml and paste code from the below.
If you have namespace with a different name, feel free to change it. The same if you want to have different name of the cluster, number of Control Planes/Workers or Kubernetes version.
apiVersion: run.tanzu.vmware.com/v1alpha2
kind: TanzuKubernetesCluster
metadata:
  name: custom-cl01 # TKGs cluster name
  namespace: ns-01 # vSphere namespace
spec:
  topology:
    controlPlane:
      replicas: 1
      vmClass: 4vcpu-8ram-vmclass # Name of the custom VM Class
      storageClass: taznu-sc-01 # Name of the associated storage class
      tkr:
        reference:
          name: v1.23.8---vmware.3-tkg.1 # Kubernetes version
    nodePools:
    - name: worker
      replicas: 1
      vmClass: 4vcpu-8ram-vmclass # Name of the custom VM Class
      storageClass: taznu-sc-01 # Name of the associated storage class
      tkr:
        reference:
          name: v1.23.8---vmware.3-tkg.1 # Kubernetes version
3. Save file and apply it, to start creating process.
kubectl apply -f custom-cl01.yaml
4. You can check creating status with a command: kubectl get tkc. The cluster is ready when READY status is set to True.
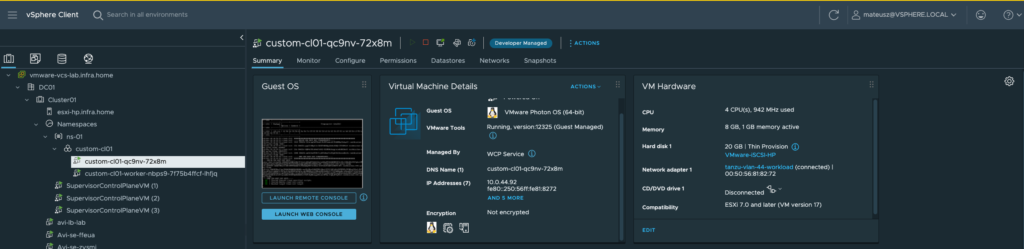
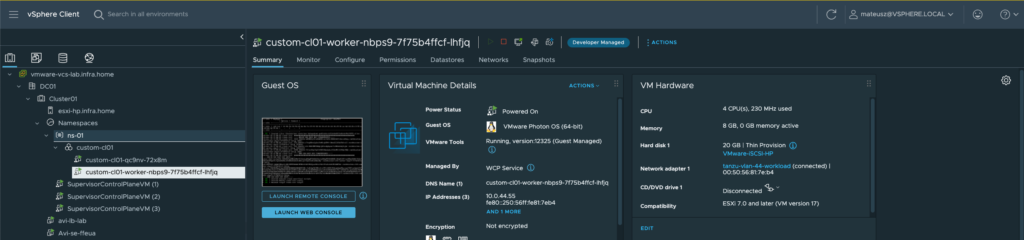
In the meantime, you can see in the vCenter, that new nodes are deploying.
kubectl get tkc
5. After a few minutes, new cluster was created with a specific vCPU and RAM configuration.