Between Cluster v1beta1 API and earlier APIs are lot of configuration changes. One of them, is introduced in TKG 2.0 a new resource pool called ClusterClass.
ClusterClass is a collection of templates that define cluster and configurations. It has a many functions like provisioning of Kubernetes clusters across different cloud platforms. It uses a simple YAML cluster configuration that references the ClusterClass CRD or allows for the use of variables to customize clusters.
Depending on the needs of your organization or application, you may need to execute certain commands on the K8S nodes. For example, you can apply additional network rules, create a directory, create files, or execute scripts. ClusterClass can help with these types of tasks.
In this article I will show you how to create custom ClusterClass and run a Linux command.
(Hard) prerequisites:
- vSphere 8 U2 environment – vCenter and ESXi servers running on the v8.0 U2
- Workload Management enabled (vSphere with Tanzu)
- (Super Important) Supervisor running on the newest available version – in this case is a v1.26.4
- NSX ALB (Avi) in version v22.1.2 (or NSX-T)
I did many tests to create a custom ClusterClass from vSphere 8.0 U1 and each time it failed for various reasons. After hours of troubleshooting, it was necessary to update all components to the latest versions to resolve issues. Then the process looks as it should.
1. Create a custom ClusterClass
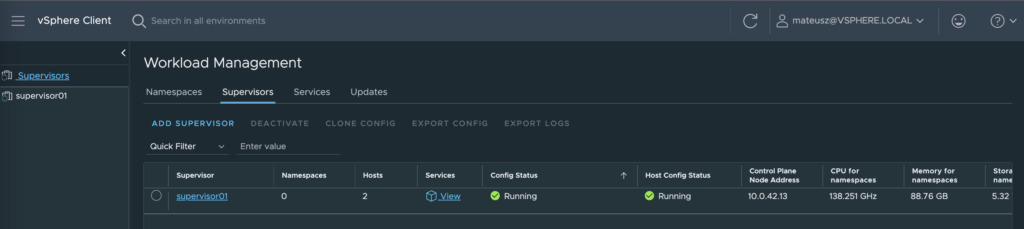
1. At first, we need to be sure that Supervisor is healthy.
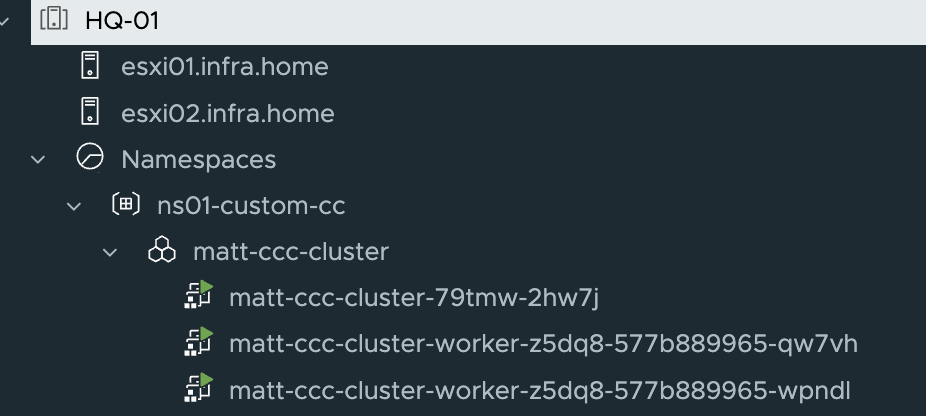
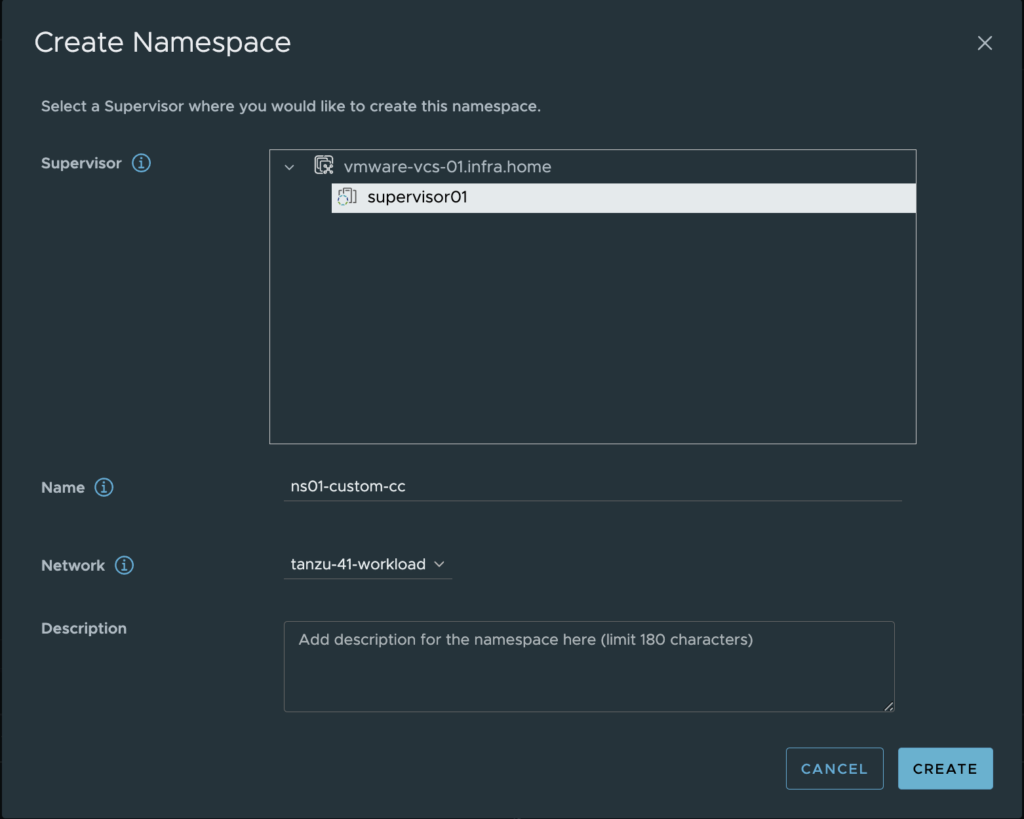
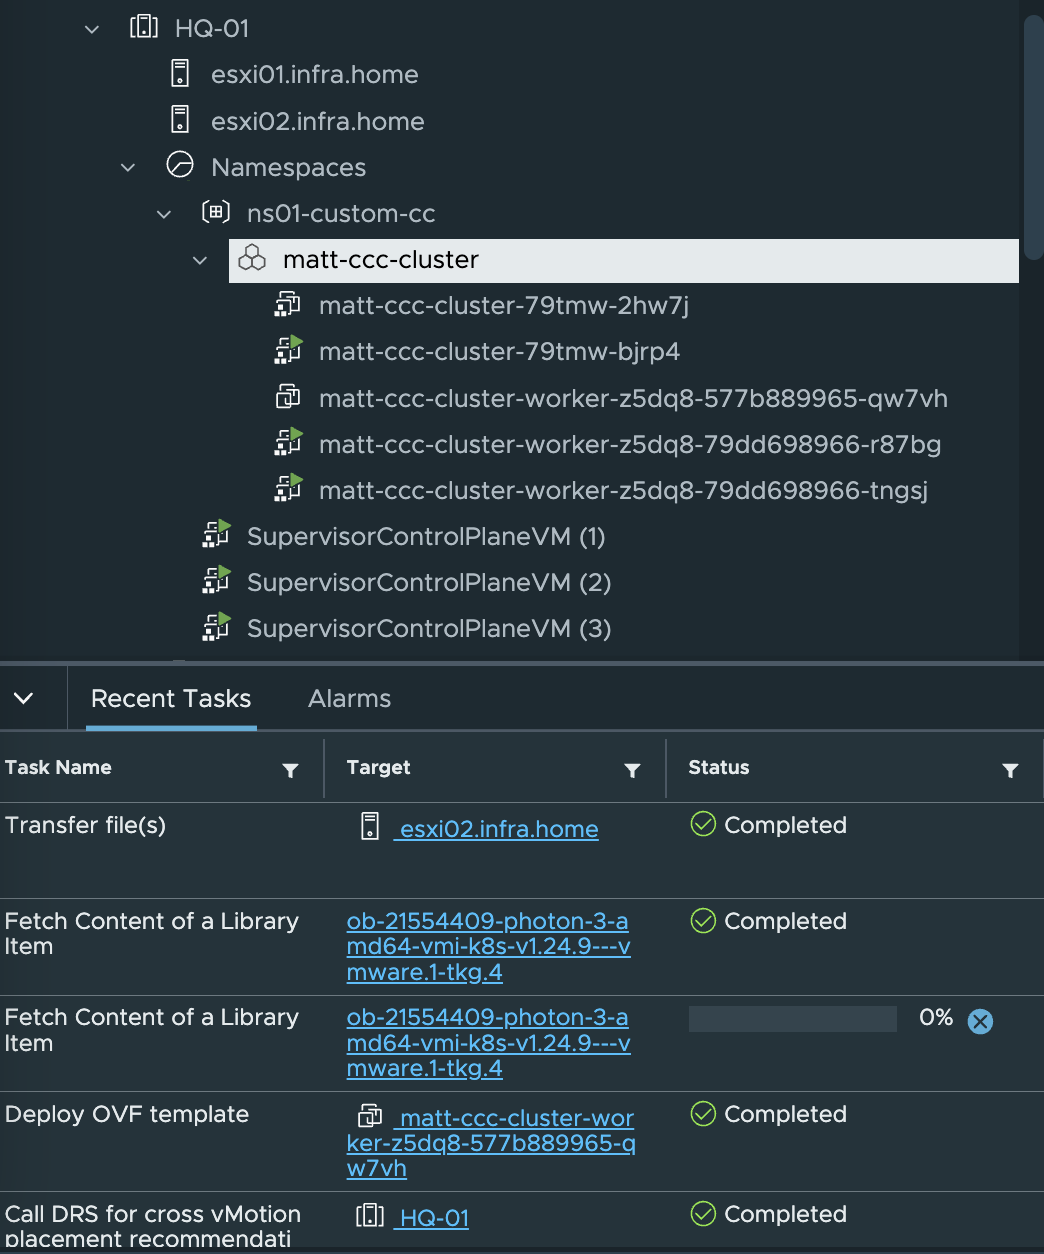
2. Next, let’s create an empty vSphere Namespace (ns01-custom-cc) for a custom ClusterClass purposes.

3. Log in to the newly created vSphere Namespce. Remember to switch context (kubectl config use-context [name_of_the_vSphere_Namespace]

4. With a command kubectl get cc (instead of cc you can use clusterclass) we can list all existing ClusterClass objects existing in a current space.
tanzukubernetescluster is a default ClusterClass running on every vSphere Namespace.

5. Type a command below to get yaml definition of the existing (tanzukubernetescluster) ClusterClass and redirect to the new file (ns01-ccc.yaml)
kubectl get cc tanzukubernetescluster -o yaml > ns01-ccc.yaml
6. Use text editor to start editing a new file. ClusterClass definition looks like this:
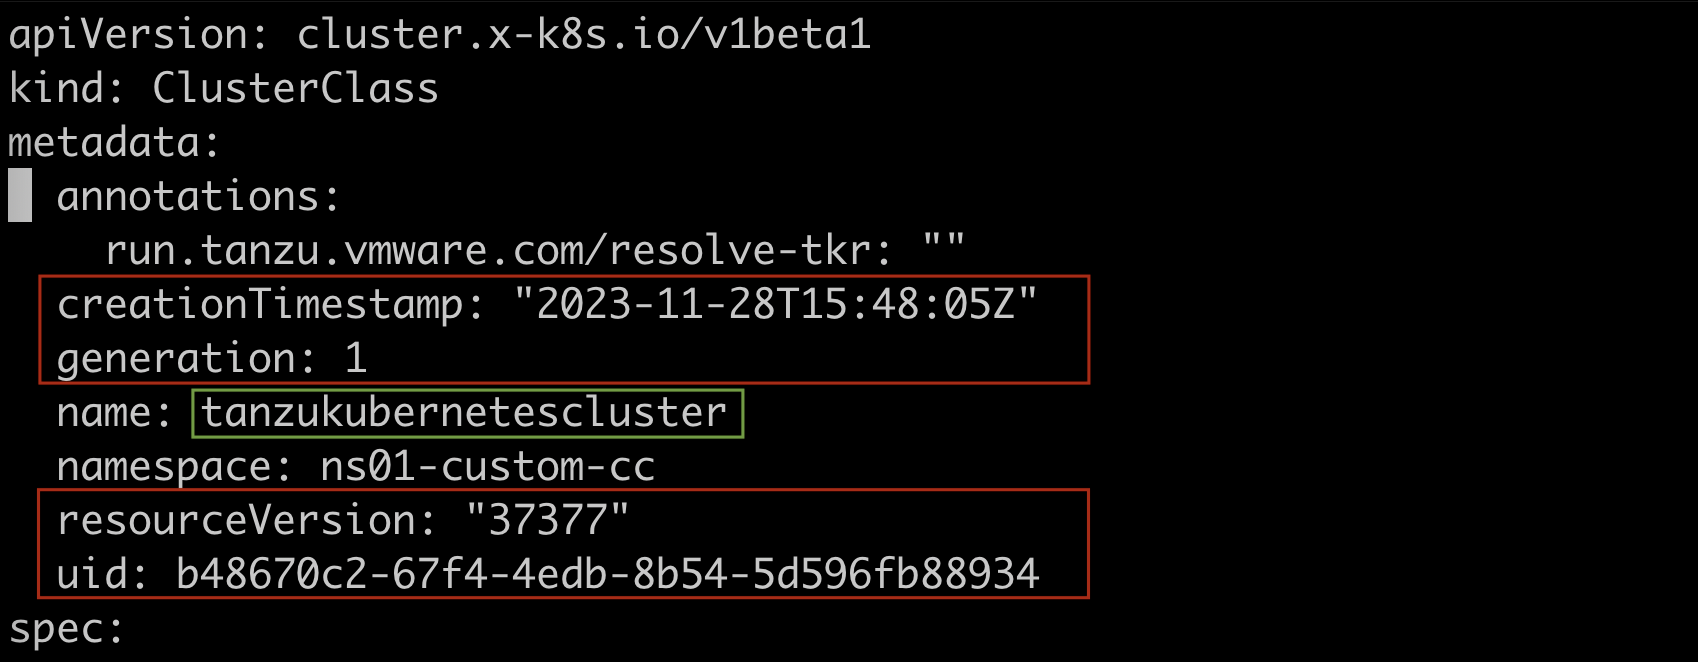
We need to edit a few values under metadata section to use this definition.
The lines with the red frame need to be deleted:
– creationTimestamp;
– generation;
– resourceVersion;
– uid;
The value in the green frame need to be changed to the name of the new ClusterClass. In my case, it’s a “ns01-ccc“
Leave the remaining lines unchanged.
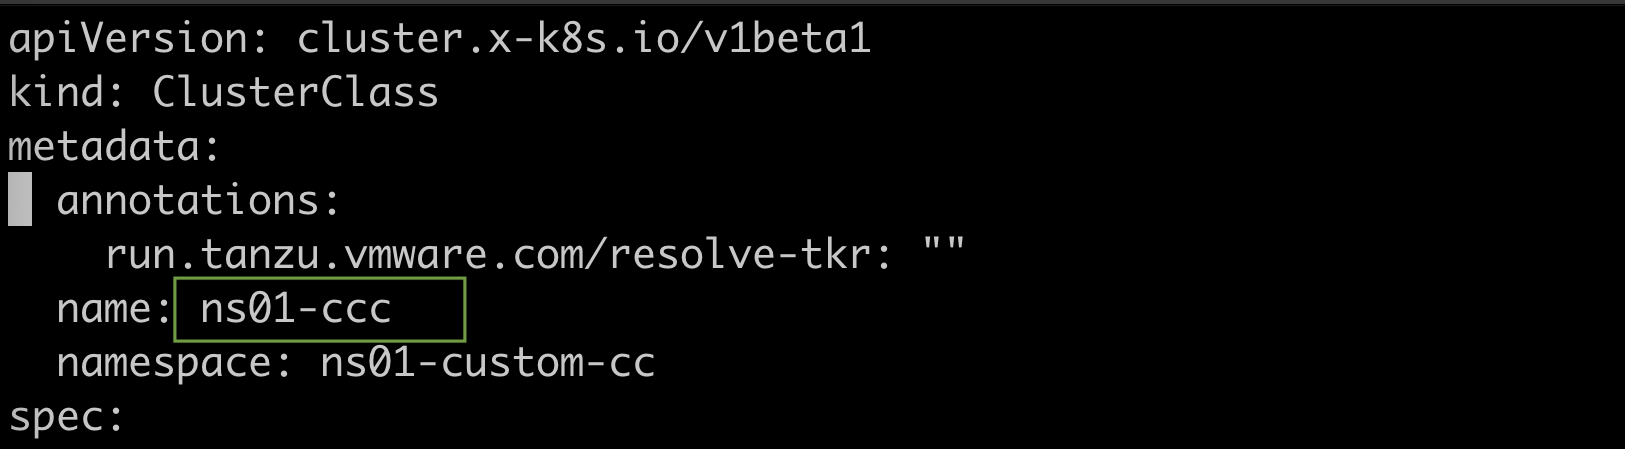
7. Save file and apply it to the vSphere Namespace. Now, you can see two ClusterClasses – default one and custom.

2. Create a cluster using custom ClusterClass
1. Create a yaml definition of the cluster that will use a custom ClusterClass.
U can use a template from the below, but remember to change a few values to match your needs:
– name of the cluster;
– pods/services networking;
– class under topology section – this is the name of the new ClusterClass;
– version of the Kubernetes;
– replicas – number of the nodes;
– vmClass name;
– StorageClass value;
apiVersion: cluster.x-k8s.io/v1beta1
kind: Cluster
metadata:
name: matt-ccc-cluster
spec:
clusterNetwork:
pods:
cidrBlocks:
- 172.20.0.0/16
services:
cidrBlocks:
- 10.96.0.0/24
serviceDomain: cluster.local
topology:
class: ns01-ccc
version: v1.24.9---vmware.1-tkg.4
controlPlane:
replicas: 1
workers:
machineDeployments:
- class: node-pool
name: worker
replicas: 2
variables:
- name: vmClass
value: best-effort-small
- name: storageClass
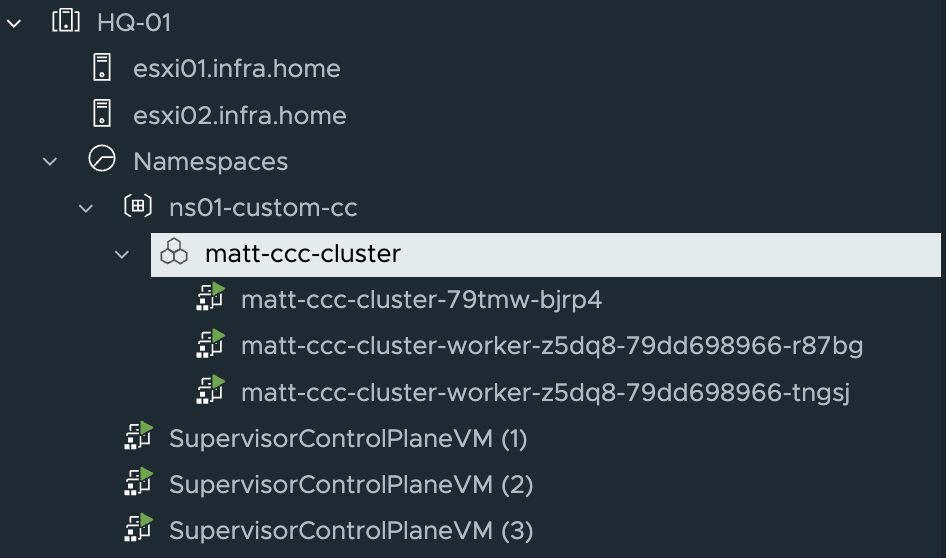
value: tanzu-vmware-ssdWhen the definition is ready, apply it to the cluster. After a moment, nodes are up and ready!

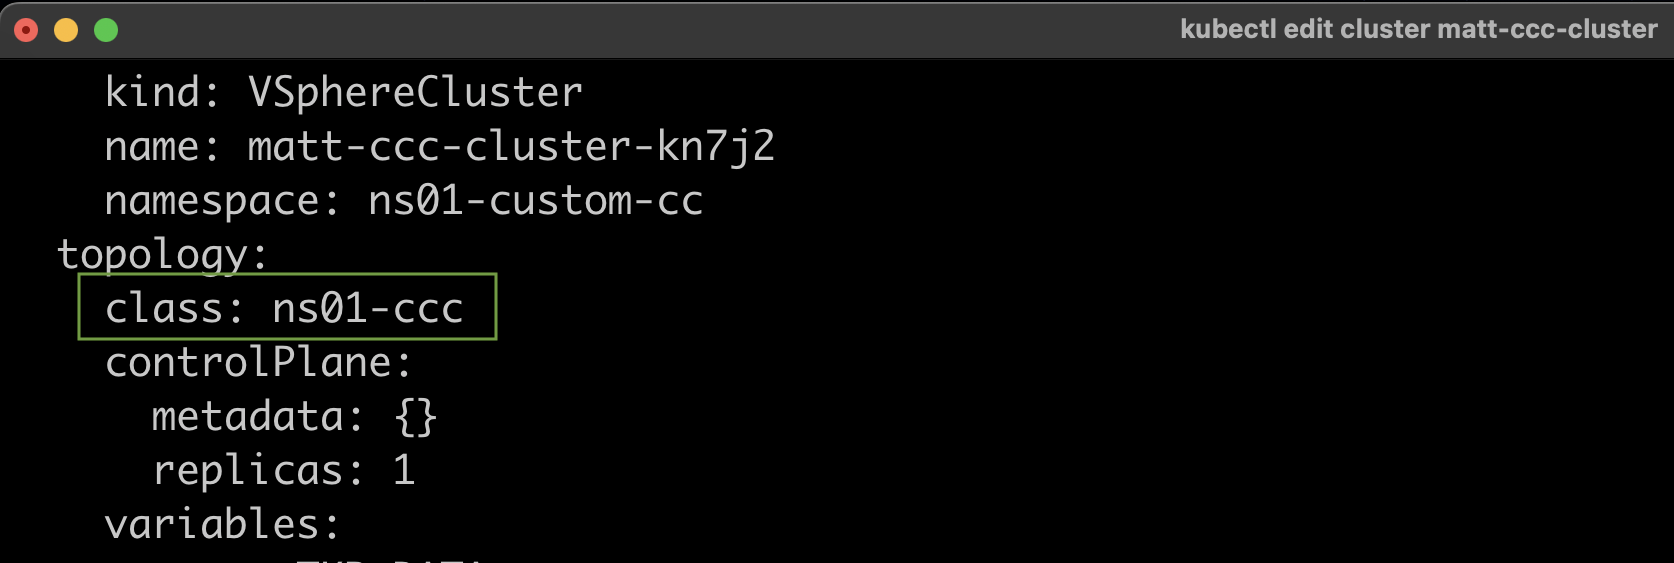
2. Type a command kubectl edit cluster [name_of_the_cluster] from the vSphere Namespace where the new cluster is running. Find topology section. Class value is name of the newly created ClusterClass. That means, cluster matt-ccc-cluster is using a custom ClusterClass named ns01-cc.
3. What next? Let’s add a command inside a custom ClusterClass to do “something”
In this example, I will add simple command to create directory matt-ccc-cluster-vMattroman-folder in /tmp on each worker node.
1. Set context to the vSphere Namspace context and edit a custom ClusterClass. Type kubectl edit cc [name_of_the_custom_clusterclass] command.
Find the section (path) postKubeadmCommands
If you want to add a new command to be executed after cluster deployment, you need to add it in the 2 places. I mark it in the green frame.
Save the file.
mkdir /tmp/matt-ccc-cluster-vMattroman-folder 
2. If you save the file, each node will be redeployed with a new configuration.
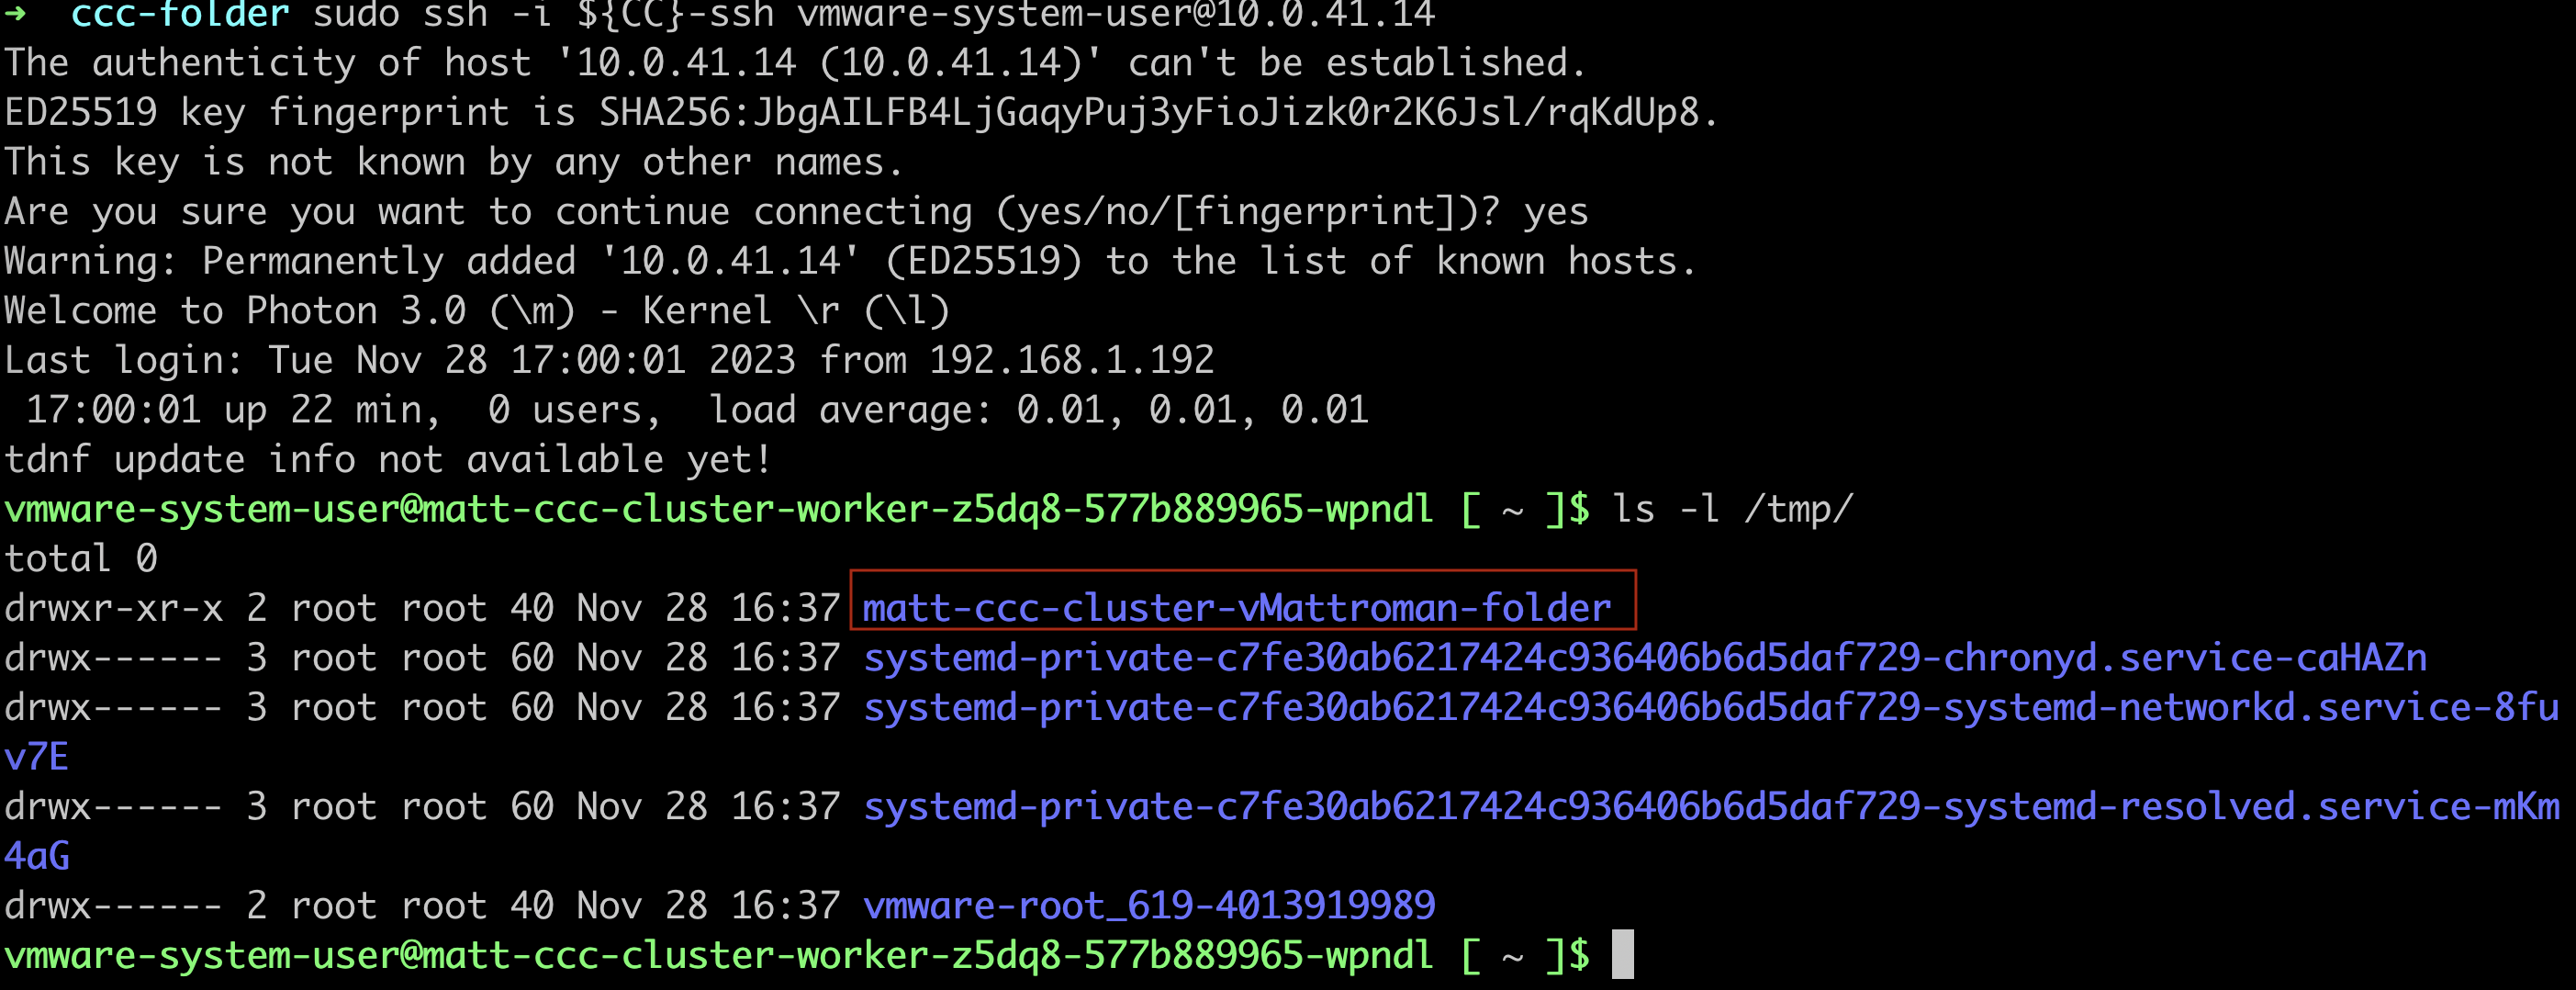
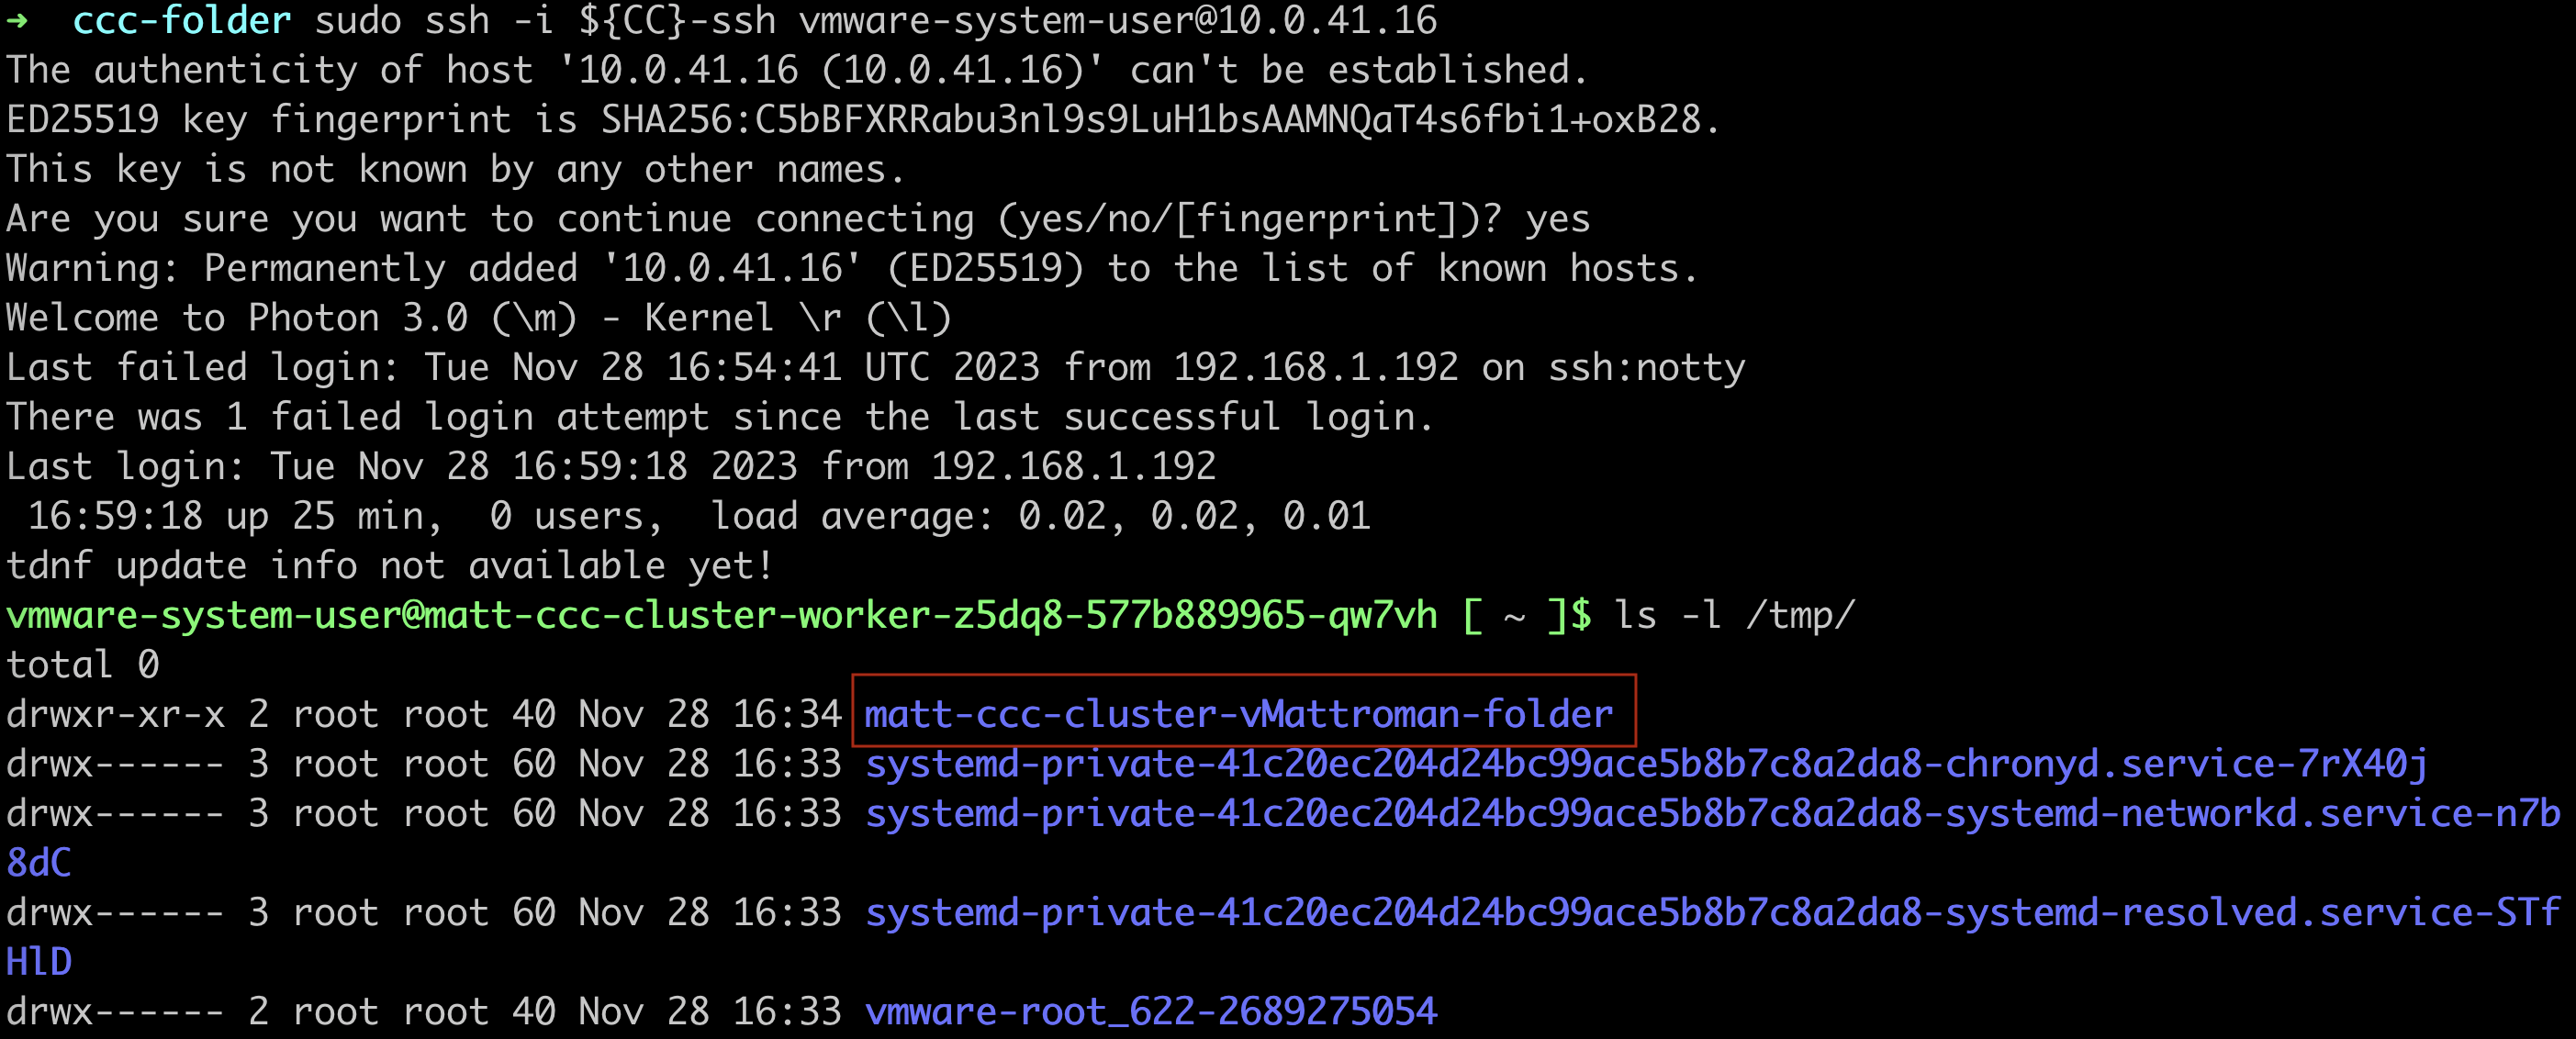
3. When the cluster is ready, we can connect to the workers and check changes in the /tmp folder.
To achieve this, use command from below to get SSH key. Remember to change bolded values to match your environment.
export CC=matt-ccc-cluster && kubectl get secret -n ns01-custom-cc ${CC}-ssh -o jsonpath={.data.ssh-privatekey} | base64 -d > ${CC}-ssh && chmod 4000 ${CC}-ssh
4. Log in to the two workers and check /tmp folder. New matt-ccc-cluster01-vMattroman-folder is here!
That means, command was executed successfully.
If you need to redeploy the cluster (e.g. to update the K8S version) ClusterClass will make sure that defined commands are always executed.
sudo ssh -i ${CC}-ssh vmware-system-user@10.0.41.14