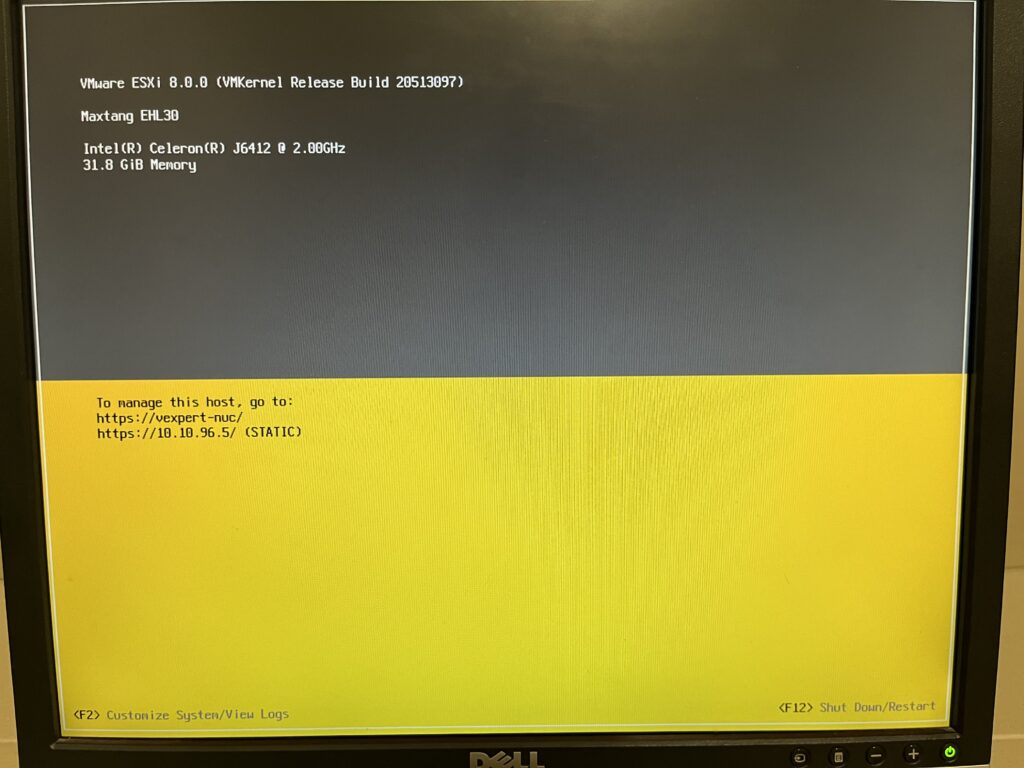
After clean and default setup of Maxtang NUC (gift for vExperts on VMware Explore 2022 in Barcelona) it’s time to do something more. Let’s configure 2 independent USB to Ethernet adapter, block/file storage and connect to the vCenter 8.
1. Requriements:
- Prepared vExpert Maxtang NUC NX6412 like in the previous post: How to install and configure ESXi 8 on the vExpert NUC? – VMware Explore 2022 in Barcelona
- 2nd USB to Gigabit Ethernet Adapter
2. 2nd NIC configuration
- Power off NUC, attach 2nd USB adapter and power on server.
Press F2 and login in as a root user.
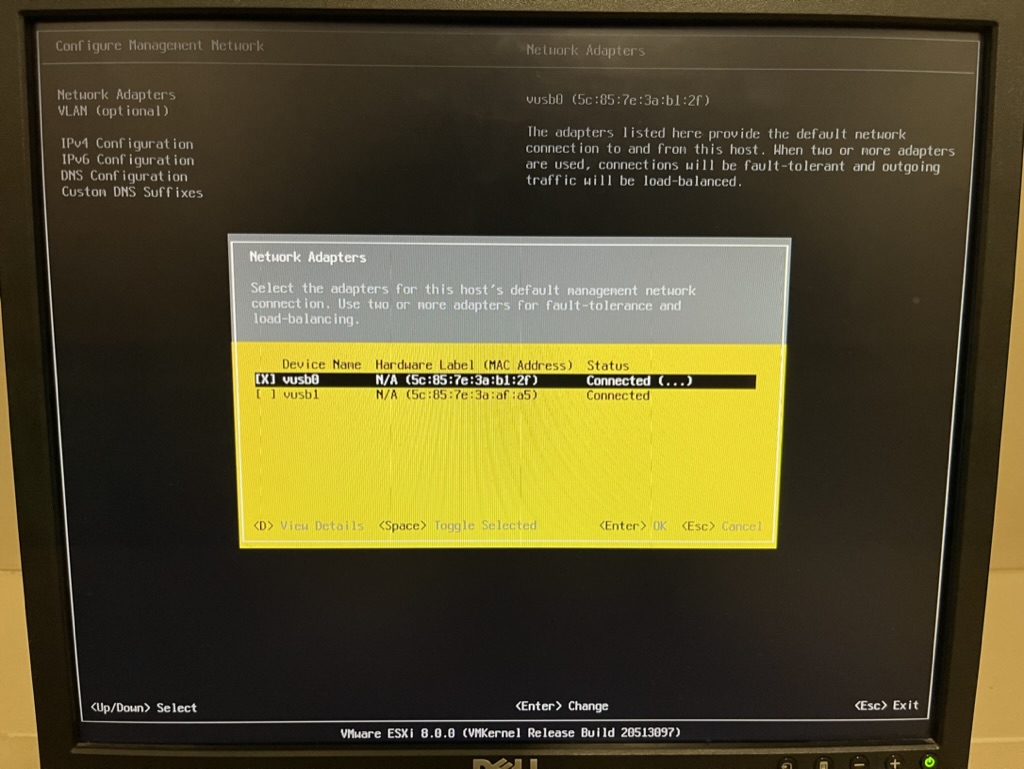
2. Go to the Configure Management Network. At the next screen, choose Network Adapters.
Now, here are 2 vusb adapters: vusb0 and vusb1
!IMPORTANT TIP!
Remember to unmark vusb1. Marked network adapter should be only vusb0 (management).
If both of them will be marked, you will lost access to the server. It’s because, only vusb0 is a management port
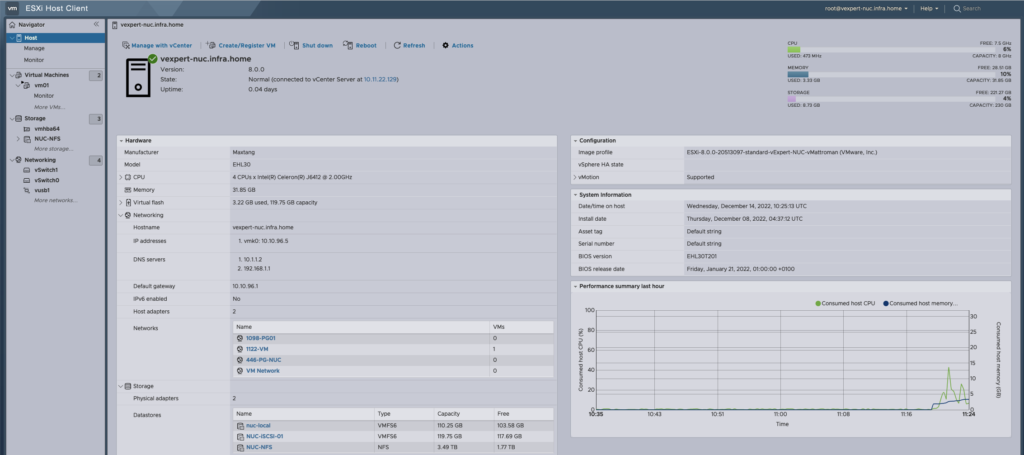
3. From the ESXi Host Client, 2 Phisical NICs should appear.

4. Look at the summary of the existing standard switch – vSwitch0.
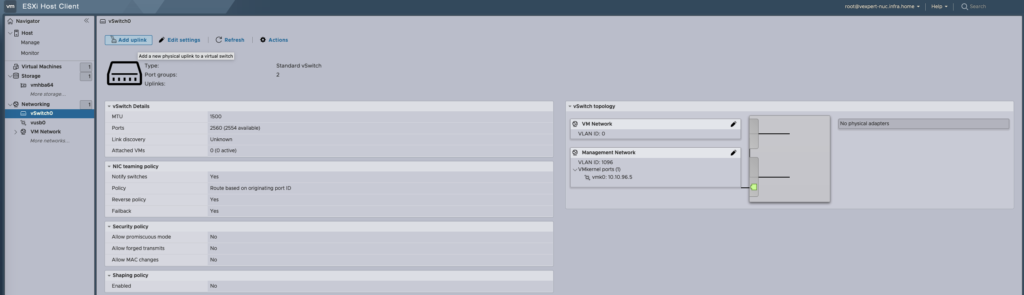
There are no mapped physical adapters in this view, despite there are visible by ESXi host.
!IMPORTANT TIP!
source: https://flings.vmware.com/usb-network-native-driver-for-esxi#instructions
At beloew, this a solution to this behavior.
Look at configuration file located in: /etc/rc.local.d/local.sh and it should look similar as mine (if you follow the steps from previous blog post):
vusb0_status=$(esxcli network nic get -n vusb0 | grep 'Link Status' | awk '{print $NF}')
count=0
while [[ $count -lt 20 && "${vusb0_status}" != "Up" ]]
do
    sleep 10
    count=$(( $count + 1 ))
    vusb0_status=$(esxcli network nic get -n vusb0 | grep 'Link Status' | awk '{print $NF}')
done

esxcfg-vswitch -R
At 1st step, you need to add configuration to the 2nd vusb (vusb1) and additionally mapping each vusb to the specific standard swtich. Edit file and save the changes.
vusb0_status=$(esxcli network nic get -n vusb0 | grep 'Link Status' | awk '{print $NF}')
count=0
while [[ $count -lt 20 && "${vusb0_status}" != "Up" ]]
do
    sleep 10
    count=$(( $count + 1 ))
    vusb0_status=$(esxcli network nic get -n vusb0 | grep 'Link Status' | awk '{print $NF}')
done


vusb1_status=$(esxcli network nic get -n vusb1 | grep 'Link Status' | awk '{print $NF}')
count=0
while [[ $count -lt 20 && "${vusb1_status}" != "Up" ]]
do
    sleep 10
    count=$(( $count + 1 ))
    vusb1_status=$(esxcli network nic get -n vusb1 | grep 'Link Status' | awk '{print $NF}')
done

esxcli network vswitch standard uplink add --uplink-name=vusb0 --vswitch-name=vSwitch0
esxcli network vswitch standard uplink add --uplink-name=vusb1 --vswitch-name=vSwitch0

esxcfg-vswitch -R
exit 0
2nd step is to setup persisting VMkernel to USB NIC mappings, if we have multiple USB NICs connected. There is a solution to avoid random change of the mappings between vmkX to physical MAC Address of the USB NIC.
esxcli system module parameters set -p "vusb0_mac=5c:85:7e:3a:b1:2f vusb1_mac=5c:85:7e:3a:af:a5" -m vmkusb_nic_flingNow, reboot the host.
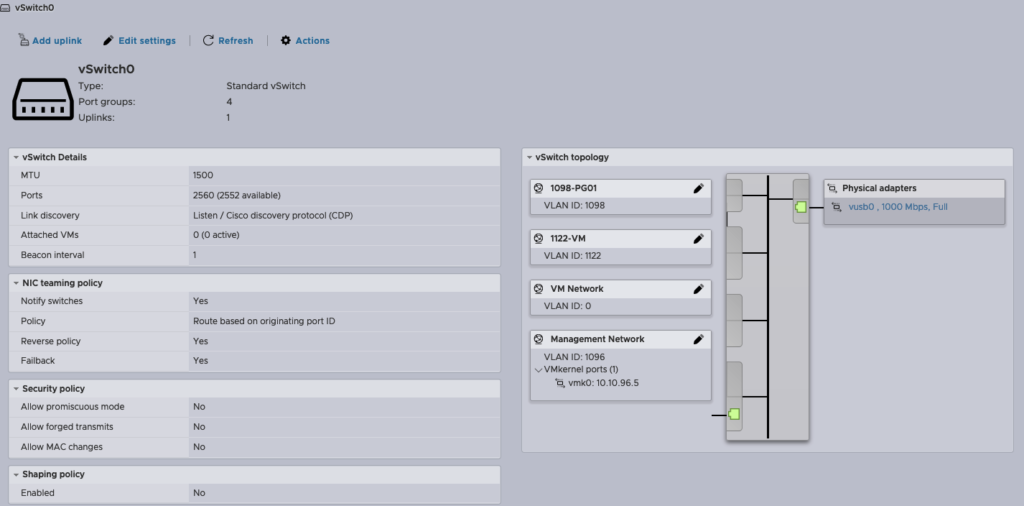
After that, vusb0 and vusb1 are mapped to the standard vSwitch0

If you want to map only one vusb to the swtich, for example vusb0, add only:
esxcli network vswitch standard uplink add –uplink-name=vusb0 –vswitch-name=vSwitch0
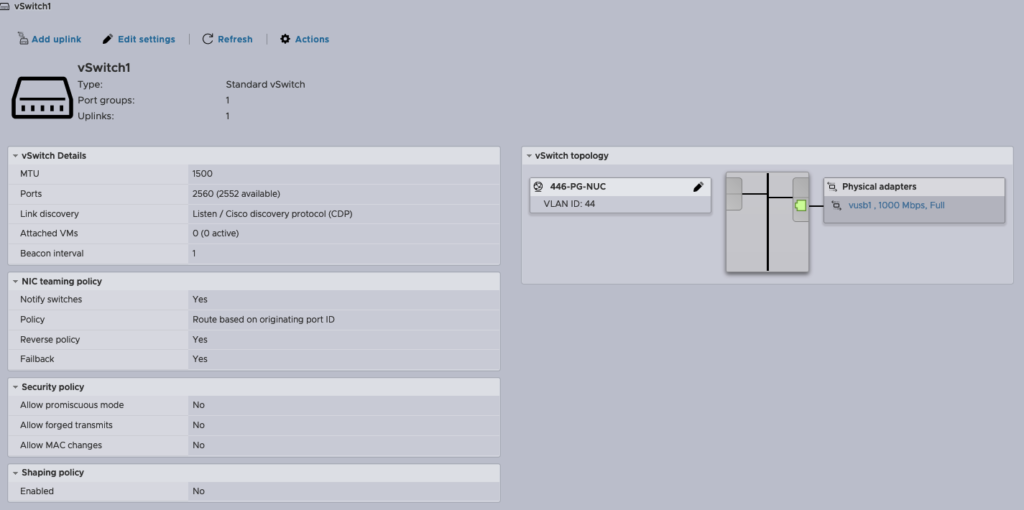
But, what in case, when I have 2 standard swtiches? And I want to have vusb per switch? For example: vusb0->vSwitch0 and vusb1->vSwitch1
At first, create a new stanard swtich – vSwtich1 (or any name). Next, go to the /etc/rc.local.d/local.sh file again and modify it. Reboot the host.
vusb0_status=$(esxcli network nic get -n vusb0 | grep 'Link Status' | awk '{print $NF}')
count=0
while [[ $count -lt 20 && "${vusb0_status}" != "Up" ]]
do
    sleep 10
    count=$(( $count + 1 ))
    vusb0_status=$(esxcli network nic get -n vusb0 | grep 'Link Status' | awk '{print $NF}')
done

esxcfg-vswitch -R

if [ "${vusb0_status}" = "Up" ]; then
    esxcli network vswitch standard uplink add --uplink-name=vusb0 --vswitch-name=vSwitch0
fi

if [ "${vusb1_status}" = "Up" ]; then
    esxcli network vswitch standard uplink add --uplink-name=vusb1 --vswitch-name=vSwitch1
fi
exit 0
After that, there are mapped 1 uplink per Standard Swtich without any manual change.

3. Storage configuration – iSCSI and NFS
As a storage device I use my Synology NAS DS918+
A good practice is to separate iSCSI vmkernel. I’m trying in a many different ways to make it work. I tried to create vmkernel with dedicated portgroup and switch. After add it to vmhba64 adapter and reboot a host, LUN doesn’t appear. Rescan and refresh adapter don’t fix the problem. I can’t achive it with the Stanard vSwitch.
The working solution in this case, is to use default Management Network vmkernel.
iSCSI
1. Go to the Storage -> Adapters. Choose Software iSCSI.
Check Enabled in ‘iSCSI enabled’ line. Add VMkernel port binding (vmk0 – default Management Network), put IP address of the storage – dynamic targets and port 3260, save configuration. After this, configuration should look like this – Static targets will appear.

2. Rescan VMFS adapters. Storage-> Adapters/Devices tab-> Rescan
If new iSCSI LUN will not appear in the Datastore section, add it manually.

!IMPORTANT TIP!
Many times, while I troubleshoot this case, iSCSI LUN don’t automatically show. To fix this add this line in the file /etc/rc.local.d/local.sh before exit 0 and reboot the host.
esxcli storage core adapter rescan -aNFS
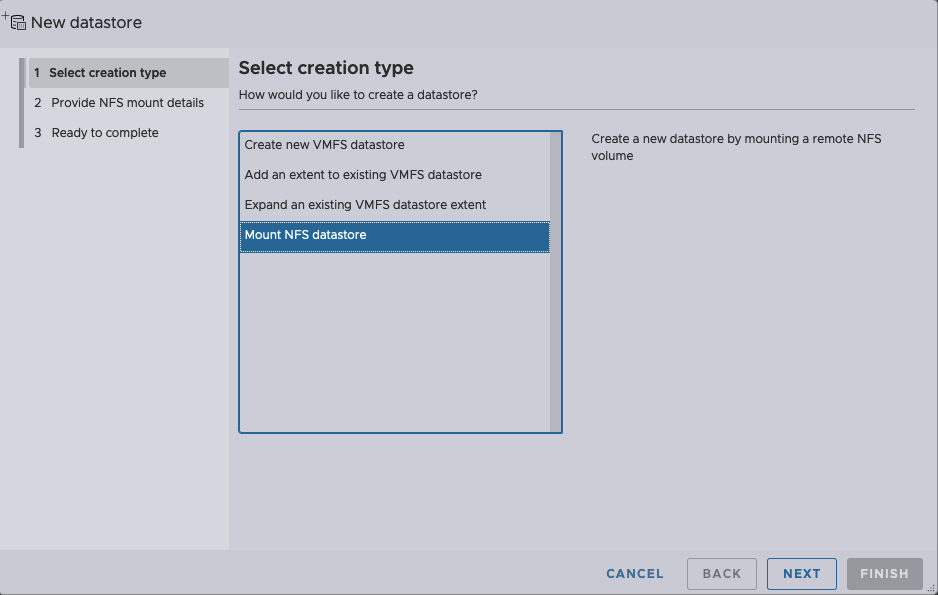
1. Go to the Storage -> Datastores -> New Datastore. Choose Mount NFS datastore.
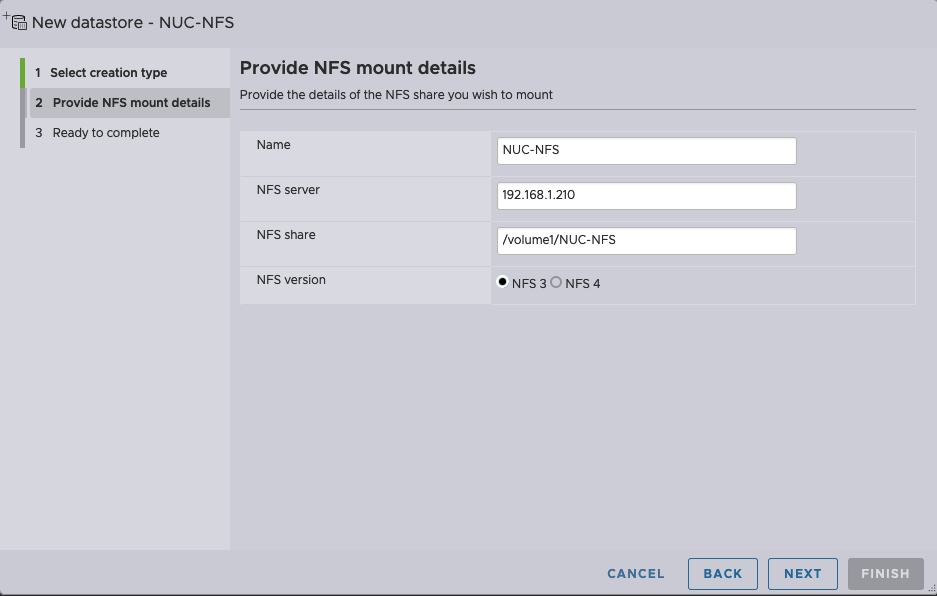
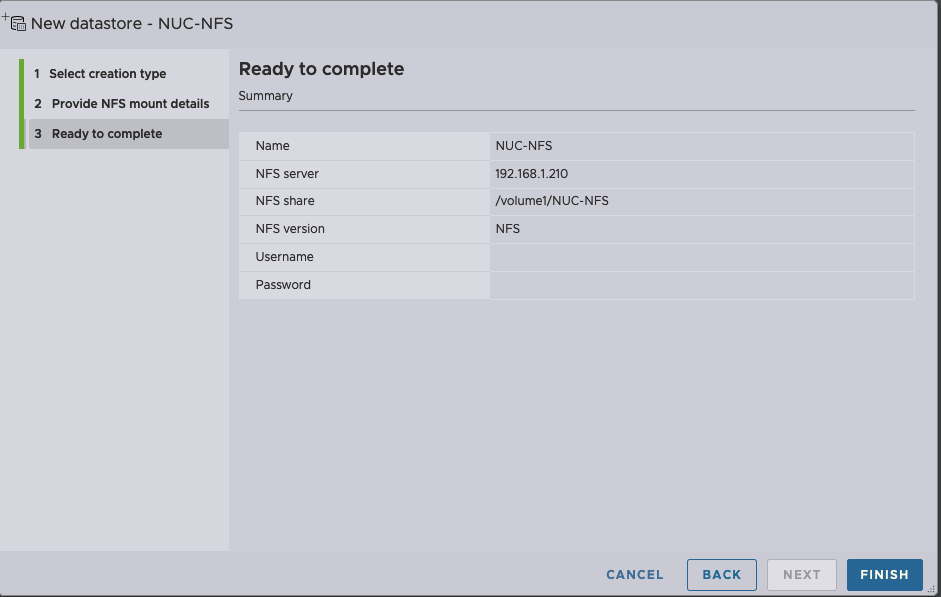
2. Type Name, NFS server IP address and NFS share name, choose NFS Version and Finish configuration.

Like with iSCSI add this line in the file /etc/rc.local.d/local.sh before exit 0 and reboot the host.
esxcli storage core adapter rescan -a4. Connect NUC to the vCenter
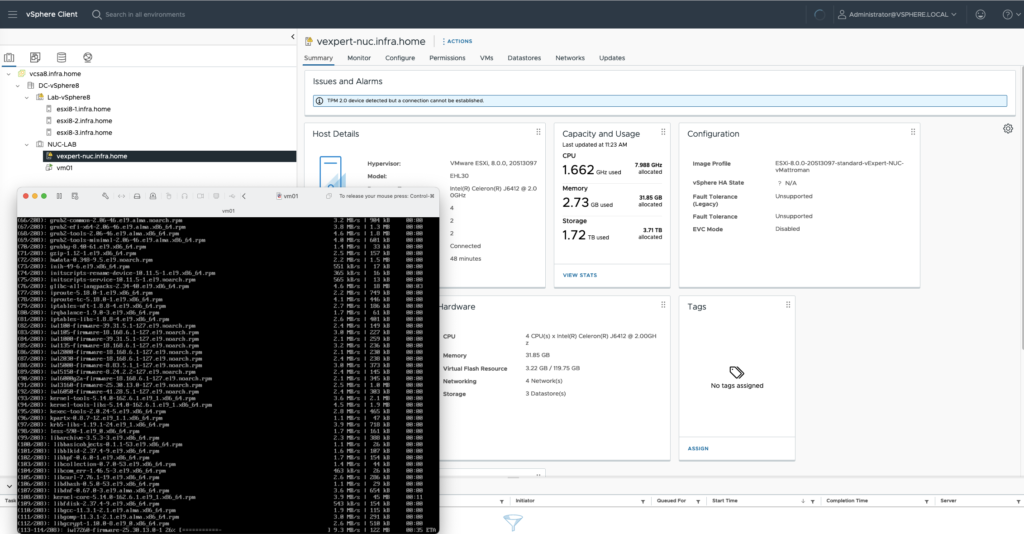
This is the easiest part. Simply connect server to the existing vCenter 8.
In my case, this is a nested vSphere 8 lab.
Create dedicated cluster, add host and run virtual machine! 🙂
So, it was a few problems from my side. I hope this tips will be helpful for you and configuration goes smoothly.