Do you ever wonder how to integrate your CI/CD Pipelines with vSphere with Tanzu? Here I want to show you, how to use Jenkins for TKG cluster deployment.
Requriements:
- Configured vSphere with Tanzu
Look at my previous posts to learn how enable it (here I use vSphere with Tanzu + AVI LB):
vSphere with Tanzu + AVI Load Balancer
vSphere with Tanzu + HAProxy - Virtual Machine with Jenkins (I have a newest avaiable version)
1. Create vSphere namespace
At first, we need to create vSphere namespace to prepare space for the TKG cluster deployment.
- In vSphere Client choose Menu -> Workload Management, change to the Namespace tab and choose Create namespace button. Choose Cluster and type a Name.

2. Configure Permissions, choose Storage Policy and select VM Class.

2. Jenkins user configuration
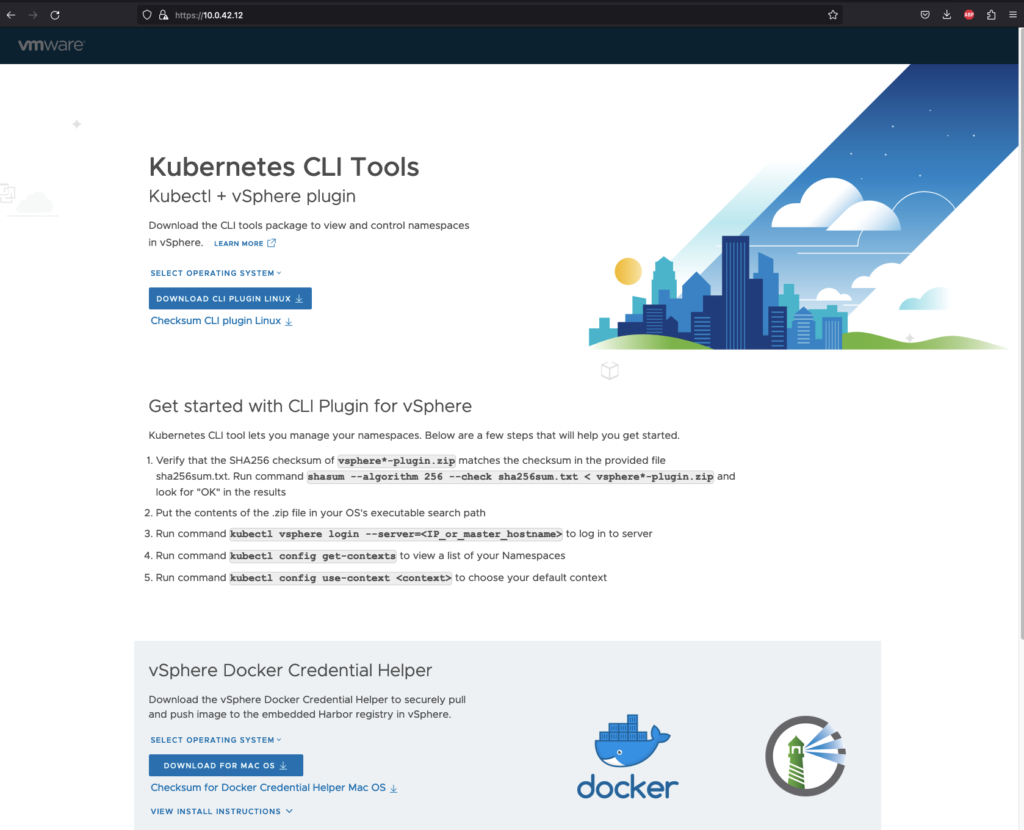
Remember to Install Kubernetes CLI Tools on Jenkins server before next steps. It’s very important, because Jenkins server will communicate with Supervisor endpoint.
1. 10.0.42.12 – this is IP of my Supervisor Cluster endpoint.
Download vsphere-plugin.zip file. After that, unzip it and than you have bin catalog with two files: kubectl and kubectl-vsphere.
Open terminal and change directory where files are unizpped.
If your downloaded files are not executable, give them right privileges:
chmod +x kubectl*
Copy two files to your PATH: cp * /usr/local/bin
2. Log in to the Jenkins server via web browser.
3. From the left menu, choose Manage Jenkins.

4. Choose Manage Credentials

5. Choose ‘System‘

6. Choose ‘Global credentials (unrestricted)‘

7. Choose ‘Add credentials‘ to create new credentials.

8. Configure new user:
– Kind: Username with password
– Scope: Global (Jenkins, nodes, items, all child items, etc)
– Username: mateusz@vsphere.local // This is my local vSphere user. You can create another, dedicated account and use it here.
– Password: N/A
– ID: tanzu_jenkins_user
– Description: N/A
Click Create
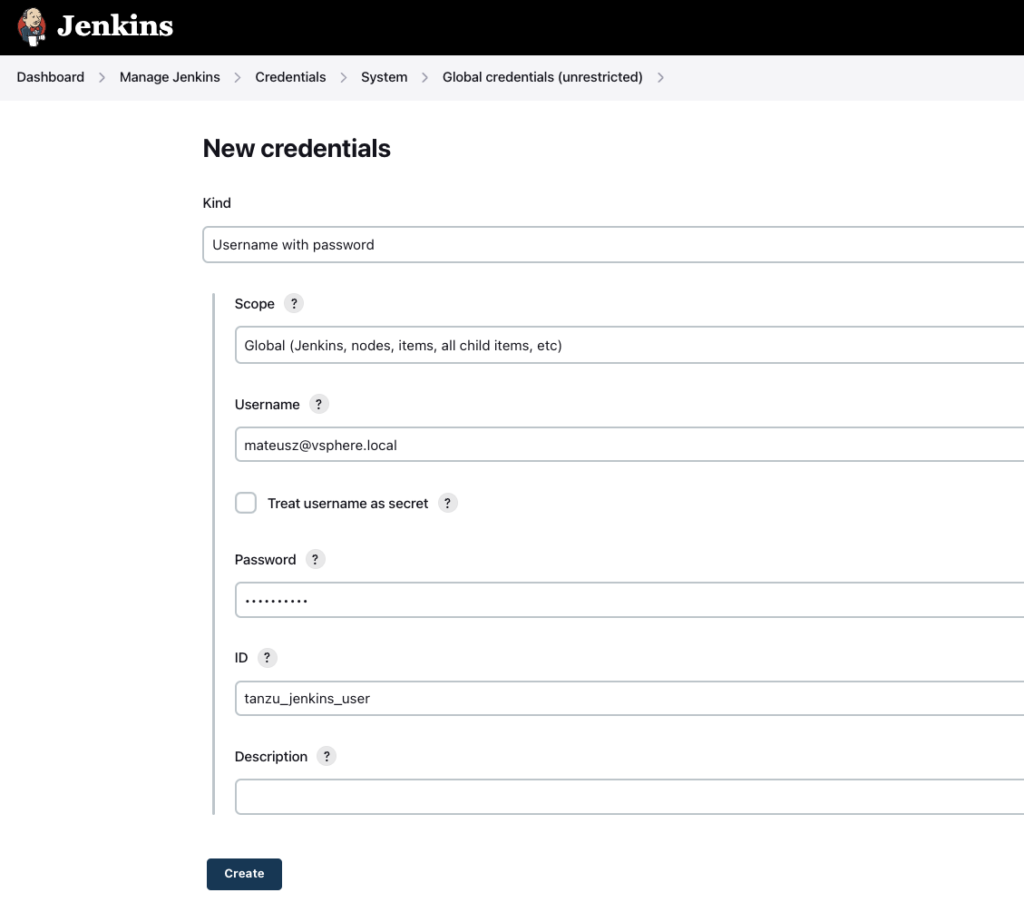
9. New credentials was created!

3. Pipeline configuration
Now, it’s time to prepare build script to deploy TKG cluster on the vSphere.
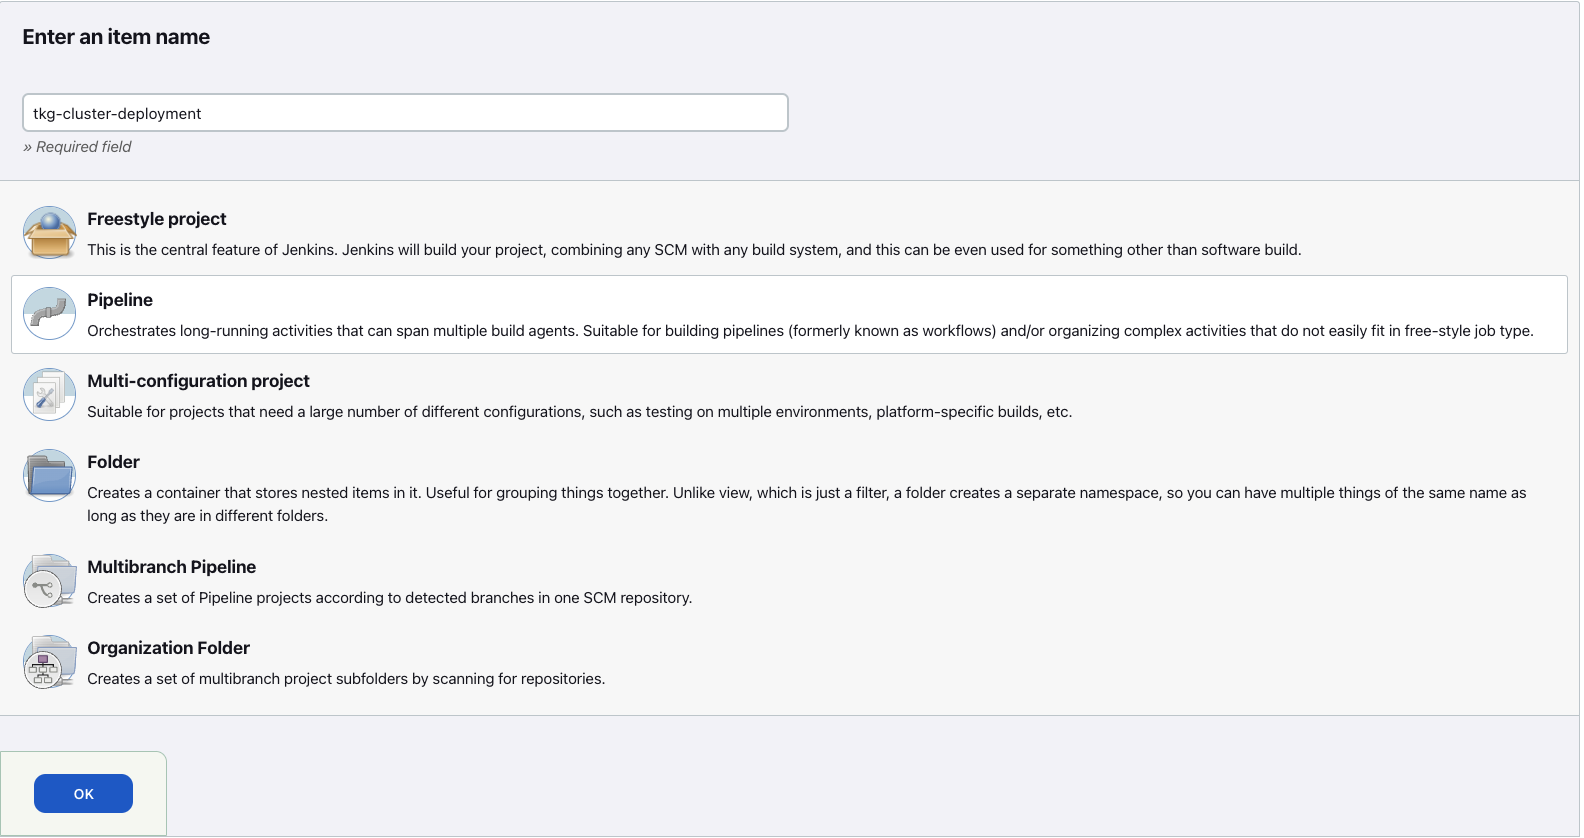
1. Choose Dashboard and ‘New Item‘

2. Type name of the new project, select ‘Pipeline‘ and click OK
3. On the next screen choose ‘This project is parameterised‘ and select ‘String Parameter‘
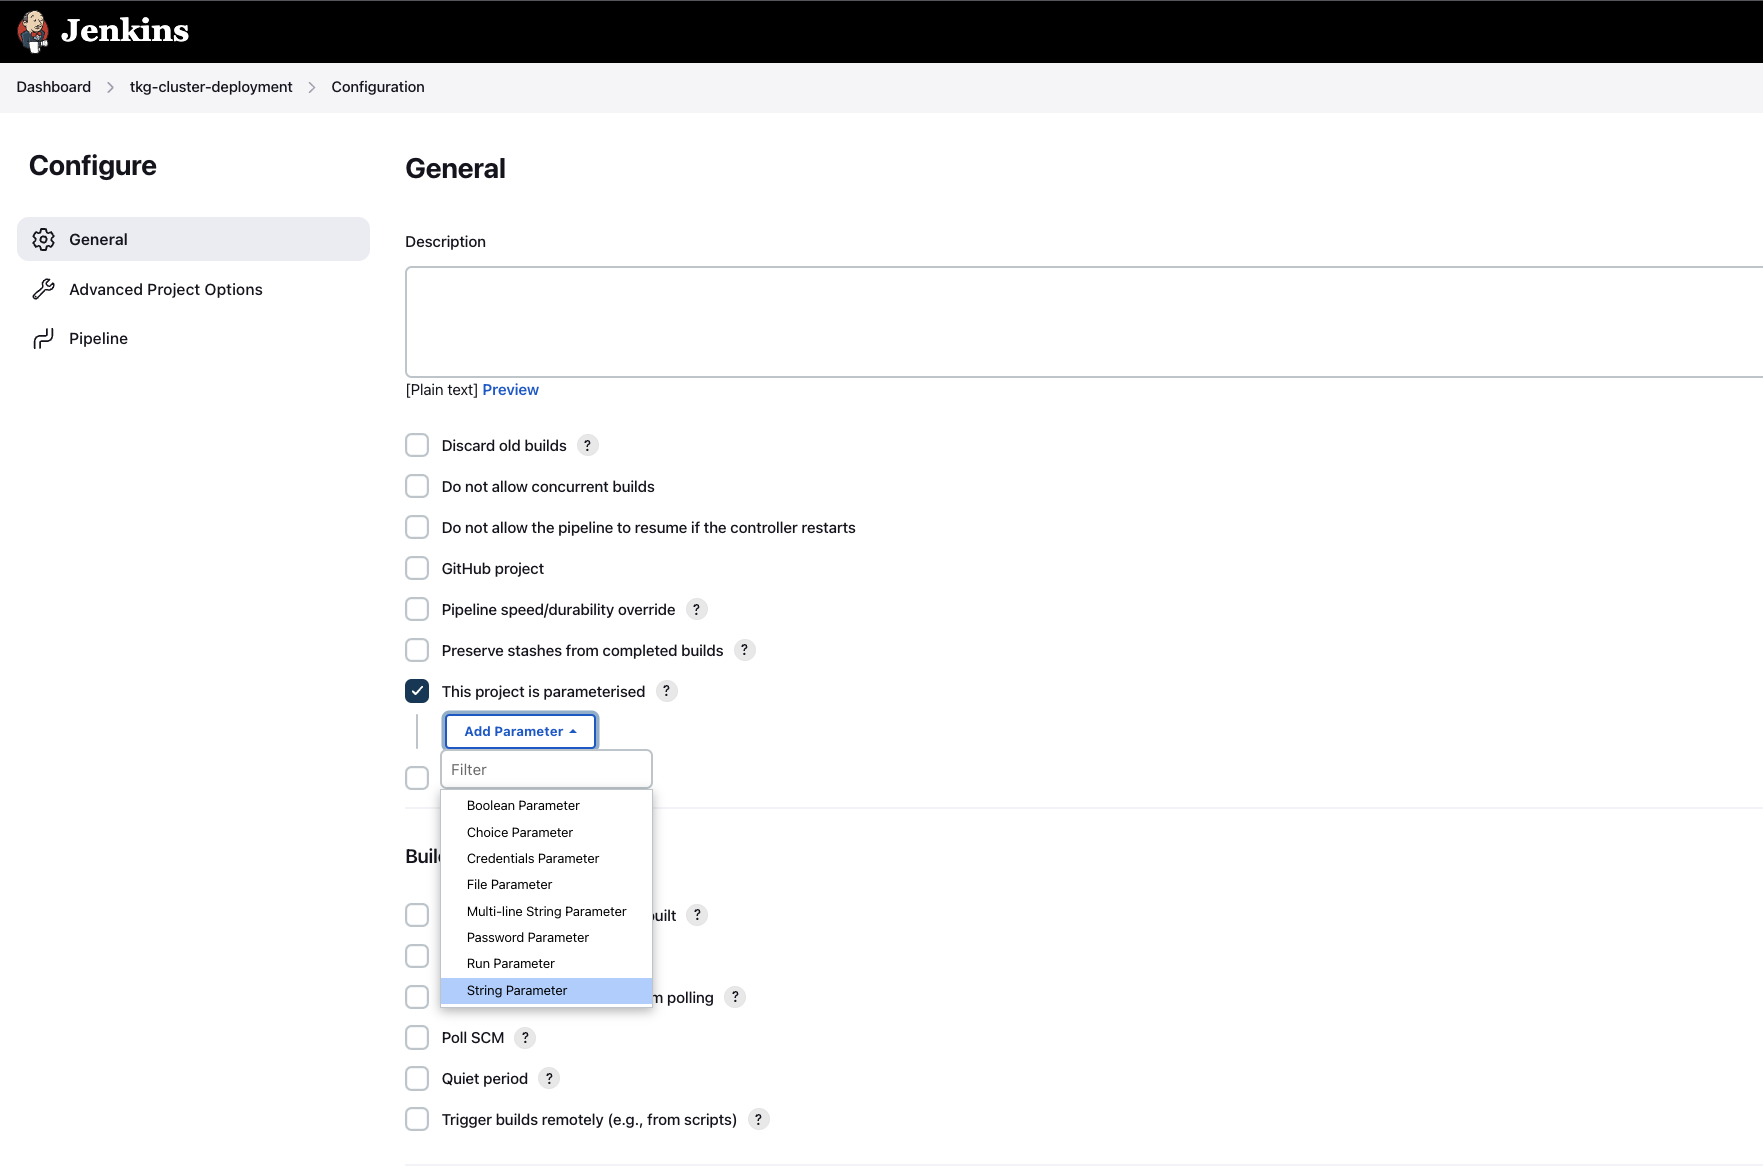
4. Type details:
– Name: Tanzu_Supervisor_Address
– Default Value: IP address of the Supervisor Cluster endpoint
– Description: N/A
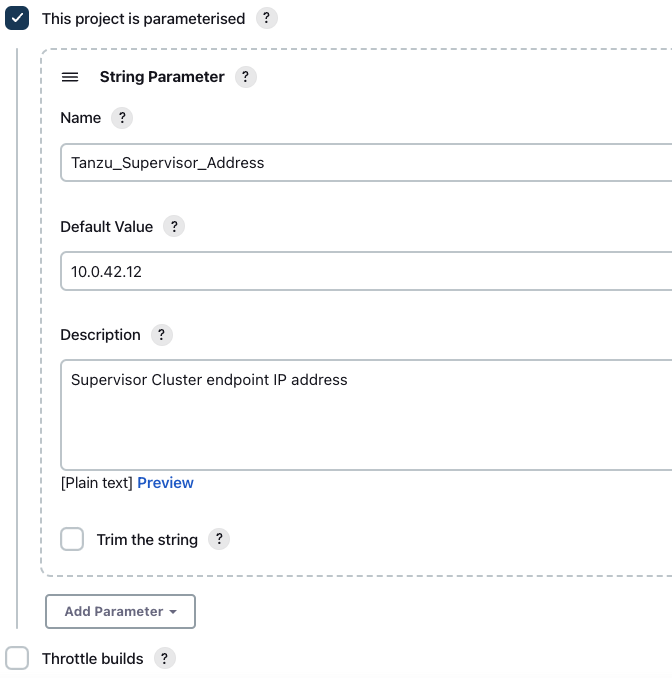
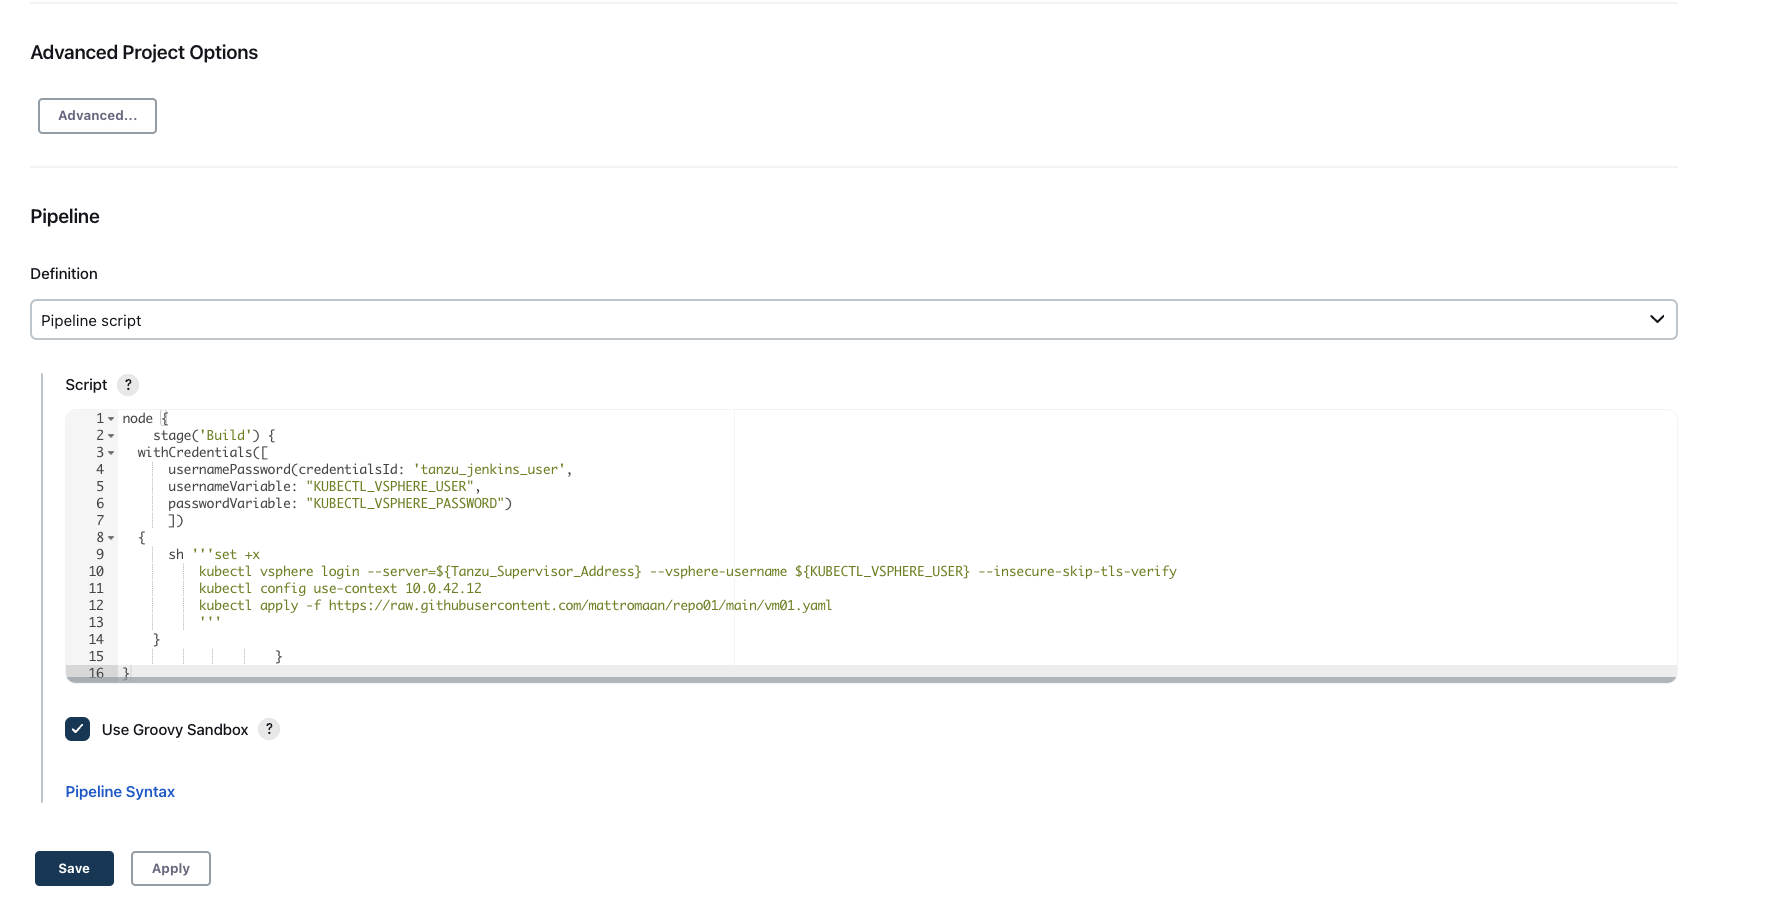
5. Scroll down to the ‘Pipeline‘ section. Paste script from the below and click Save.
Here you can find example yaml file with TKG cluster configuration on Github.
node {
    stage('Build') {
  withCredentials([
      usernamePassword(credentialsId: 'tanzu_jenkins_user',
      usernameVariable: "KUBECTL_VSPHERE_USER",
      passwordVariable: "KUBECTL_VSPHERE_PASSWORD")
      ])
  {
      sh '''set +x
          kubectl vsphere login --server=${Tanzu_Supervisor_Address} --vsphere-username ${KUBECTL_VSPHERE_USER} --insecure-skip-tls-verify
          kubectl config use-context 10.0.42.12
          kubectl apply -f https://raw.githubusercontent.com/mattromaan/repo01/main/vm01.yaml
          '''
    }
                    }
}
Description:
usernamePassword -> ID of the credential created at section nr 2
usernameVariable -> username (mateusz@vsphere.local)
passwordVariable -> password for user mateusz@vsphere.local
Tanzu_Supervisor_Address -> string from the parameter
All commands below “sh ”’set +x” there are the same commands, if we want to manage the vSphere Supervisor Cluster.
The script will use earlier created ‘tanzu_jenkins_user’ credentials to authenticate to the Supervisor clustrer. After that, with kubectl command, context is switched to the 10.0.42.12 (Supervisor Cluster endpoint). At the end with kubectl apply command, vm01.yaml file from Github will be push to the cluster.
4. Build project
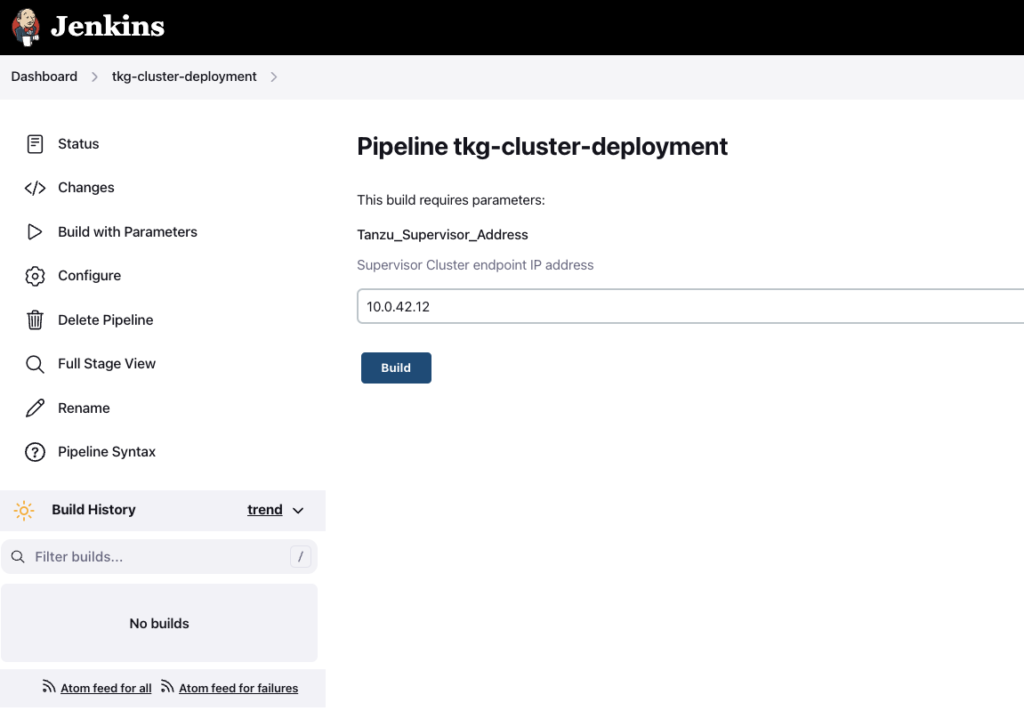
1. Choose ‘Build with Parameters‘ and than ‘Build’ button.
At this moment, you can change IP address to another Supervisor endpoint (if you want).
2. If you click on the ‘Status‘ you should see the build process was successful.
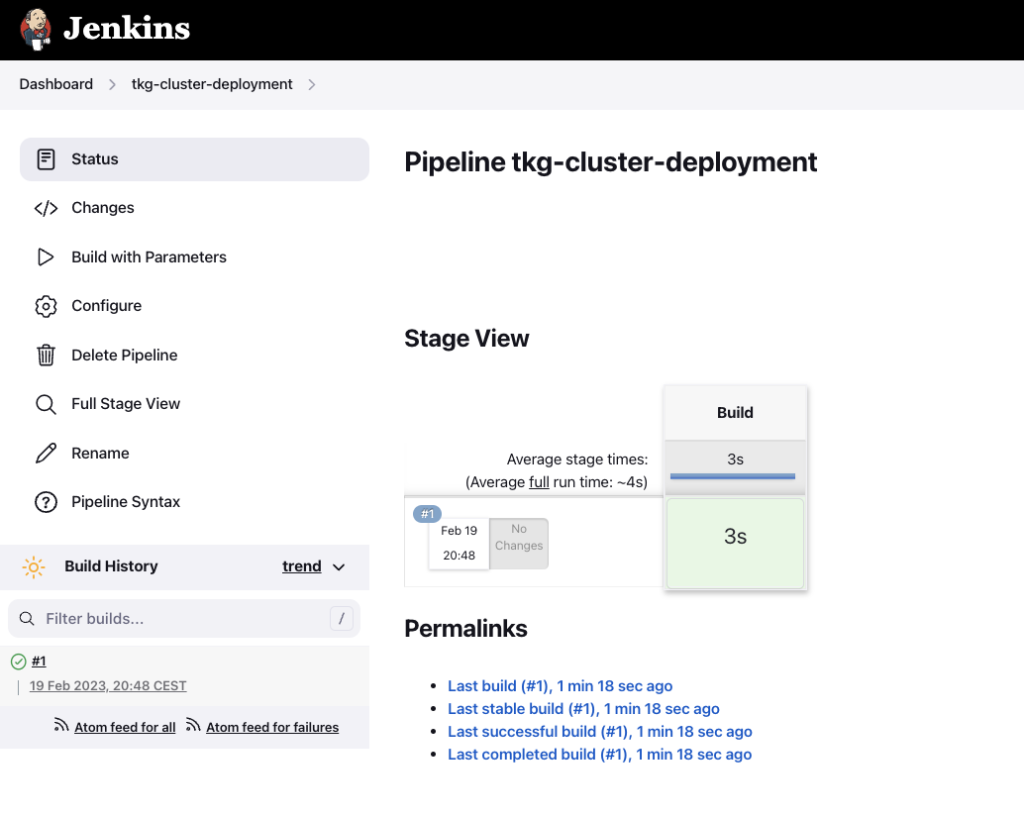
3. Let’s look at Console Output and TKG cluster deployment from vSphere perspective.
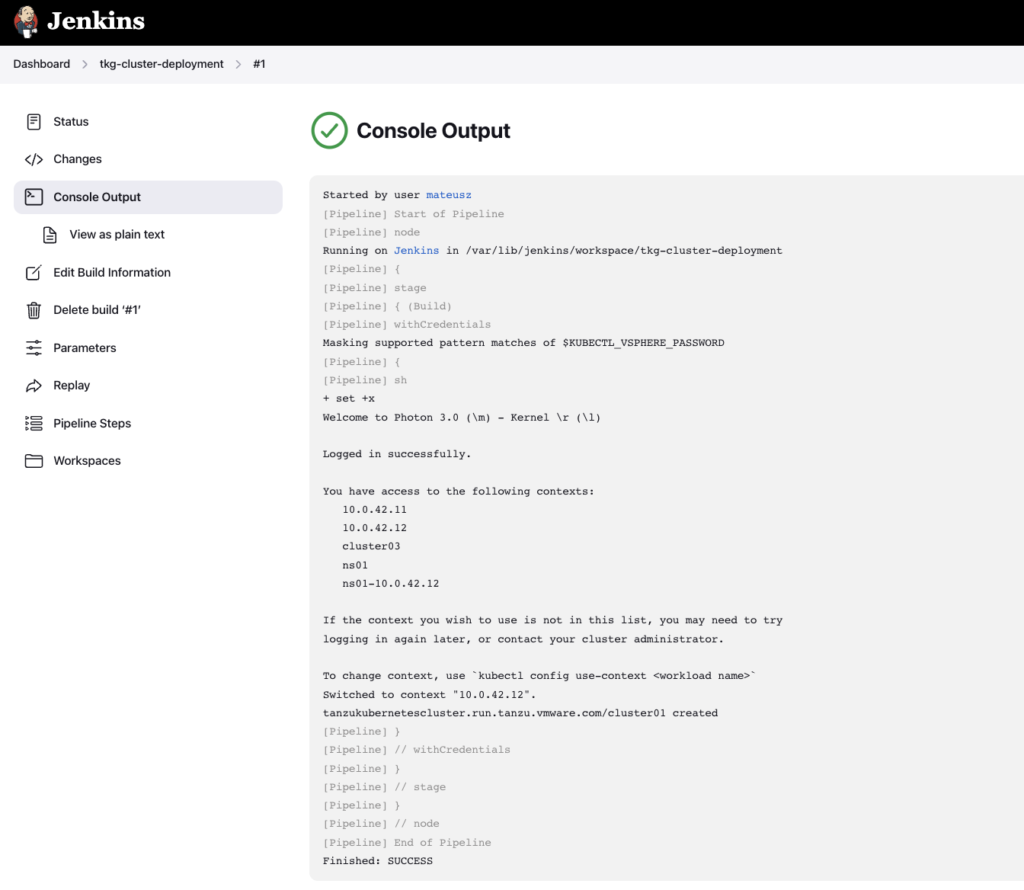

4. With a command kubectl get tanzukubernetesclusters.run.tanzu.vmware.com we can monitor deployment status of the new cluster. If READY and TKR COMPATIBLE are True, that means cluster is preapred and ready to use.

5. Summary
This is simply step by step solution how to start automate process with TKG cluster deployment. Feel free to use it and modify, depending of your requierements 🙂
Special thanks to Ryan Kelly, who inspired me to write this post. He presented similar guide, but for automate VM Service deployment – https://www.vmtocloud.com/configuring-jenkins-pipelines-to-use-the-tanzu-vm-service/


