
Some time ago, I’ve posted tutorial how to deploy linux virtal machine using Ansible. If you missed it, check this link: Deploying Linux VM using Ansible
In this post, I’will show you another kind of this deployment. Now, we use Terraform as automation tool to create new server from template on the vCenter. This is a simple tutorial how to automate repeatable tasks.
What is Terraform?
Terraform is a open-soruce Infrastructure as code (IaC) tool offered by HashiCorp. Can be used for building, modifying and versioning infrastructure. Terraform can be hosted in the major public clouds (AWS, Google, Azure) and in the private cloud, such as VMware vSphere or OpenStack.
With this tool, you can manage services across multiple infrastructures, clouds and vendors.
Requriements:
- Linux server – in this tutorial I use Ubuntu 20.04. You can choose CentOS or another distribution. Windows and Mac OS systems are supported too.
- Existing virtual machine template in the vCenter.
- Service user in the vCenter (optional step).
- Terraform
I’ve tested this procedure on vCenter 7.0.3.00100 (7.0 U3a) with ESXi 7.0.2 (7.0 U2d).
Create service user
It’s not obligatory step. To keep your work under control and be more secure, let’s create terraform service user with Administrator role. You can use administrator@vsphere.local account too. But, it’s a good habit to create separate accounts for different systems.
At first, create service user.
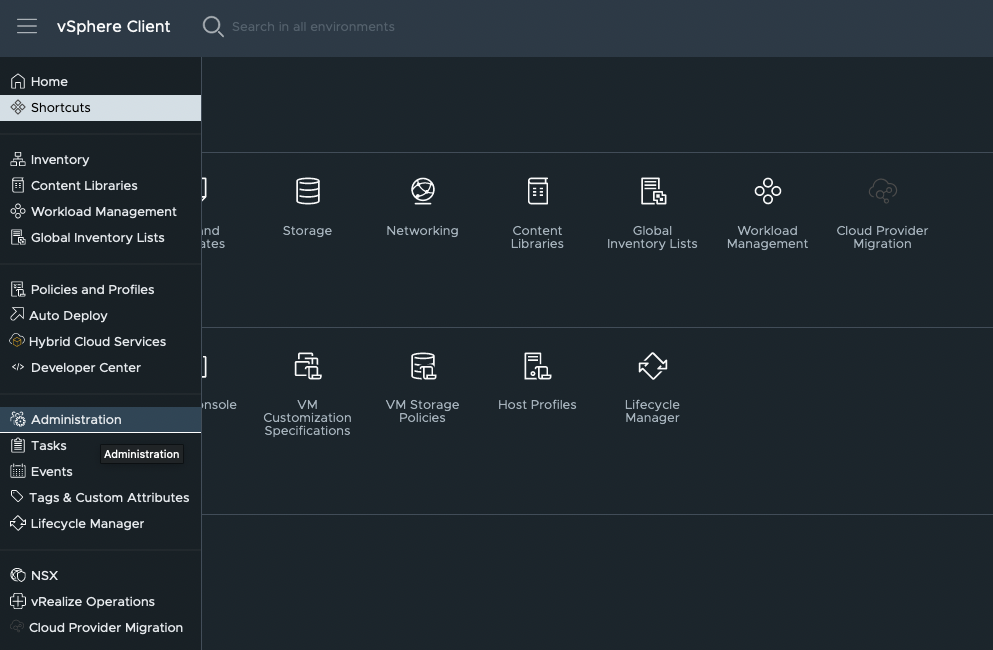
- Login to the vCenter with administrator privileges account. On the left pane, choose 3 horizontal stripes. From the menu, choose Administration tab.
2. Choose User and Groups. From Domain drop-down list find vsphere.local domain.

3. Click ADD button. Type Username and Password for the service user.

4. The user terraform@vsphere.local has been created.
Attach terraform@vsphere.local user with Administrator role to the vCenter.
- Choose vCenter object from Hosts and Clusters view. Than, change tab to the Permissions and click ADD.

2. In the new window, make sure to choose vsphere.local Domain. Find user terraform in User/Group line. Locate and choose Administrator Role. Check Propagate to children and press OK.

3. Service user terraform@vsphere.local with Administrator role has been attached to the vCenter. Now, let’s use this user in the deployment process.
Terraform CLI installation
Depending on you system, installation process could be a little bit different from this tutorial.
- Go to https://www.terraform.io/downloads and choose Ubuntu/Debian tab.

2. Run these 3 commands and wait unitil installation completed.
curl -fsSL https://apt.releases.hashicorp.com/gpg | sudo apt-key add -sudo apt-add-repository "deb [arch=amd64] https://apt.releases.hashicorp.com $(lsb_release -cs) main"sudo apt-get update && sudo apt-get install terraform
3. Now, let’s check installed Terraform version.
terraform --version
VM deployment
To start deployment we need to create three files.
- vsphere.tf -> This is a main file with all instructions and configurations values, which Terraform needs to apply in the deployment.
- variables.tf -> This file contains variables used in the vsphere.tf file.
- terraform.tftvars -> This file contains values of variables provided in the variables.tf file.
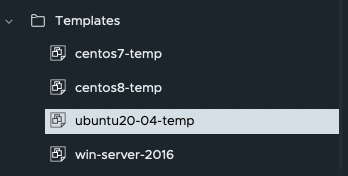
For clone process, I have ubuntu20-04-temp (2 vCPU, 2 GB RAM, 25 GB disk). This is earlier prepared VM template with Ubuntu 20.04.
1. At first, create deployment catalog to store Terraform files. Go to this directory.
For each project, create separated catalog.
mateusz@terraform:~$ mkdir terraform-deployment-01mateusz@terraform:~$ cd terraform-deployment-012. Create first file: vsphere.tf
mateusz@terraform:~/terraform-deployment-01$ touch vsphere.tf3. Create second file: variables.tf
mateusz@terraform:~/terraform-deployment-01$ touch variables.tf4. Create third file: terraform.tfvars
mateusz@terraform:~/terraform-deployment-01$ touch terraform.tfvars5. Edit vsphere.tf file.
In contrast to Ansible (YAML files), Terraform uses different syntax – HCL. The structure of the configuration file is a different.
#VMware vSphere Provider
provider "vsphere" {
  #Set of variables used to connect to the vCenter
    vsphere_server = var.vsphere_server
    user           = var.vsphere_user
    password       = var.vsphere_password

#If you have a self-signed cert
    allow_unverified_ssl = true
  }

#Name of the Datacenter in the vCenter
  data "vsphere_datacenter" "dc" {
    name = "HQ"
  }
#Name of the Cluster in the vCenter
  data "vsphere_compute_cluster" "cluster" {
    name          = "Cluster"
    datacenter_id = data.vsphere_datacenter.dc.id
  }
#Name of the Datastore in the vCenter, where VM will be deployed
  data "vsphere_datastore" "datastore" {
    name          = "VMware-iSCSI-01"
    datacenter_id = data.vsphere_datacenter.dc.id
  }
#Name of the Portgroup in the vCenter, to which VM will be attached
  data "vsphere_network" "network" {
    name          = "VLAN-111"
    datacenter_id = data.vsphere_datacenter.dc.id
  }
#Name of the Templete in the vCenter, which will be used to the deployment
  data "vsphere_virtual_machine" "ubuntu20-04" {
    name          = "ubuntu20-04-temp"
    datacenter_id = data.vsphere_datacenter.dc.id
  }

#Set VM parameteres
  resource "vsphere_virtual_machine" "ubu-testing" {
    name = "ubu-test"
    num_cpus = 2
    memory   = 4096
    guest_id = "ubuntu64Guest"
    resource_pool_id = data.vsphere_compute_cluster.cluster.resource_pool_id
    datastore_id     = data.vsphere_datastore.datastore.id

    network_interface {
      network_id = data.vsphere_network.network.id
    }


    disk {
      label            = "disk0"
      thin_provisioned = true
      size             = 50
    }


    clone {
      template_uuid = data.vsphere_virtual_machine.ubuntu20-04.id
#Linux_options are required section, while deploying Linux virtual machines
      customize {
          linux_options {
              host_name = "ubu-test"
              domain = "infra.local"
          }
          network_interface {
              ipv4_address = "10.111.10.215"
              ipv4_netmask = "24"
          }
#There are a global parameters and need to be outside linux_options section. If you put IP Gateway or DNS in the linux_options, these will not be added
          ipv4_gateway = "10.111.10.1"
          dns_server_list = ["192.168.1.121", "192.168.1.1"]
          dns_suffix_list = ["infra.local"]
      }


    }
  }
#Outup section will display vsphere_virtual_machine.ubu-testing Name and IP Address
output "VM_Name" {
  value = vsphere_virtual_machine.ubu-testing.name
}

output "VM_IP_Address" {
  value = vsphere_virtual_machine.ubu-testing.guest_ip_addresses
}
To get Terraform ability to communicate and work with VMware vSphere, we need to use VMware vSphere Provider. This provider can be used to manage a set of VMware object in the infrastructure. Note that, VMware vSphere Provider is not supported on a free ESXi license.
Here is a link to the documentation:
https://registry.terraform.io/providers/hashicorp/vsphere/latest/docs
6. Edit variables.tf file.
#set of VM variables to authenticate to the vCenter
variable "vsphere_server" {
  description = "vSphere server"
  type        = string
}

variable "vsphere_user" {
  description = "vSphere username"
  type        = string
}

variable "vsphere_password" {
  description = "vSphere password"
  type        = string
  sensitive   = true
}
7. Edit terraform.tfvars file.
#set of VM values of variables
vsphere_server     = "vcenter.infra.local"
vsphere_user       = "terraform@vsphere.local"
vsphere_password   = "SecretPassword1!"
Execute Terraform deployment
- Initialize Terraform workspace (working directory). This command should be used everytime, after writing a new Terraform configuration.
terraform init
2. Apply configuration to start Terraform deployment. This process executes the actions propsed in a Terraform plan.
terraform plan -> creates an execution plan to preview propsed chagnes
–auto-update -> this parameter automatically accept terraform plan
If you skip –auto-update parameter, Terraform ask you to manually accept propsed terraform plan.
In the beggining, there is a list with Terraform changes. This points will be applied according to configuration files.
terraform apply --auto-approve
3. In the meantime let’s have a look to the vCenter. In the Recent Tasks section, there are few new tasks has been initialated by terraform@vsphere.local user.

4. In the terminal window, at the bottom you can see deployment process. When execution successfully complete, there is a status: ‘Apply complete! Resources: 1 added, 0 changed, 0 destroyed’

5. New VM has been created in the vCenter with a name: ubuntu-test. DNS name is ubuntu-test and IP Address is 10.111.10.215.

6. Testing communication between another server in different subnet and ubu-test virtual machine.
mateusz@vm1:~$ ip a
1: lo: <LOOPBACK,UP,LOWER_UP> mtu 65536 qdisc noqueue state UNKNOWN group default qlen 1000
    link/loopback 00:00:00:00:00:00 brd 00:00:00:00:00:00
    inet 127.0.0.1/8 scope host lo
       valid_lft forever preferred_lft forever
    inet6 ::1/128 scope host
       valid_lft forever preferred_lft forever
2: ens160: <BROADCAST,MULTICAST,UP,LOWER_UP> mtu 1500 qdisc mq state UP group default qlen 1000
    link/ether 00:50:56:93:df:f1 brd ff:ff:ff:ff:ff:ff
    inet 10.50.66.149/24 brd 10.50.66.255 scope global ens160
       valid_lft forever preferred_lft forever
    inet6 fe80::250:56ff:fe93:dff1/64 scope link
       valid_lft forever preferred_lft forever
mateusz@vm1:~$ ping 10.111.10.215
PING 10.111.10.215 (10.111.10.215) 56(84) bytes of data.
64 bytes from 10.111.10.215: icmp_seq=1 ttl=63 time=0.495 ms
64 bytes from 10.111.10.215: icmp_seq=2 ttl=63 time=0.842 ms
64 bytes from 10.111.10.215: icmp_seq=3 ttl=63 time=0.653 ms
64 bytes from 10.111.10.215: icmp_seq=4 ttl=63 time=0.499 ms
^C
--- 10.111.10.215 ping statistics ---
4 packets transmitted, 4 received, 0% packet loss, time 3027ms
rtt min/avg/max/mdev = 0.495/0.622/0.842/0.141 ms
mateusz@vm1:~$
7. To delete deployment type command below. Like with terraform apply command, you can add –auto-approve to automatically accept terraform plan.
terraform destroy --auto-approve

Summary
That’s it, we performed deployment of the virtual machine using Terraform.
Terraform is a great provisioning tool. For example, it’s a good choice if you think about orchestrating cloud services. Whereas, Ansible deals better with bare metal or virtual infrastructure platforms. Between this 2 systems there are more differences. All it depends what is your goal and what you need to achive.


4 Comments
Hello Mateusz,
thanks for the great detail, just I am new on Terraform and vSphere.
may I ask for a help if want the VM stay on power-off when deploying and manually we bring it on.
I put power_state=off but keeps give me error.
thanks for your help!
Sara
Hi
I thank you very much for sharing this article
its help me alot
This was instrumental in helping my team learn terraform for vsphere. Thanks for sharing!
Merci pour le partage, c’est hyper intéressant