vSphere IaaS Control Plane with VMware Avi Load Balancer and vSphere Distributed Switch (VDS) provides a robust architecture for managing and delivering containerized applications in a virtualized environment. This setup, enables unified environment where Kubernetes applications can run alongside with traditional virtual machines. Administrators can deploy K8S workload clusters directly on vSphere environment.
For some time, this product was know as vSphere with Tanzu or Tanzu Kubernetes Grid Service, aka TKGs.
VMware Avi Load Balancer provides advanced load balancing capabilities across applications deployed in both – cloud and on-premises environments. It supports automated scaling, application delivery, and security features like web application firewalls.
In the first part of this deployment, I will show you how to prepare infrastructure before enabling Workload Management. Here, we will download and configure Avi Load Balancer. Also, I’m going to prepare storage and Content Library in the vCenter.
Requirements:
- vCenter 8.0 U3, in this tutorial I have a vCenter 8.0 U3c;
- Officially, you need minimum 3 ESXi hosts. But, it’s possible to run vSphere IaaS Supervisor on a single or two node cluster like in this tutorial;
- HA & DRS enabled on the vSphere cluster;
- vSphere Distributed Swtich (VDS) with min. MTU=1500;
- 3 networks (portgroups) created on VDS;
- Datastore(s).
Networks
| Role | CIDR | VDS Portgroup name | Usage |
| Management | 10.0.40.0/24 | tanzu-40-mgmt | Provides connectivity to vCenter Server and ESXi hosts. |
| Workload | 10.0.41.0/24 | tanzu-41-workload | Connects to Kubernetes clusters and is essential for deploying applications. |
| Frontend | 10.0.42.0/24 | tanzu-42-frontend | Used by AVI Service Engines to handle client traffic and load balancing tasks. Virtual IPs (VIPs) are assigned from this network, enabling efficient traffic distribution to backend services. |
IP Assignments
| Role | IP Address or IP range | VDS Portgroup name |
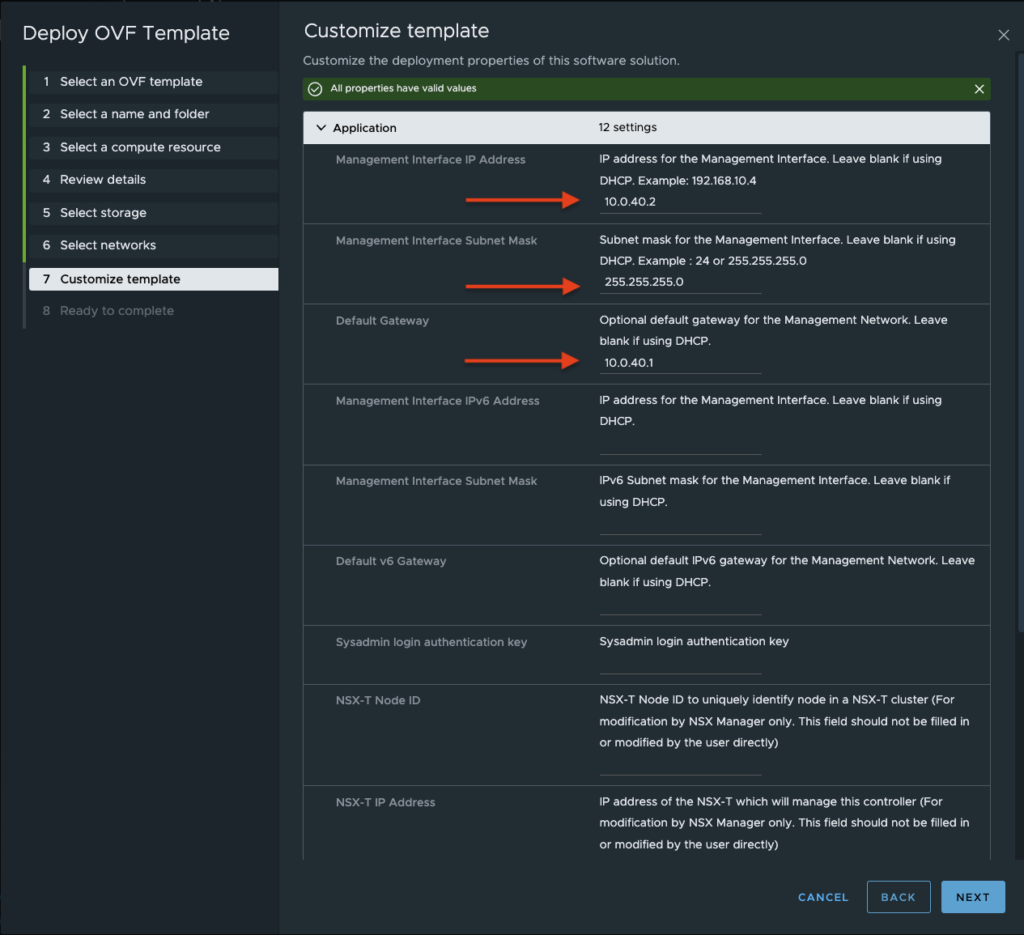
| VMware Avi Load Balancer | 10.0.40.2 | tanzu-40-mgmt |
| AVI Service Engines VMs | 10.0.40.10-10.0.40.40 | tanzu-40-mgmt |
| AVI Service Engines VMs (2nd NIC) | 10.0.42.10-10.0.42.250 | tanzu-42-frontend |
| SupervisorControlPlaneVMs | 10.0.40.3-10.0.40.7 | tanzu-40-mgmt |
| SupervisorControlPlaneVMs (2nd NIC) | 10.0.41.10-10.0.41.250 | tanzu-41-workload |
| VIPs for K8S backend services | 10.0.42.10-10.0.42.250 | tanzu-42-frontend |
| K8S (guest) cluster nodes | 10.0.41.10-10.0.41.250 | tanzu-41-workload |
1. Download and deploy VMware Avi Load Balancer
1. Log in to the Broadcom Support Portal – link
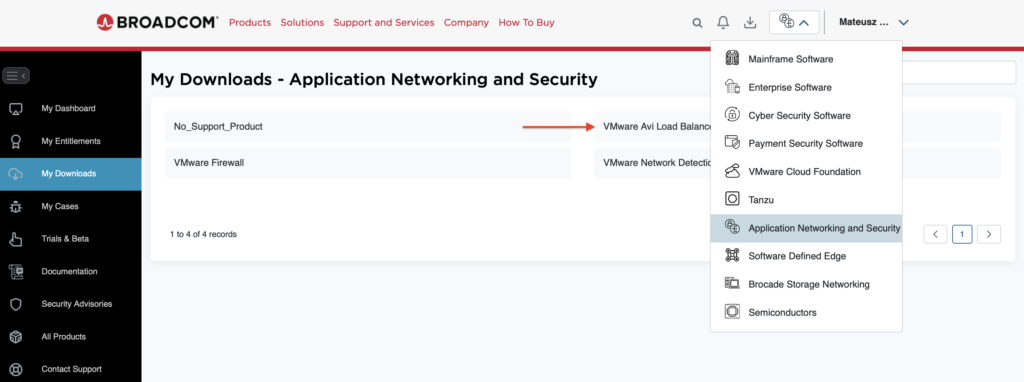
Choose Application Networking and Security section and than, My Downloads tab. Click VMware Avi Load Balancer application.
2. Choose VMware Avi Load Balancer product.

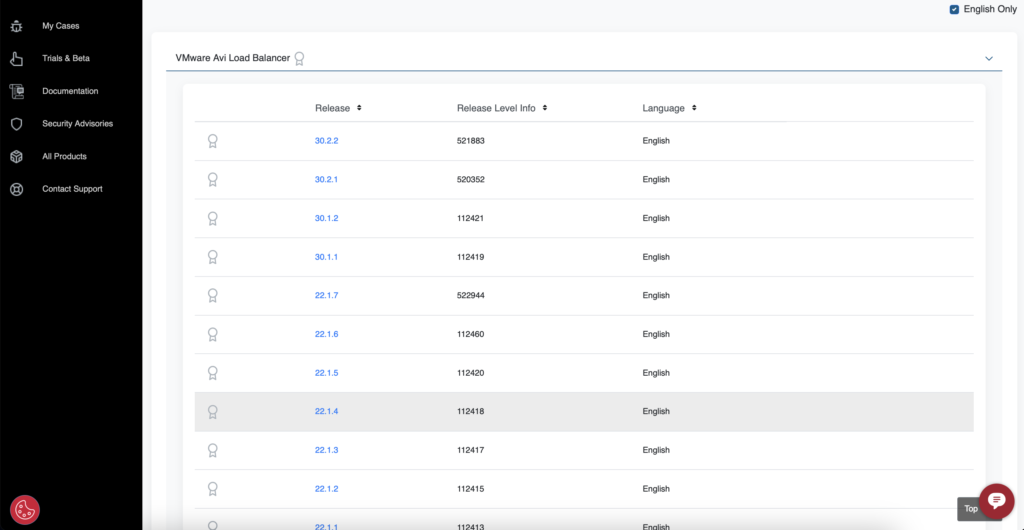
3. Choose version 22.1.4
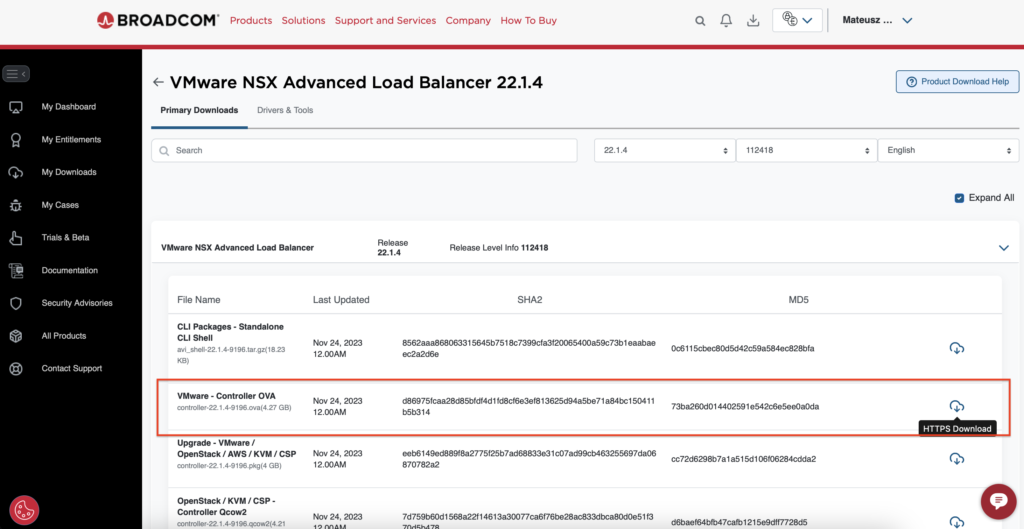
4. Find a VMware – Controller OVA file and download it.
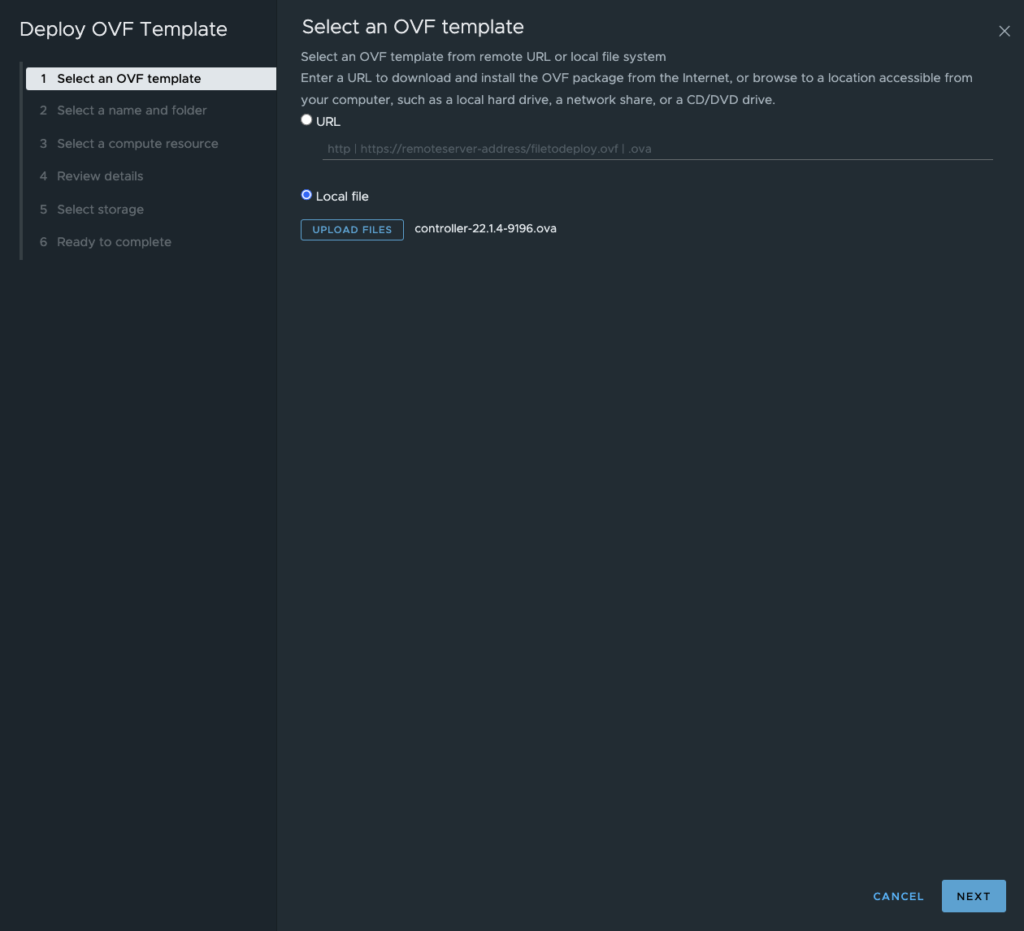
5. From the vCenter, start deploying Avi Controller from a OVF template.
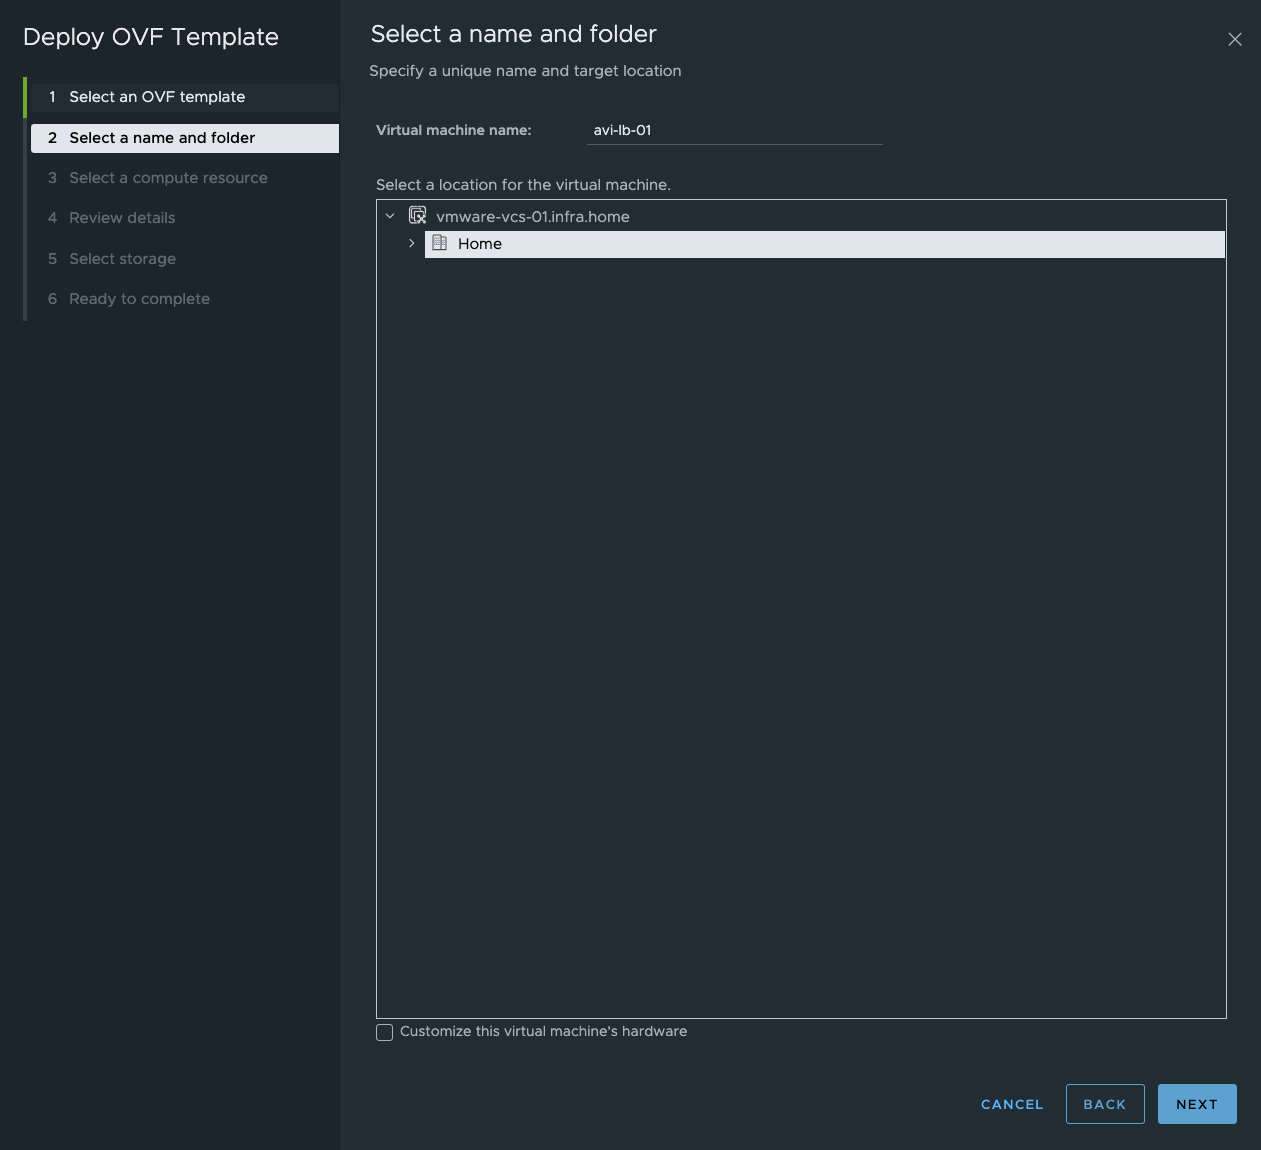
6. Type a name for the VM and location.
7. Select a cluster or specific ESXi host. Check the Automatically power on deployed VM option to avoid manually powering on the VM.

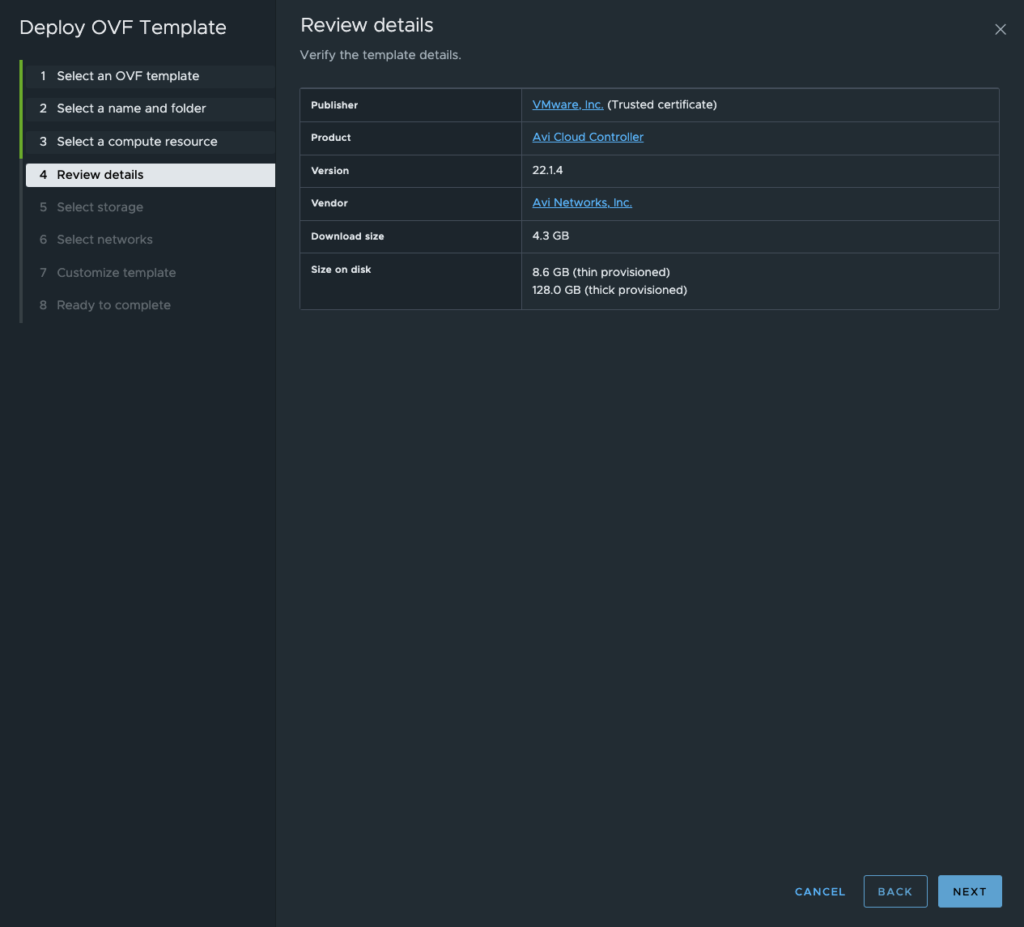
8. Review details of Avi Cloud Controller template.
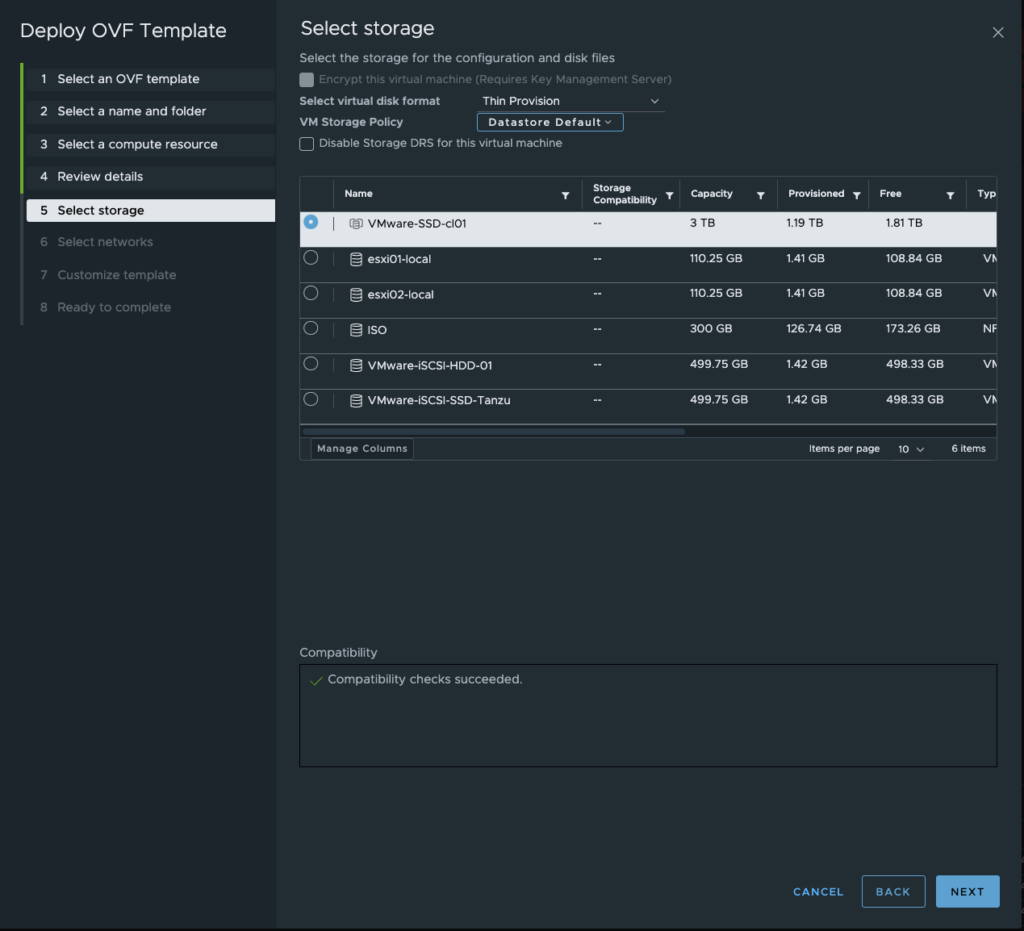
9. Select storage to deploy VM and if you want, choose Thin Provision as a disk format.
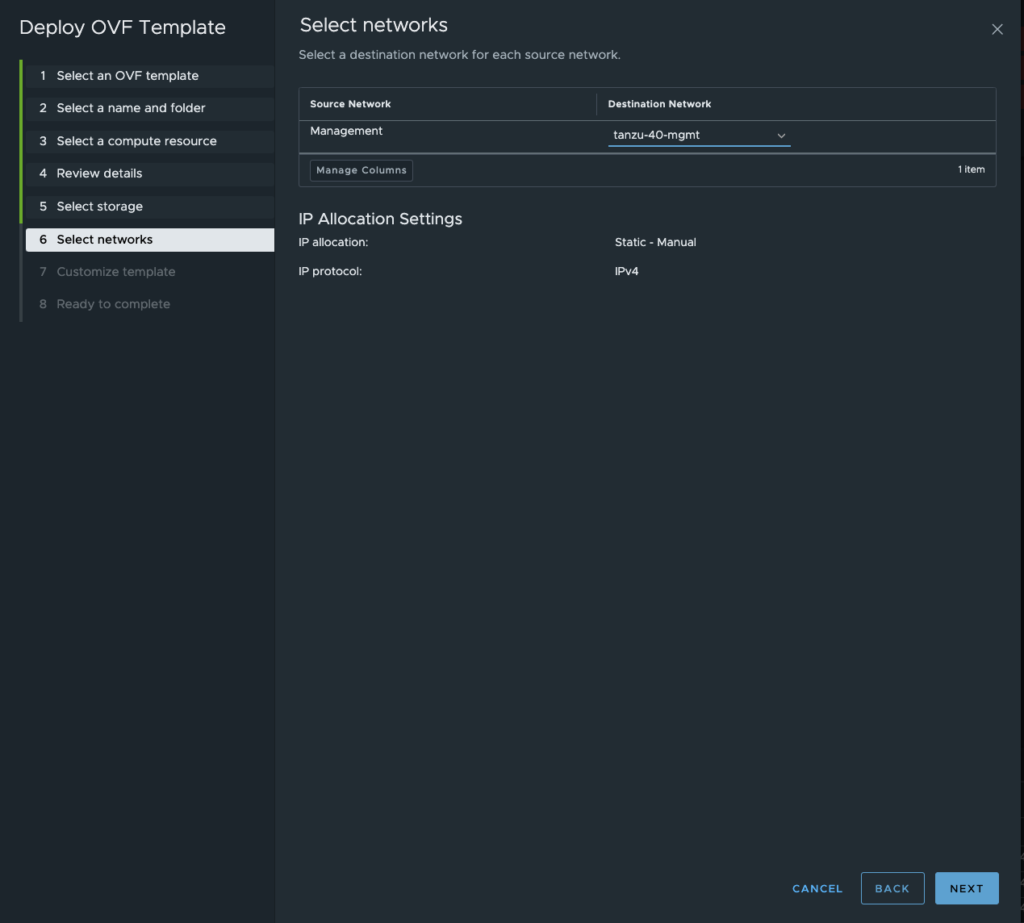
10. From the drop-down list, find Management network for Avi Controller.
11. Provide IP Address, Subnet Mask and a Default Gateway for the Avi Controller. Go to next page.
12. Review all details and if everything is OK, click Finish to start deploying VM.
After a while, VM is up a ready.

2. VMware Avi Load Balancer – configuration
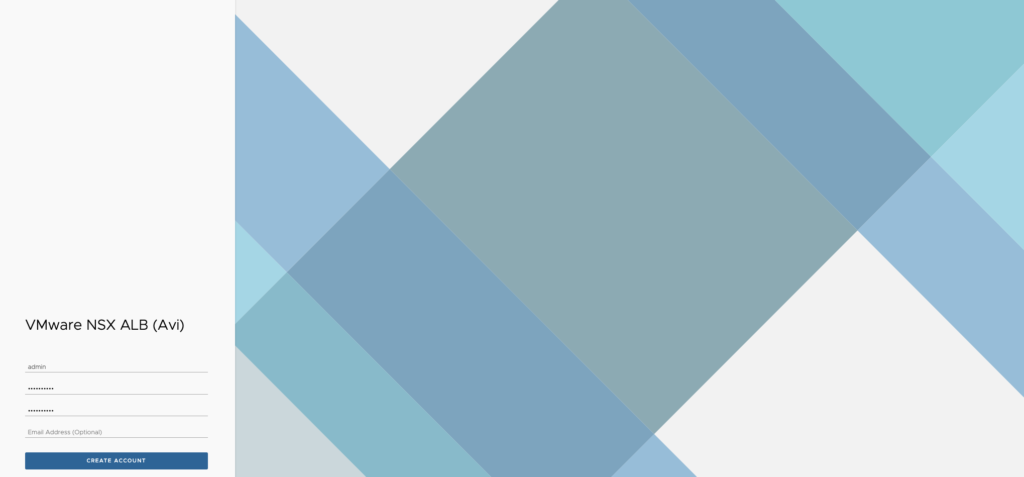
1. Log in to the Avi Controller. As a username type admin, type any new password and login via create account button.
2. Type any Passphrase, DNS Resolver(s) and DNS Search Domain. Click Next button.

3. Select option None in Email/SMTP section. Click Next.

4. In Multi-Tenat section leave default options like on the screen. Tick Setup Cloud After and Click Next.
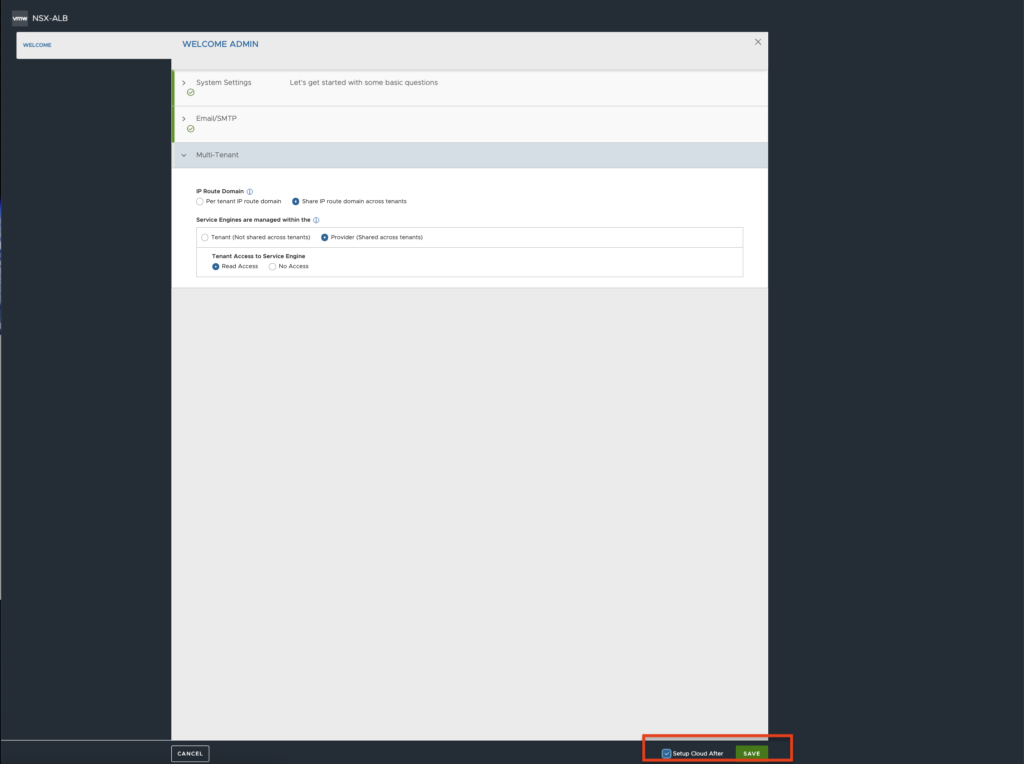
5. Let’s configure our “Cloud” aka connection to the VMware vCenter. Click pencil icon.

6. For a Type choose VMware vCenter/vSphere ESXi.
In the Credentials section click Set Credential button. In a new smaller window, type a vCenter Address (or FQDN), Username and Password. Click Connect.
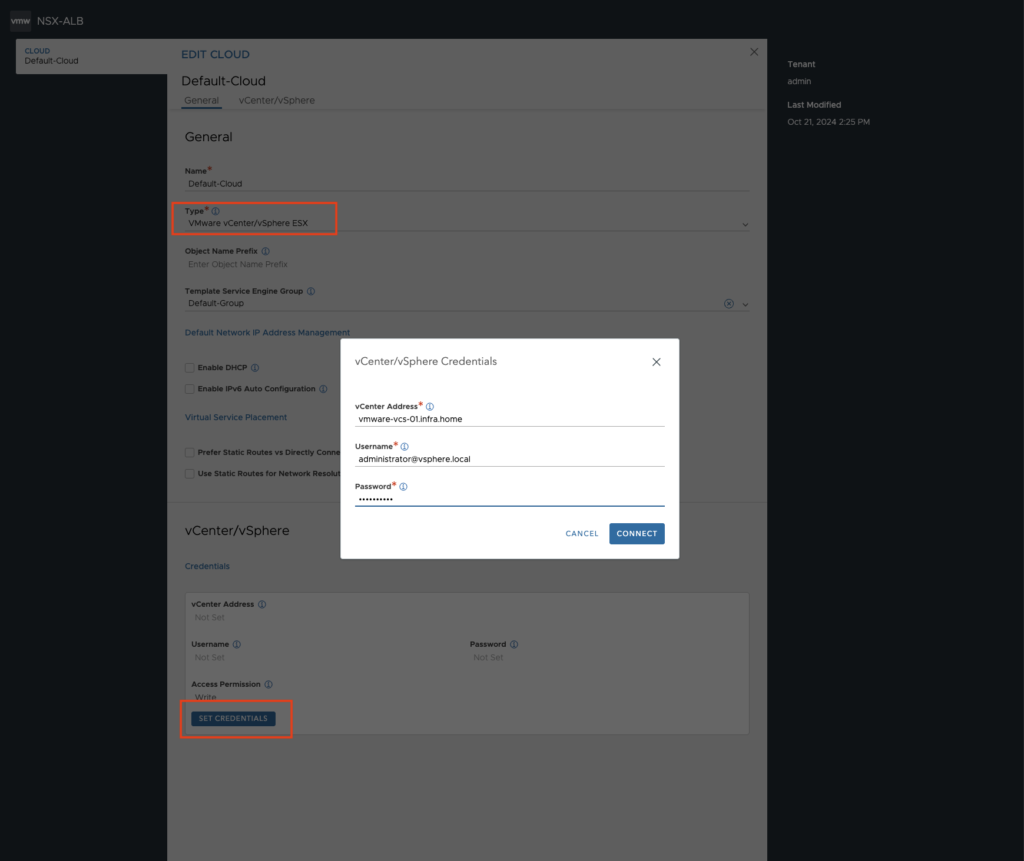
7. Avi was successfully connected to the vCenter!

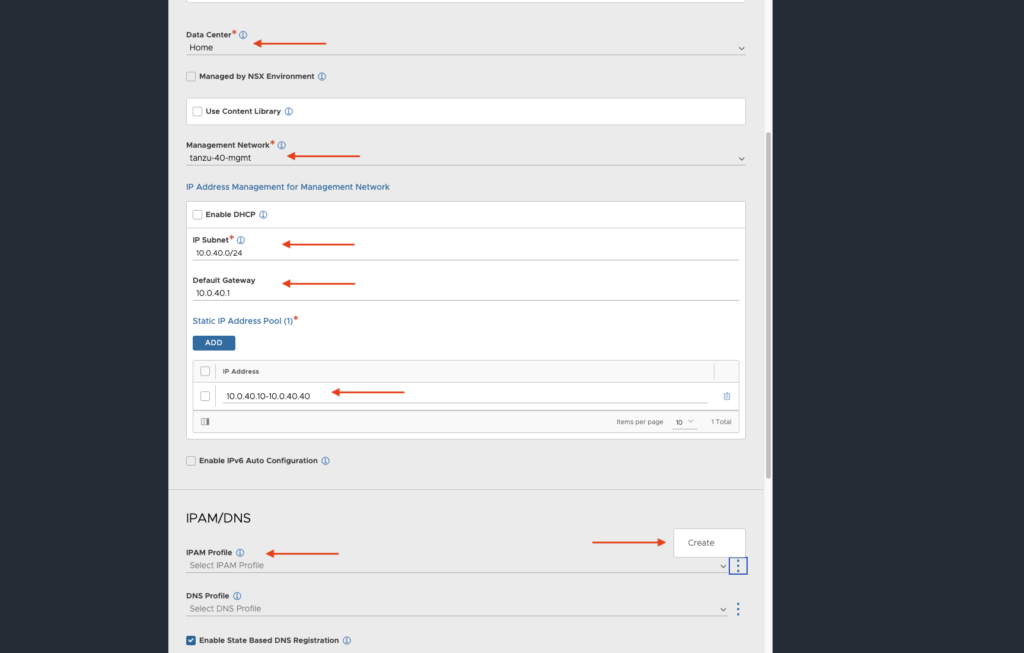
8. Scroll down and set a few parameters.
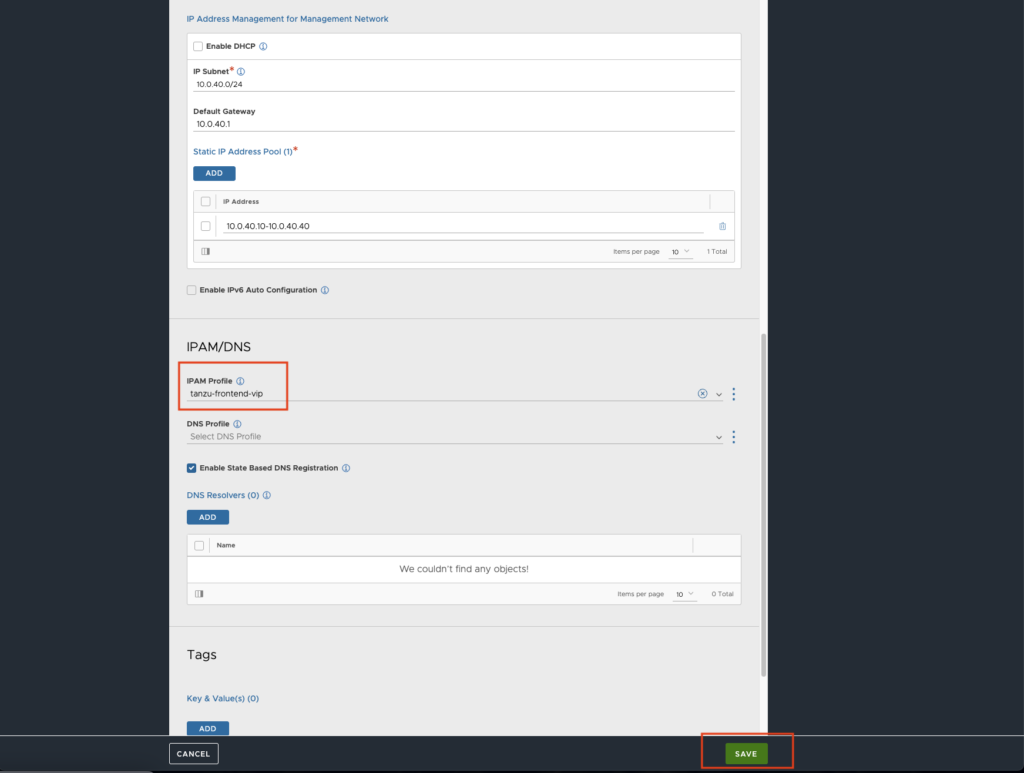
Choose your Data Center existing in the vCenter, Management Network and configure IP Address Management Network. This IP range will be used by AVI Service Engines VMs.
Than, in the IPAM/DNS section click Create button.
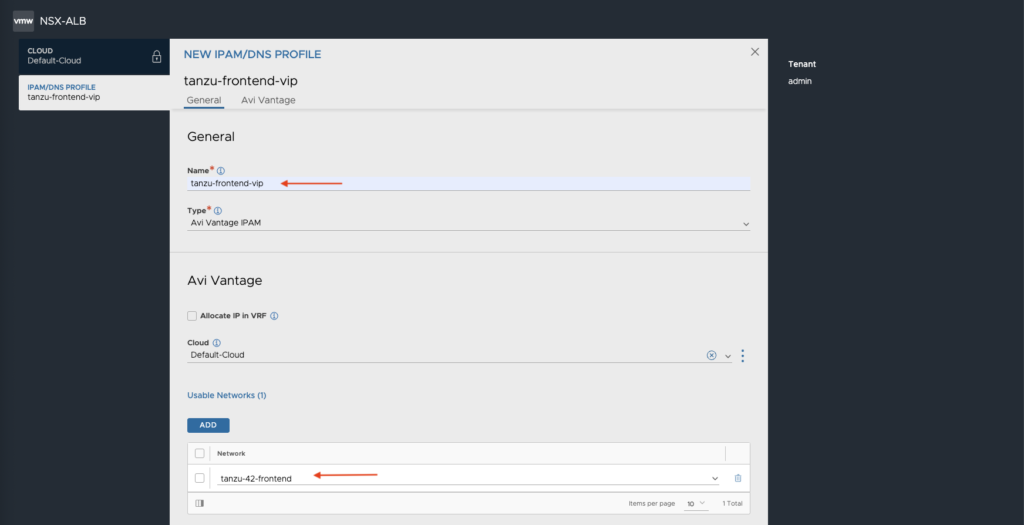
9. Provide any Name for this IPAM and choose dedicated Fronted (VIP) network from the vCenter portgroups list. Save changes.
IPAM with this network will be used to serve Kubernetes services from a new guest/workload clusters. We will configure IP range for this IPAM in the next steps.
10. Review details and save configuration. After a minute, Status dot will change from red/orange to green.

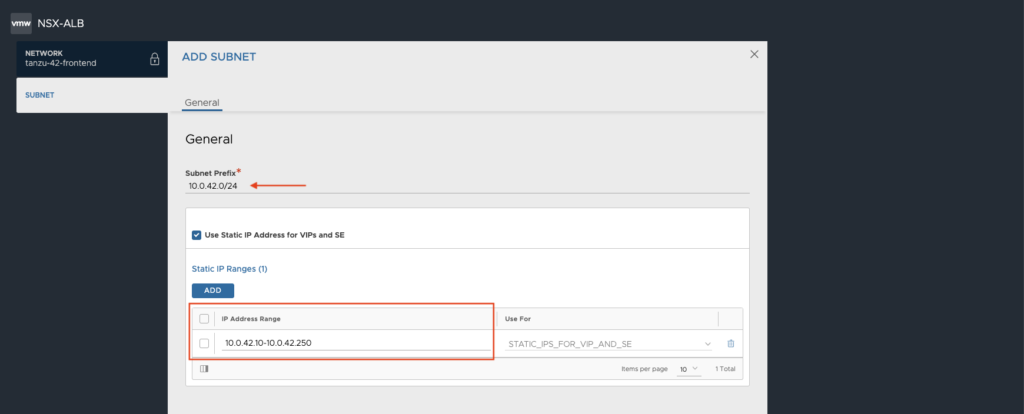
11. Go to the Infrastructure tab. Under Cloud Resources choose Network section. Find your Frontend (VIP) network and click pencil icon to edit it.

12. Define Subnet Prefix (CIDR of this Frontend network) and add IP Address Range. Save configuration.
This IP range will be used expose Kubernetes services from guest/workload clusters.
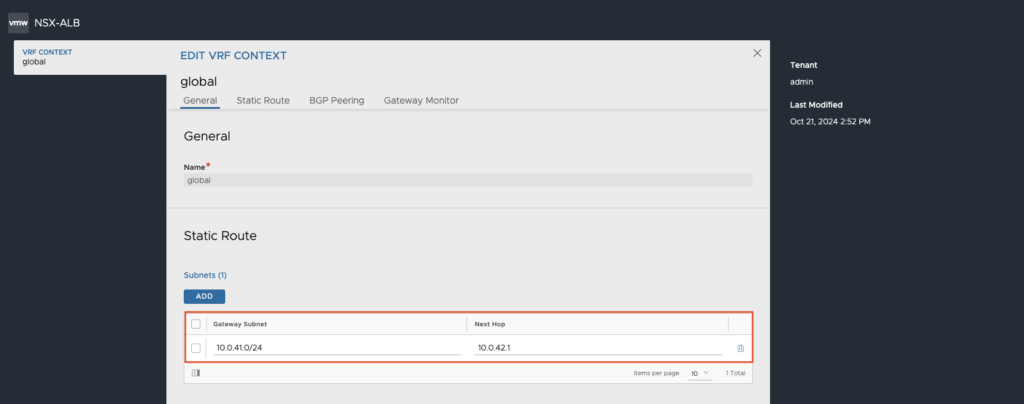
13. Go to the VRF Context in the same tab. Click pencil icon to edit global configuration.

14. In the Static Route section, as a Gateway Subnet provide Workload subnet. Next Hop is a Frontend (VIP) gateway. Save changes.
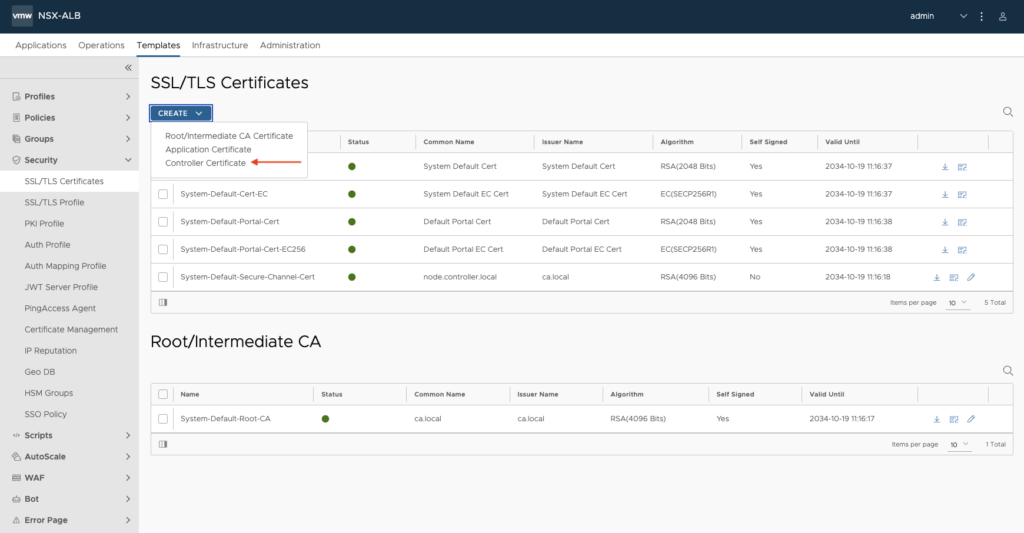
15. Go to the Templates Tab. Under Security Section, choose SSL/TLS Certificates. Create a new Controller Certificate.
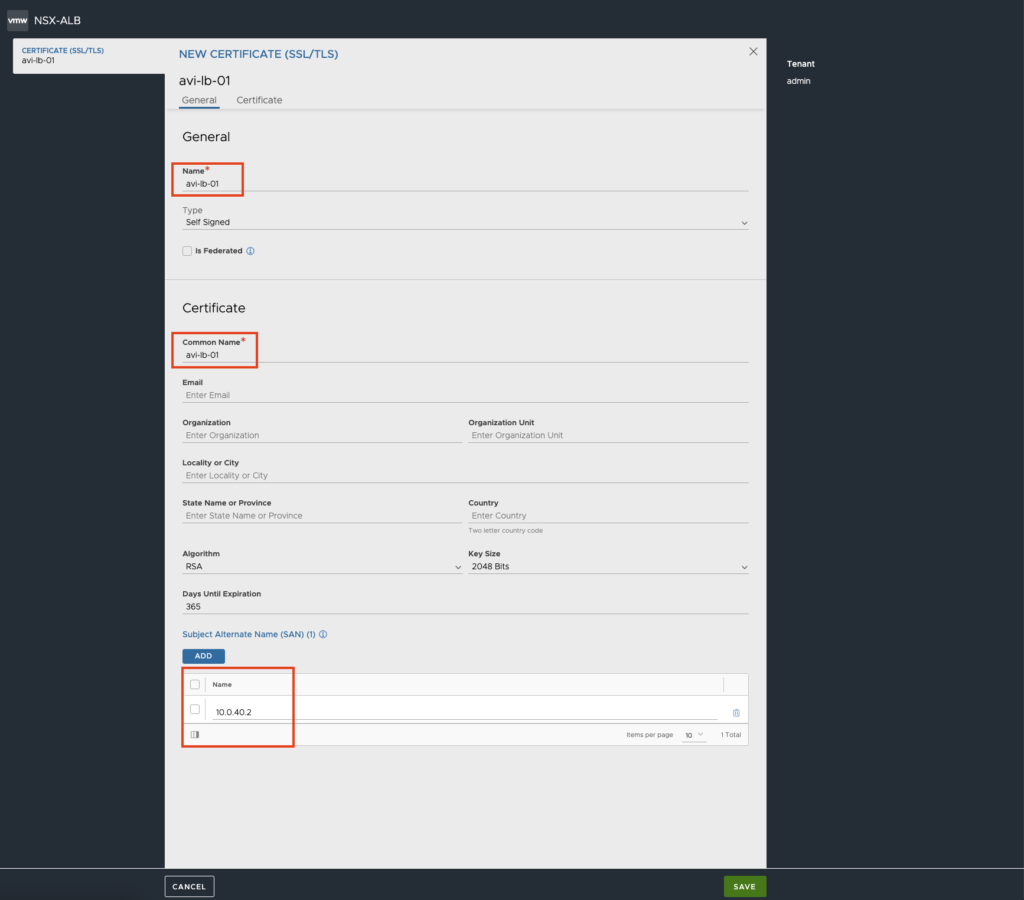
16. Type any Name, any Common Name and as a SAN, type Avi Controller IP Address. Save changes.
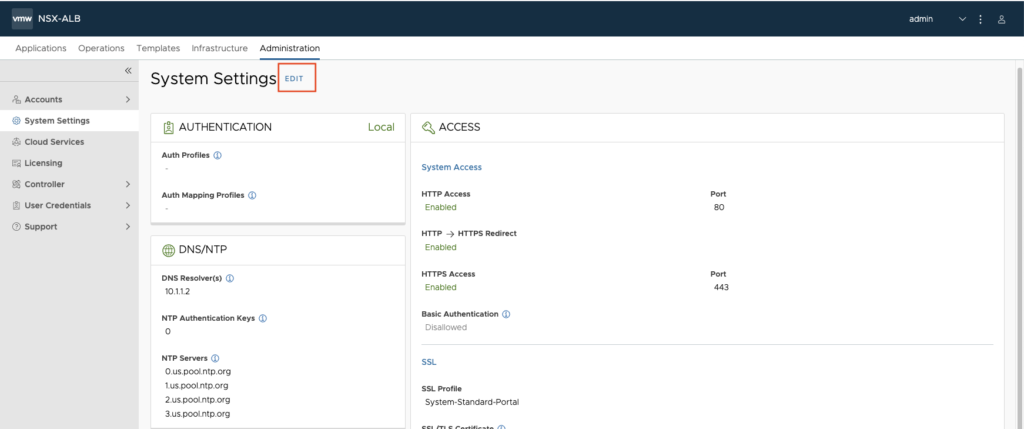
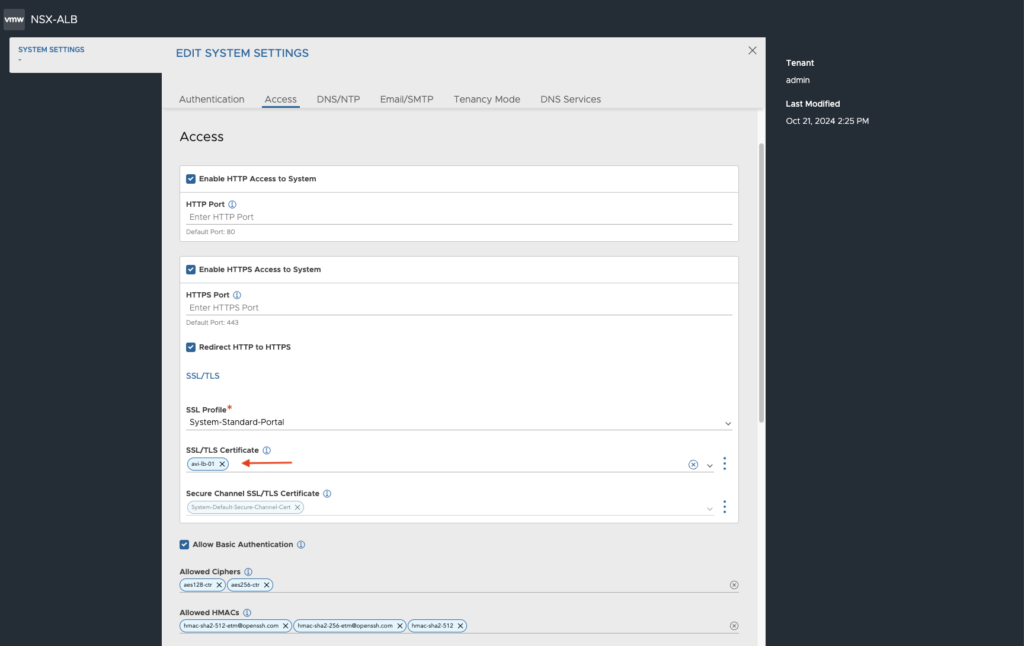
17. Go to the Administration tab and choose System Settings section. Click EDIT to edit System Settings.
18. Choose Access tab. Delete 2 existing SSL/TLS certificates: System-Default-Portal-Cert and System-Default-Portal-Cert-EC256
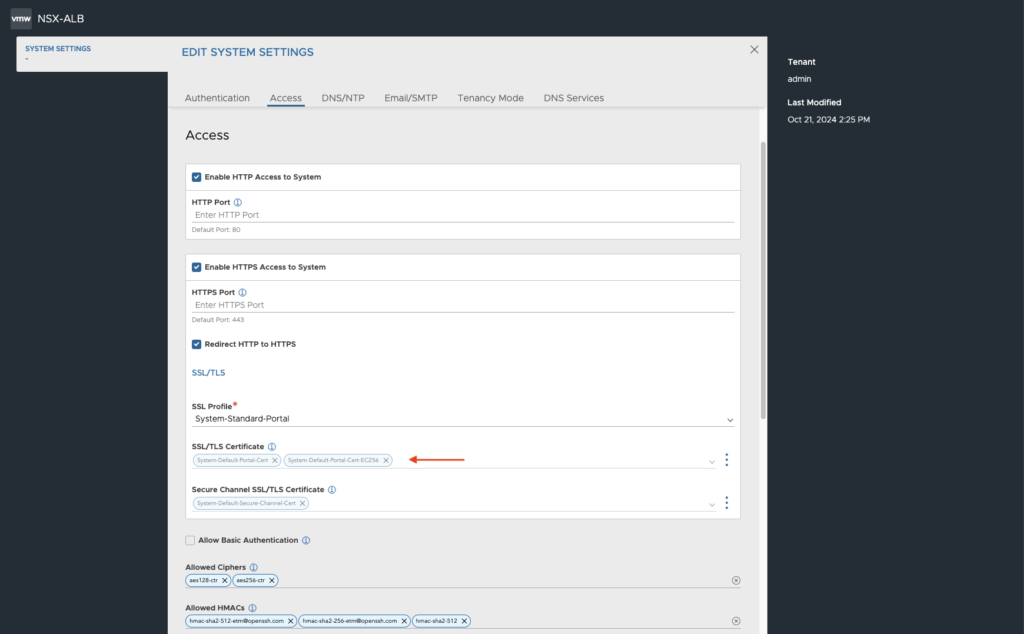
19. Replace old SSL/TLS certificates with a new created in the step 16. Save changes and refresh your browser. You need to login again.
20. (Optional, but recommended If you want, to define on which vSphere clusters/ESXis and/or datastores a new Service Engines VMs should be deployed)
Service Engine VMs are set of VMs that hosts and load balancing traffic, when Workload Management and Kubernetes workload (guest) clusters are running. It will be automatically deployed during deployment of Workload Management in the part 2 of this article.
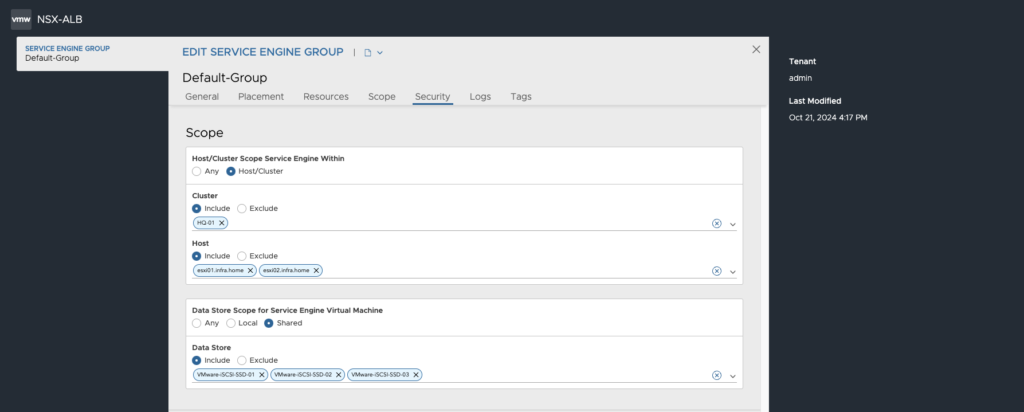
Go to the Infrastructure tab and select Service Engine Group under Cloud Resources. Click on pencil icon edit Default-Group.

21. In the Security tab you can find a Scope section. Here, you can include/exclude ESXi hosts, clusters and datastore that you want to use for future deployment of Service Engines.
If you make same changes, save it.
3. Preparing storage and Content Library
Categories & Tags – it’s needed to tag datastore(s) for future to place SupervisorControlPlaneVM nodes and other Kubernetes guest/workload nodes.
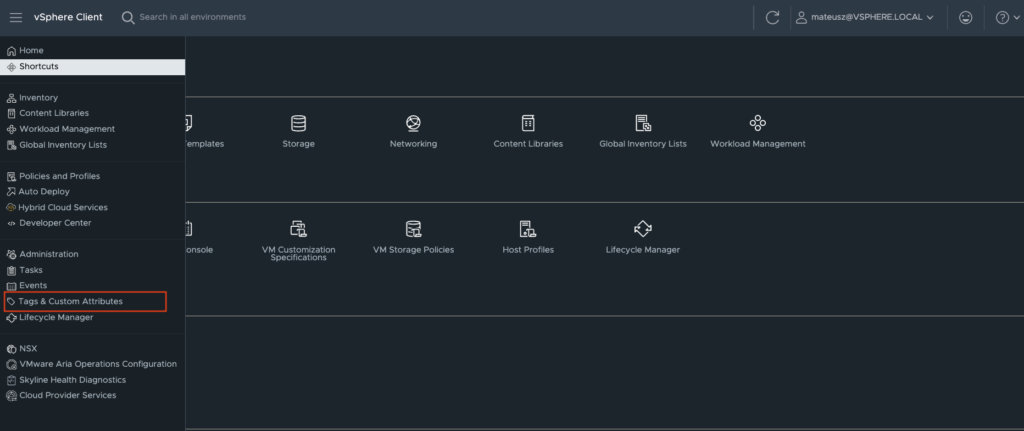
1. Log in to the vCenter and go to the Tags & Custom Attributes section.
2. Click New to create a new Category.
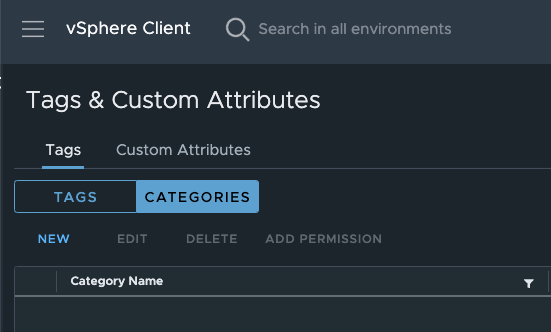
3. Type any name for Category and create it.

4. Go to the Tags and click New to create a new tag.
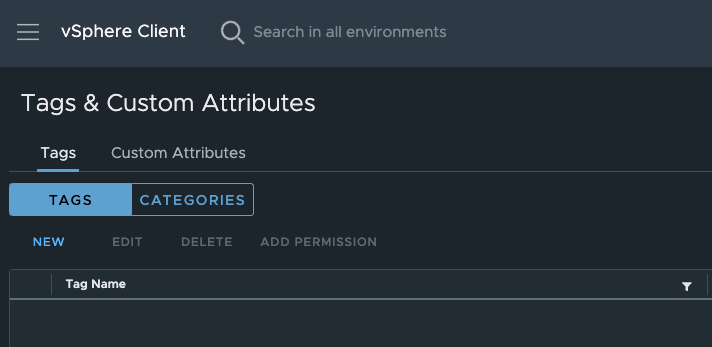
5. Type any name for Tag and create it.

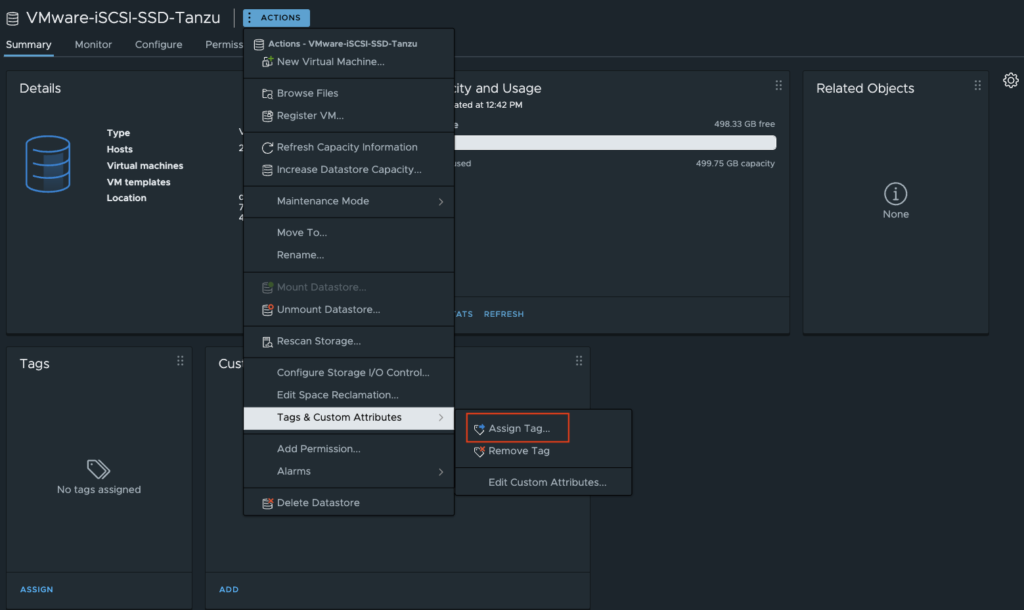
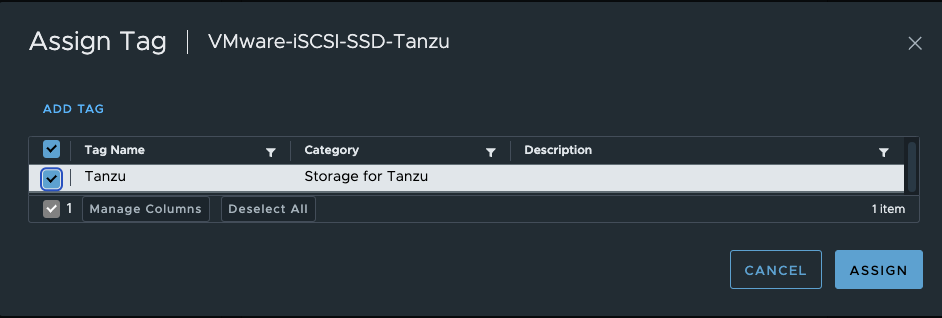
6. Assign this tag to a single or a few datastores. Remember, Storage Cluster is not supported.
Storage Policy – it’s needed to attach it as a storage class for the future vSphere namespaces with Kubernetes clusters.
1. Go to the Policies and Profiles section.

2. From the left side, choose VM Storage Polices and click Create to create a new one.

3. Type any name for you storage policy and go to the next step.
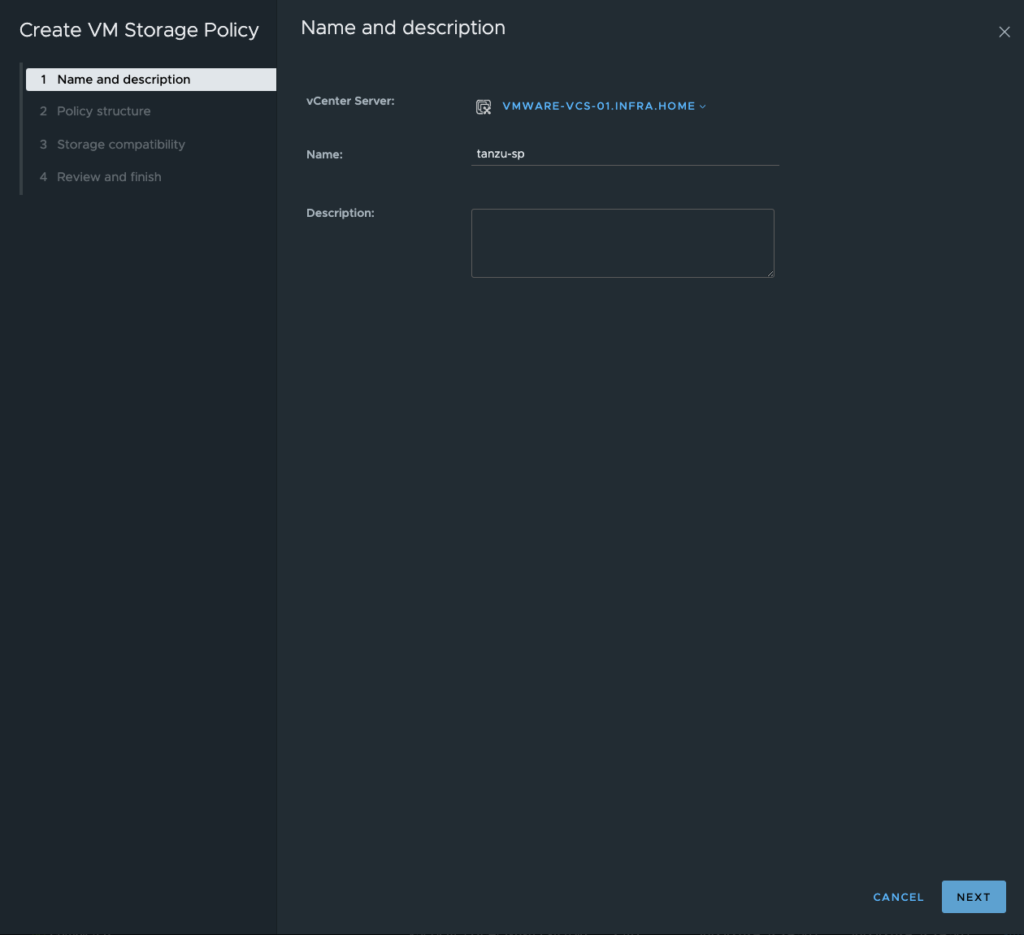
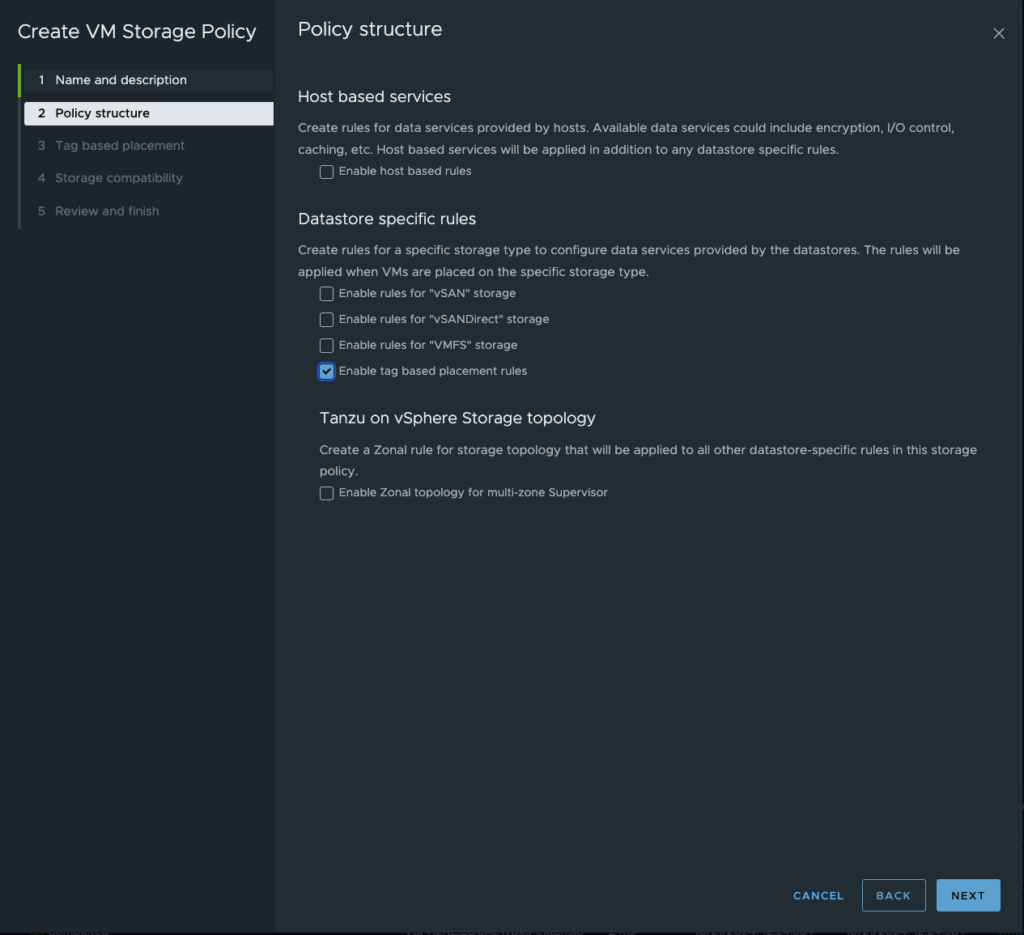
4. Tick Enable tag based placement rules and go the next window.
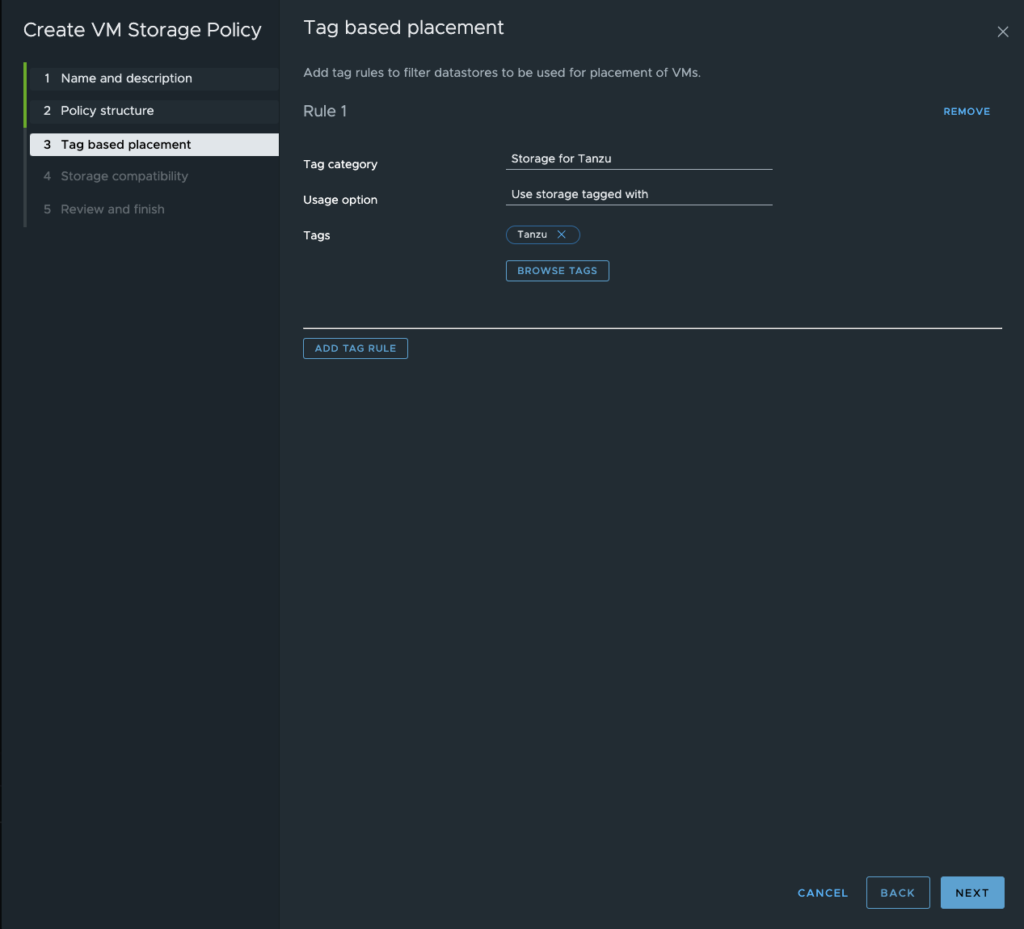
5. Choose Tag category and browse tag previously created in the last steps.
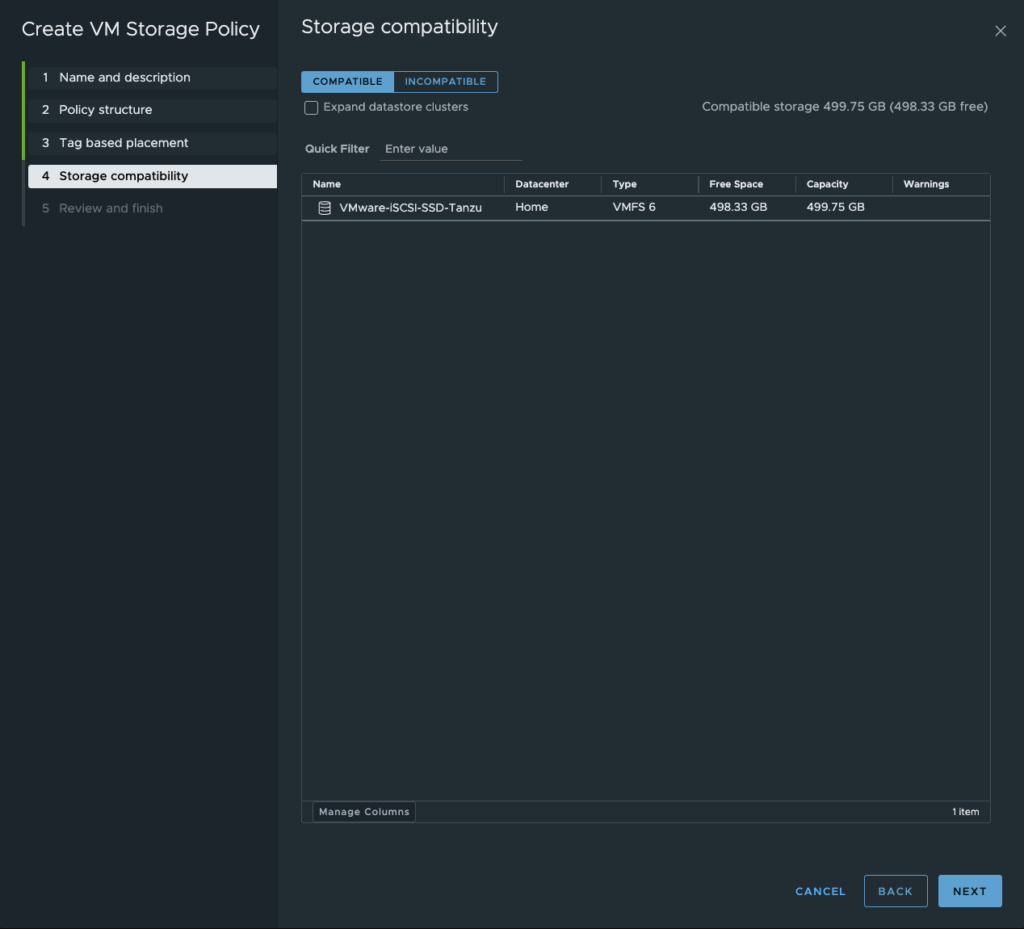
6. Review all datastore(s) with assigned tag.
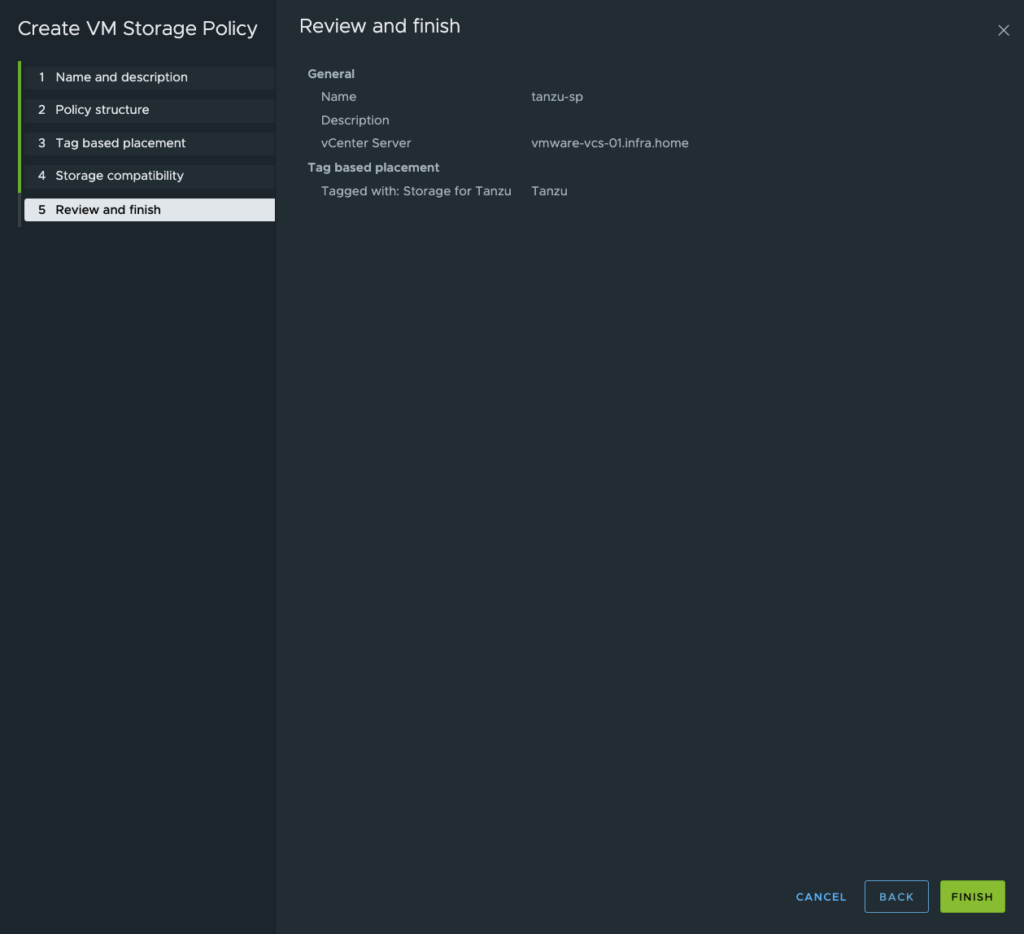
7. Review details for a new VM Storage Policy and finish configuration.
Content Library – it’s needed to store images for future Kubernetes nodes deployment.
1. Go to the Content Libraries.
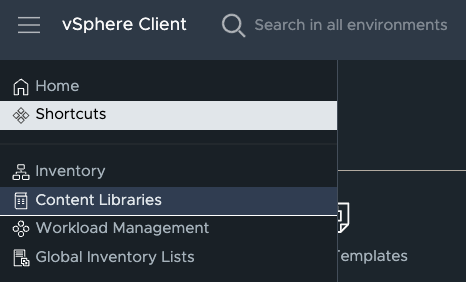
2. Create a new Content Library by hitting Create button.

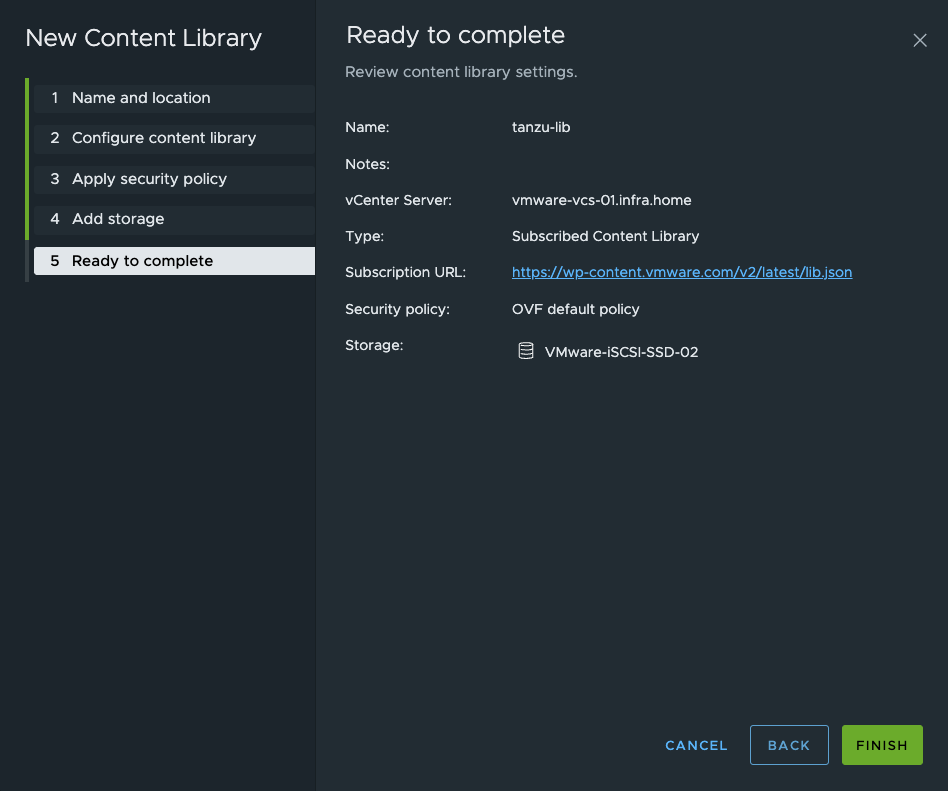
3. Type any name for your content library.
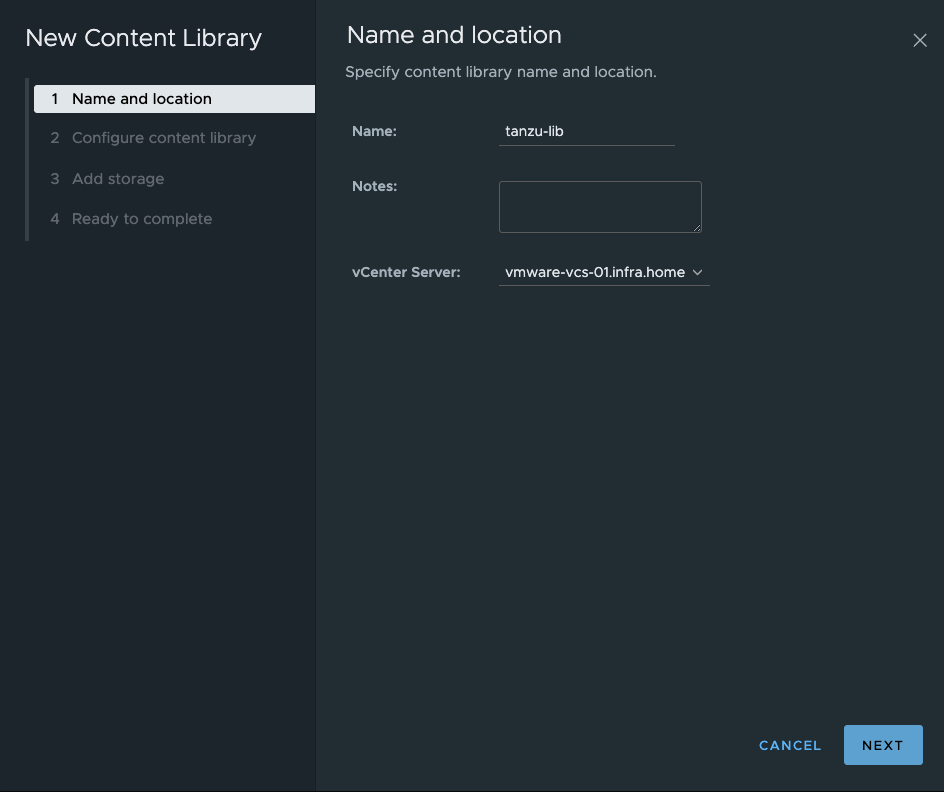
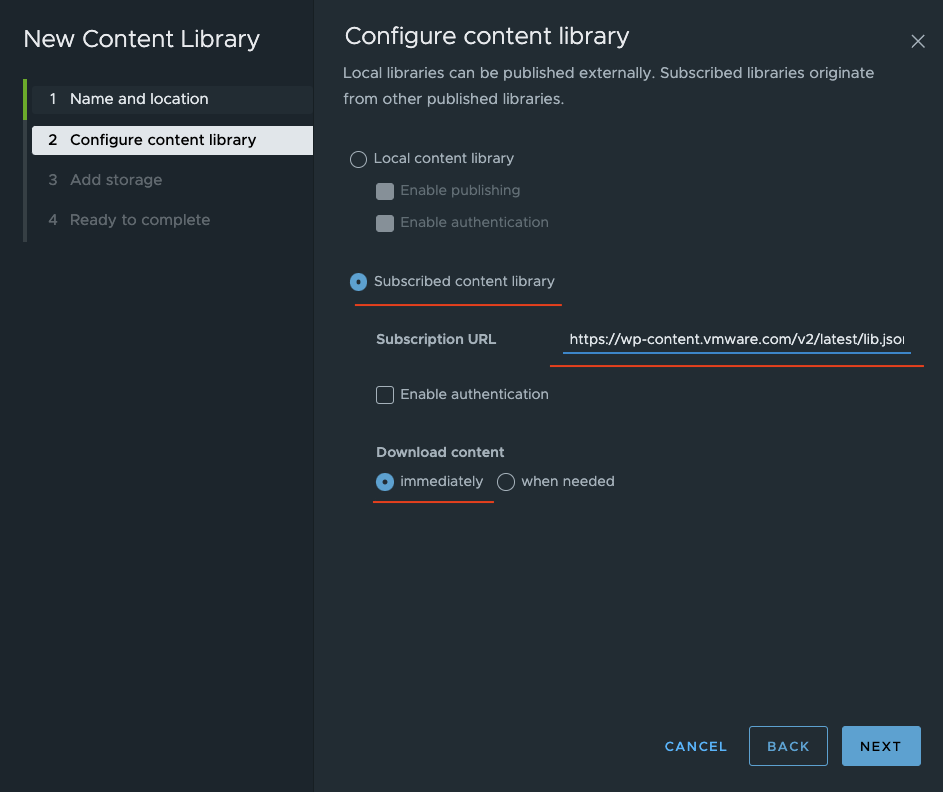
4. Choose Subscribed content library and check immediately as a Download content option.
Subscription URL is: https://wp-content.vmware.com/v2/latest/lib.json
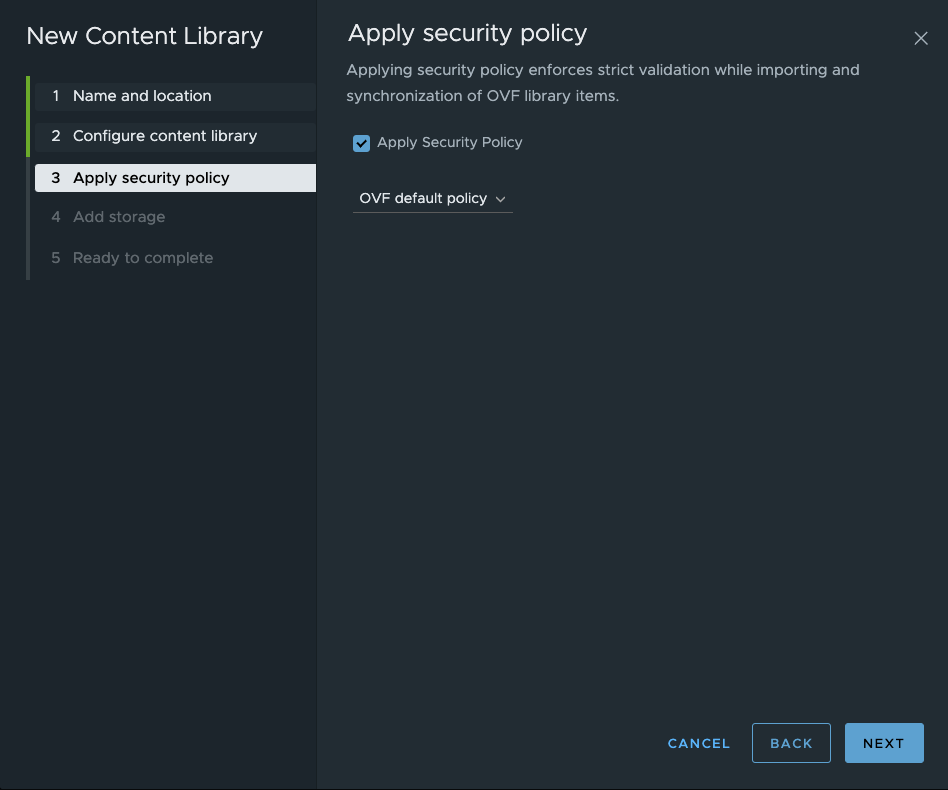
5. Tick Apply Security Policy with OVF default policy.
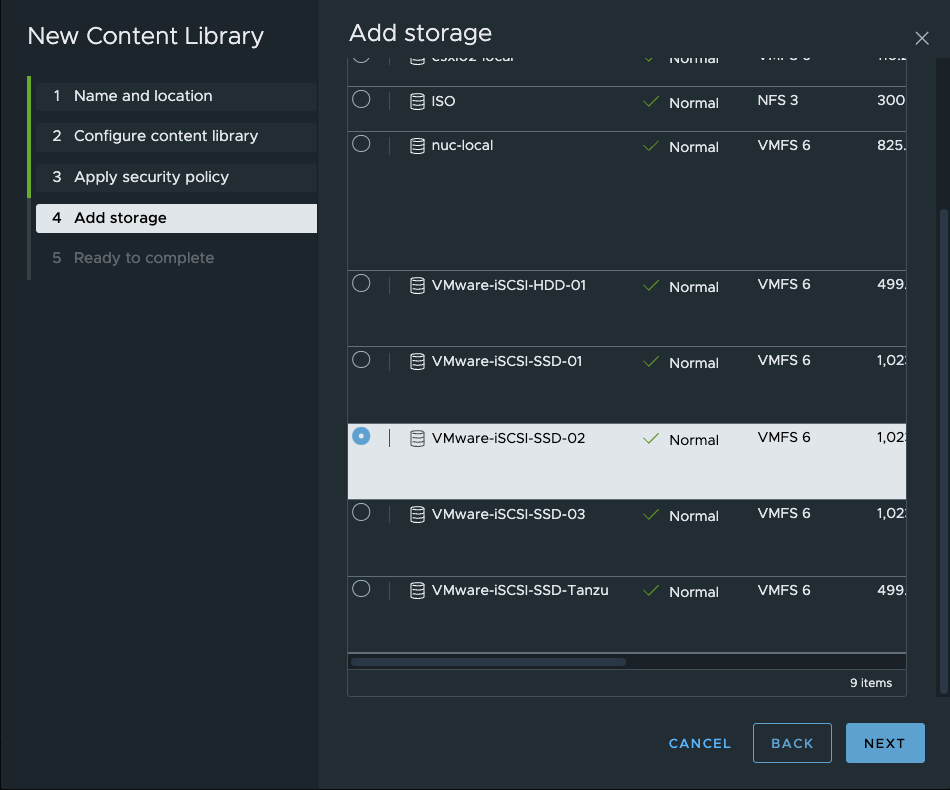
6. Choose storage for a content library.
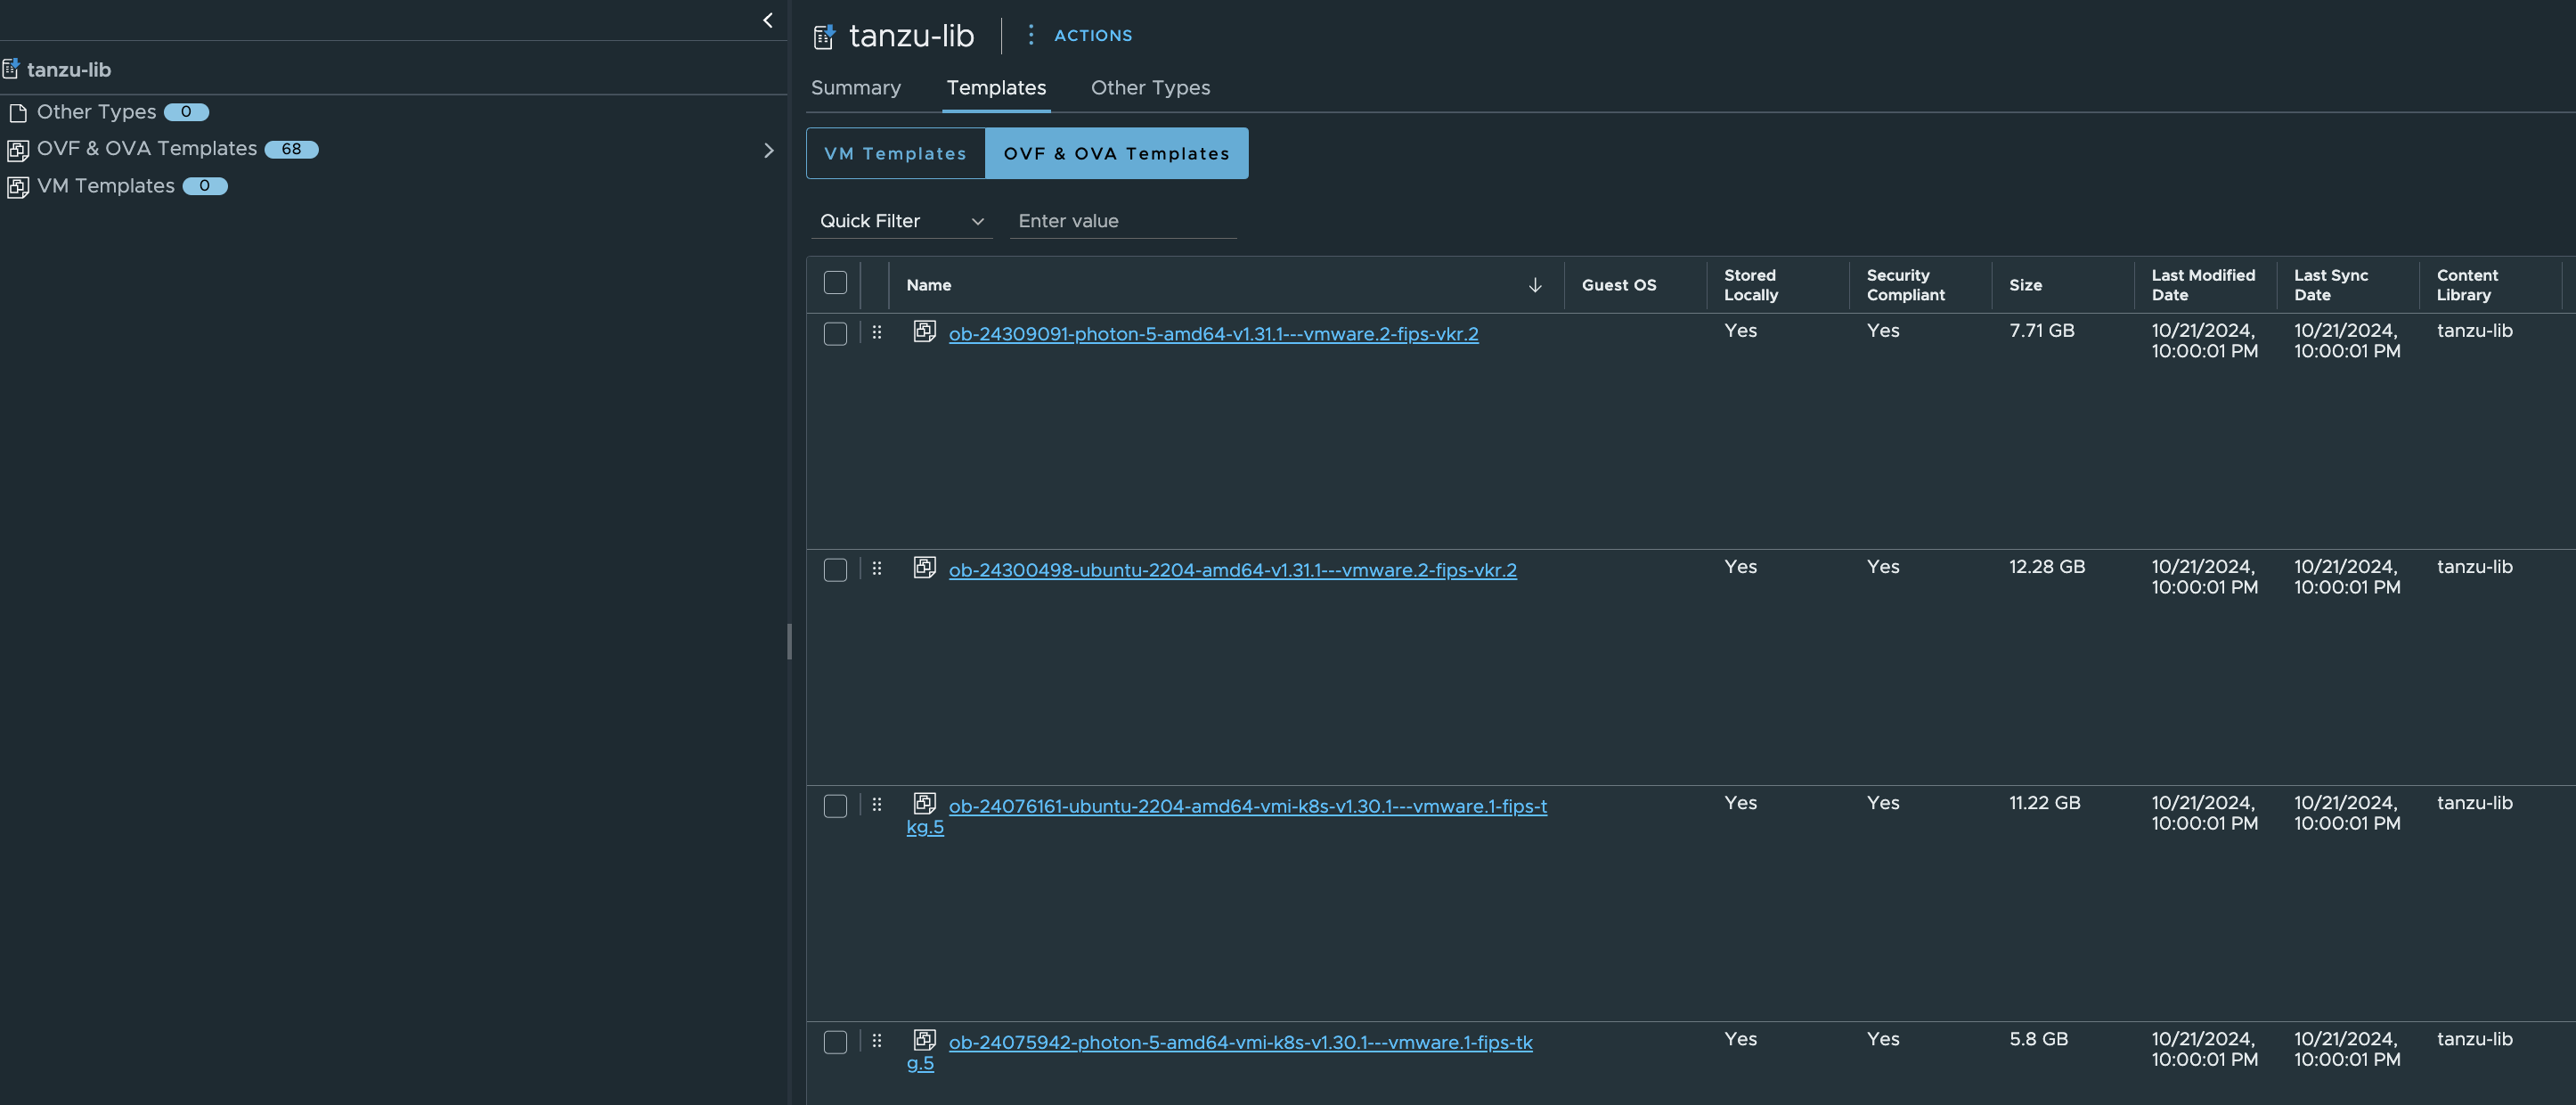
You will need about 400 GB of free space to download a store all images.
7. Review settings and click finish.
8. Downloading images may take some time.
Summary
After this steps we’re ready to go with deployment of the Workload Management, Clusters and some applications! Stay tuned for the part 2! 😉


