
Sometimes, there are situations that the standard ESXi image is not suitable for your environment. Good examples are some NUC servers with officially unsupported network cards. The solution is to use a USB to Ethernet adapter. But that’s not all. You must use the native VMware Fling USB Network driver.
Of course, you can easily install it from ESXi shell with esxcli command. Here, I can show you another way, how to combine existing standard ESXi image with an additional package. We will be using Image Builder as a “merge tool”.
1. Requirements:
- vSphere 8.0 – vCenter 8.0 & min. 1 ESXi 8.0 host;
Look at automated vSphere 8 lab deployment script by William Lam. It’s very useful! 🙂
https://williamlam.com/2022/10/automated-vsphere-vsan-8-lab-deployment-script.html - ESXi 8.0 offline bundle – https://customerconnect.vmware.com/en/downloads/details?downloadGroup=ESXI800&productId=1345&rPId=97706
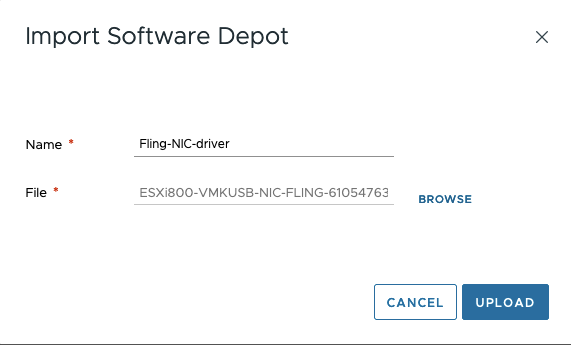
- VMware Fling USB Network Native Driver for ESXi – https://flings.vmware.com/usb-network-native-driver-for-esxi#summary
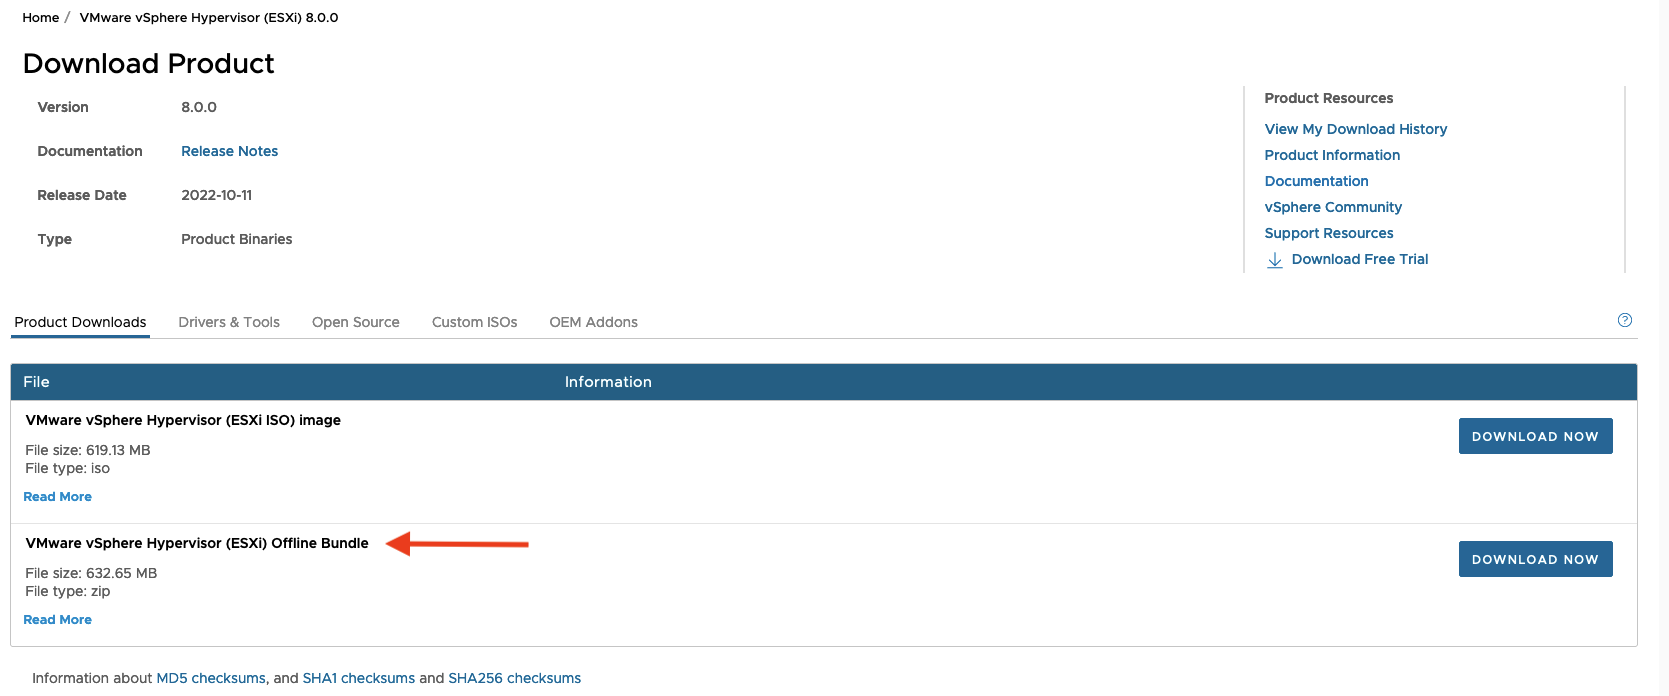
Remember, if you want to create a custom ESXi 8 image you need to use vSphere 8, not vSphere 7.
In my case, this is a nested vSphere 8 environment powered on vSphere 7 cluster.


2. vSphere Image Builder preparation
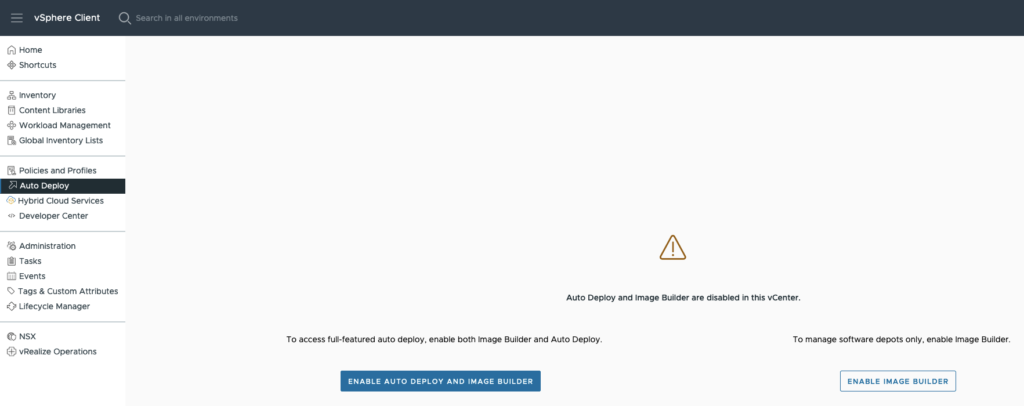
At first, we need to enable Image Builder in the vCenter. By default is disabled.
Image Builder is build in tool which, we can use to create an ESXi installation image with additional updates and/or patches.
1. Login to the vCenter 8. Press menu button on the left side and choose Auto Deploy.
If you don’t have enabled it, press Enable Image Builder and wait.
After a while, Image Builder is ready.
2. On the right side click Import. Type a Name, Browse downloaded VMware ESXi 8 zip file and upload it.


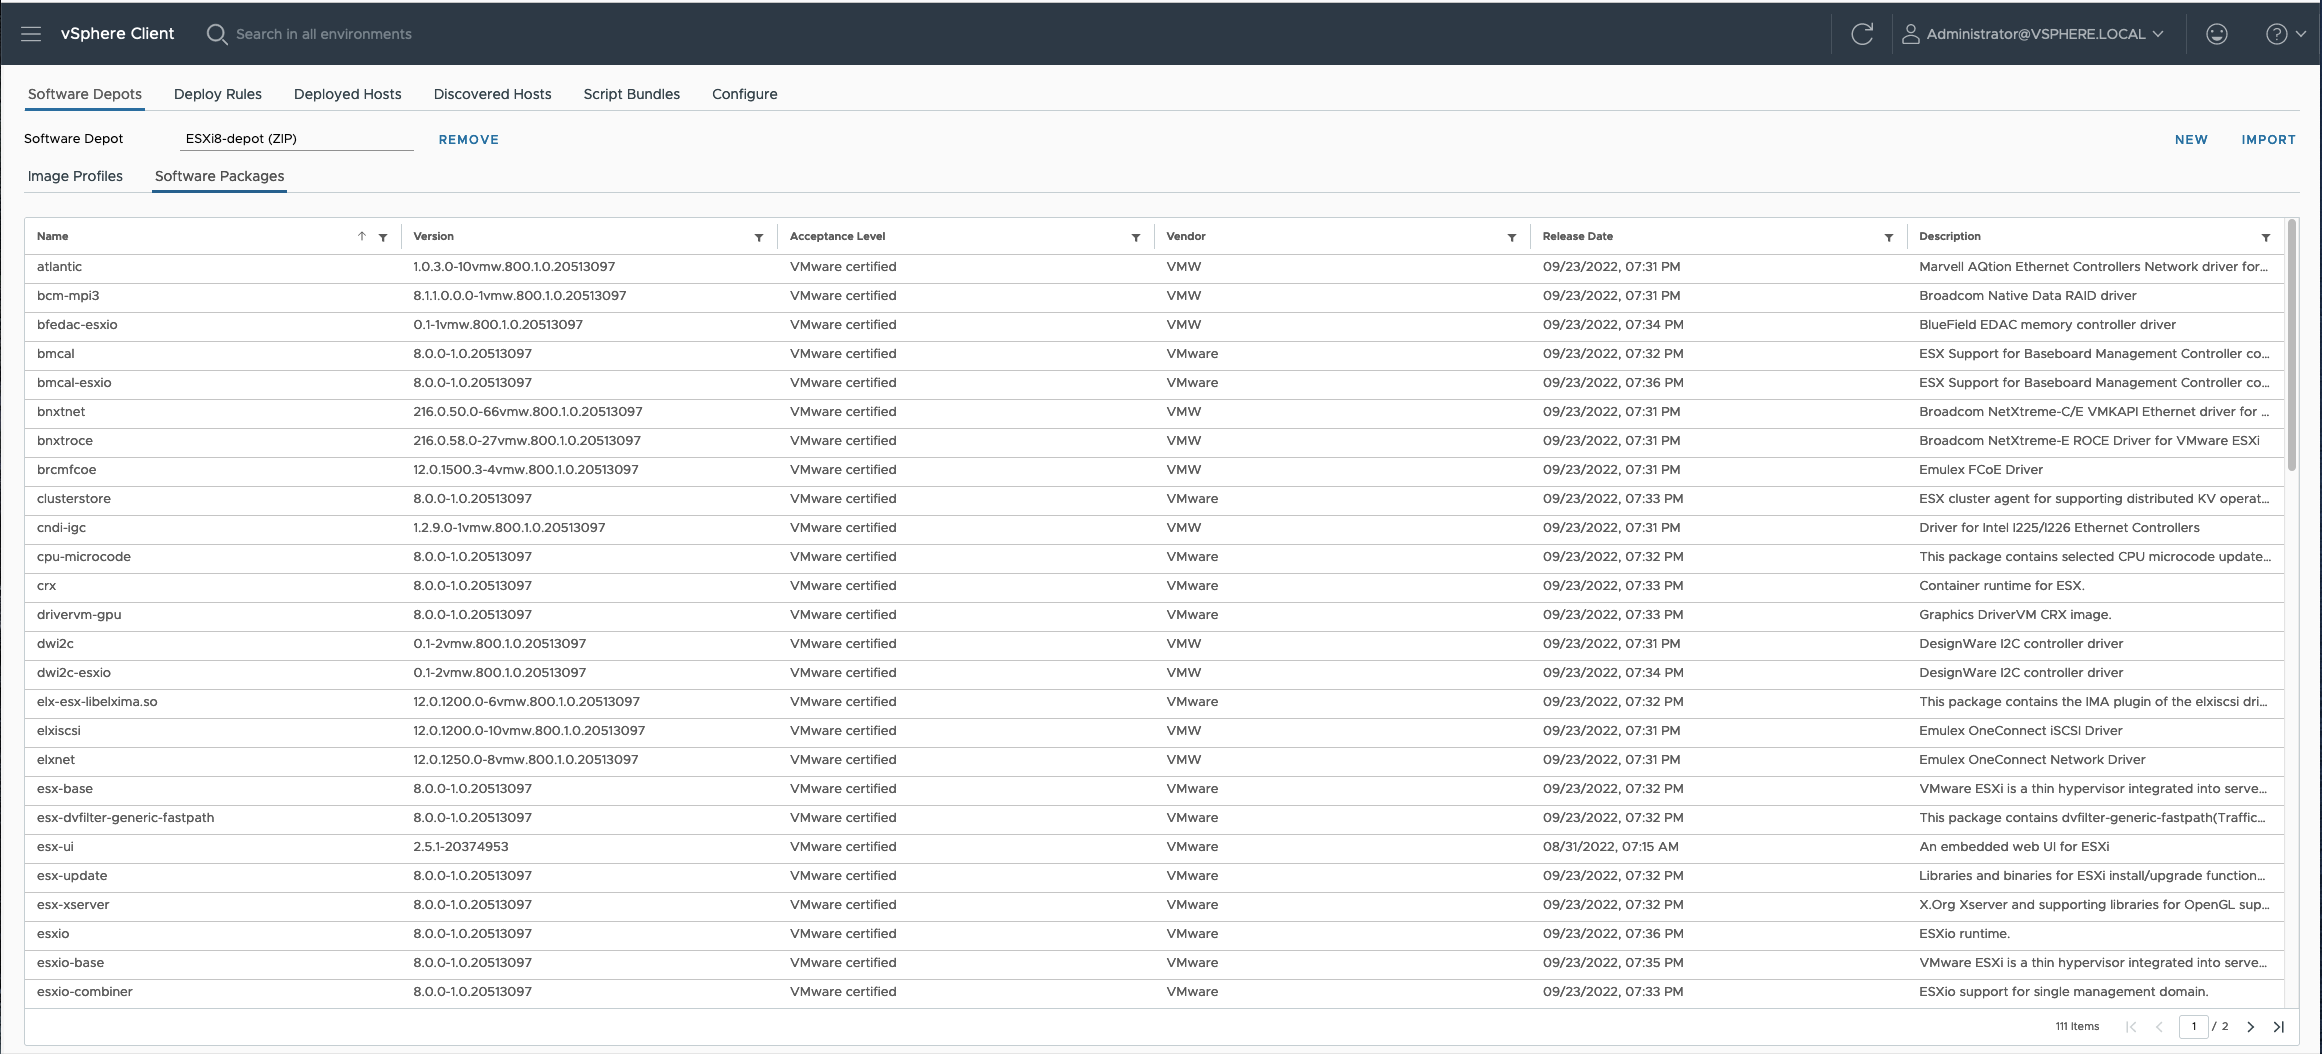
3. Now, there are visible 2 supported ESXi image profiles:
– ESXi-8.0.0-20513097-standard -> image with all patches
– ESXi-8.0.0-20513097-no-tools -> image with all patches without VMware Tools
If you choose Software Packages, there is a list with all included packages inside image. At this moment, there are 111 items (ESXi-8.0.0-20513097-standard). In the next session, we will use it this one.

4. Repeat step 2 and Import second file – USB Network Native Driver for ESXi
5. There are 2 ZIP files uploaded as a Software Depot:
– VMware vSphere Hypervisor (ESXi) Offline Bundle -> ESXi-8 depot (ZIP)
– VMware Fling USB Network Native Driver for ESXi -> Fling-NIC-driver (ZIP)
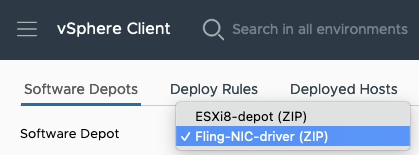
6. Next step is to create new Software Depot. Click NEW on to right side (near the Import button).
There are 2 options – Online depot or Custom Depot.
– Online depot means, you want to connect to the VMware online repository and see all images. After that, download it. If you want to use it, type any Name and (: https://hostupdate.vmware.com/software/VUM/PRODUCTION/main/vmw-depot-index.xml
– Custom depot – simply, you want to create local empty depot which are a destination, to place newly created custom image(s).
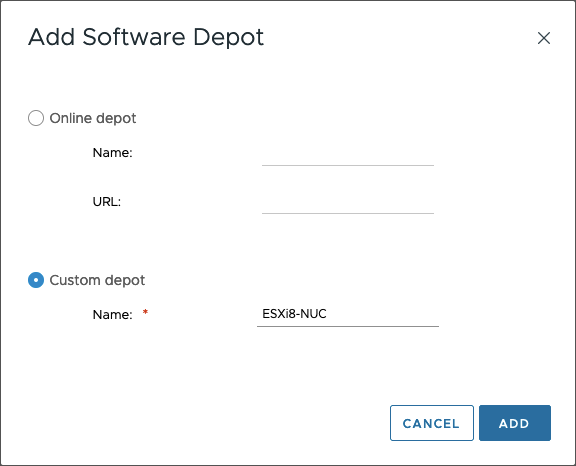
7. Now there are visible 3 objects (Software Depots): 2 ZIP files and 1 Custom depot.
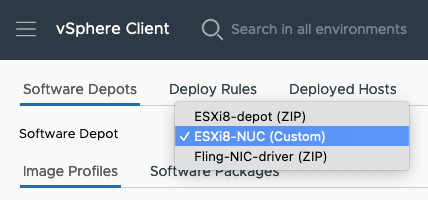
3. Creating a new custom ISO image
In this step, we’re on the straight way to create a dedicated customized ESXi 8 ISO.
1. Change Software Depot to ESXi8-Depot (ZIP), choose ESXi-8.0.0-2051309-standard image and CLONE option.

2. On the next screen type a Name of the image and be sure, to choose dedicated Software depot (ESXi8-NUC). Click Next button.

3. In the 2nd step there are visible included software packages. On the second page there is unticked (by default) vmkusb-nic-fling from Fling-NIC-driver software depot. To add it to the new image, tick it like in the screenshot.

4. Look at summary and Finish procedure.
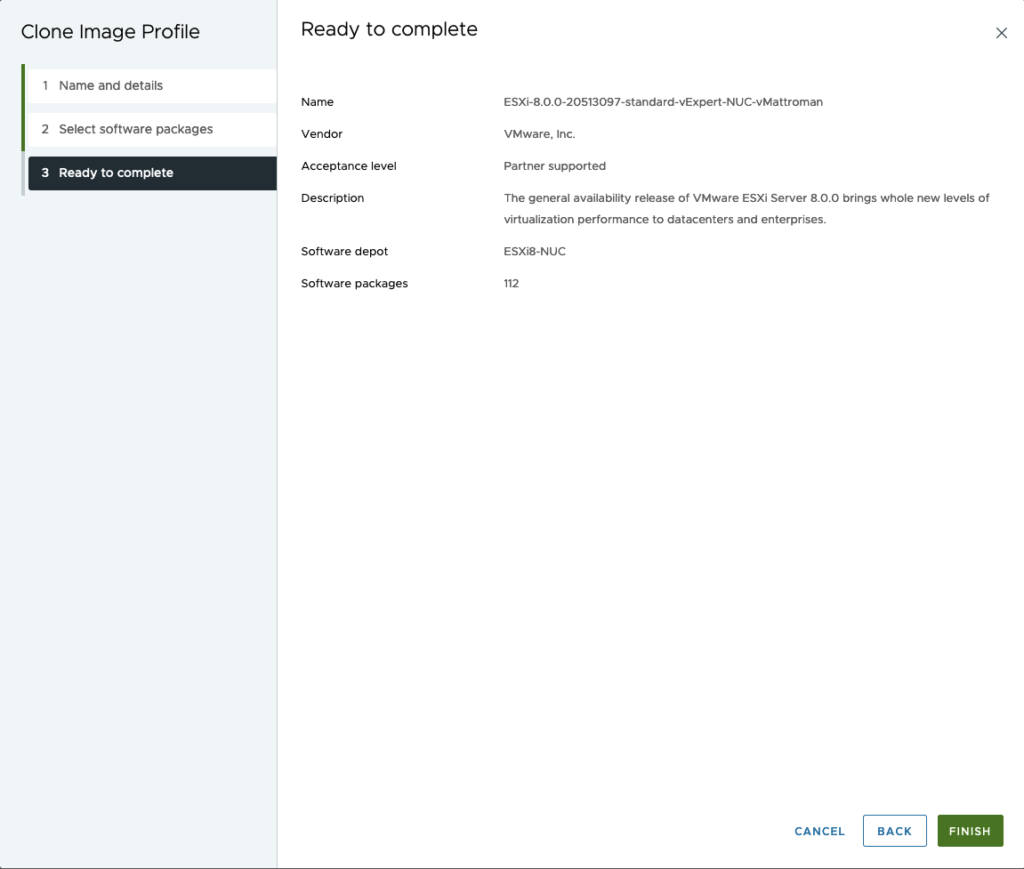
5. Choose ESXi8-NUC software depot and look at progress. Wait until you see number of the included Software Packages (112). After that, click Export button. Choose ISO option and click OK. After a while, Export button change to Download.
Now, download ISO and burn with Rufus or similar application.

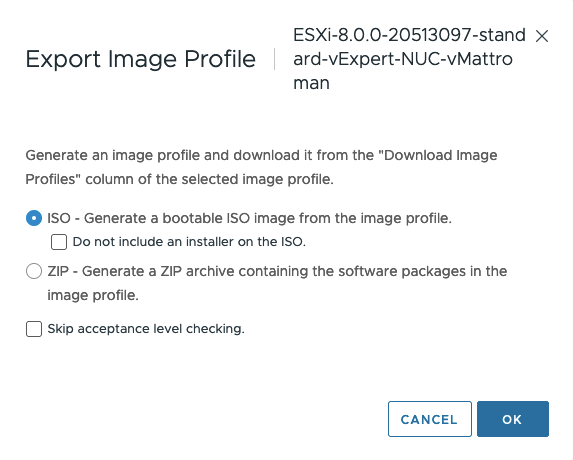


6. When you log in to the ESXi, you should see custom name of the Image profile section.

Summary
Image builder is a powerful tool to create and customize ESXi images. It’s very helpful, if you need to add/delete packages to the base ISO. If you are looking for graphical alternative to PowerShell with PowerCLI, this is a good choice.
In the next post, I will show for what purpose we prepare this custom image. Stay tuned! 🙂























One Comment