Backing up the VMware vCenter Server Appliance (VCSA) is crucial for maintaining the integrity and availability of your virtual infrastructure. The recommended and most effective method for backing up the VCSA is to utilize its built-in backup and restore functionality.
In this short post, I will show you how to configure VMware VCSA backup on the NFS storage.
Requirements:
- Prepared NFS storage to store VMware VCSA backups
1. Configuring Backup Schedule (task)
1. Log in to the VMware VCSA (https://IP_or_FQND_of_vCenter_Server:5480) using root account.

2. Go the the Backup section. In my case, I have some existing (manual) backups. There is no backup job scheduled (not configured). Click on Configure button.

3. Create a new Backup Schedule and provide necessary data:
Backup location – depending on your capabilities you can use FTP, FTPS, HTTP, HTTPS, SFTP, NFS, or SMB protocol to store VCSA backups. Here, I’m going to use my earlier prepared NFS storage. Type a path like: nfs://path_to_the_storage_location
Backup server credentials – provide user name and password to access storage location
Schedule – choose when do you want the backup to be performed
Encrypt backup – optionally, provide password if you want to encrypt your backups
Number of backups to retain – type a number of backup that need to retain
Data – if you have running Supervisors Control Plane (aka Tanzu infrastructure) tick this option. Tick Stats, Events and Tasks to include all necessary data in the backup task.
If everything is OK, click Create button.

4. Backup Schedule (task) was created. Status was changed to Activated.
If we leave as is, backup will run on the date configured in the last step. If you want to test it now, click Backup Now option.

2. Testing backup
1. Click on the Backup Now option.
2. To use previously created backup schedule, check the proper option. Now, backup location, user name and Data will be automatically filled. Type a password. If everything is correct, click Start button.

3. Backup task in progress. Depending on the size of the vCenter, amount of data and infrastructure performance this may take varying amounts of time.

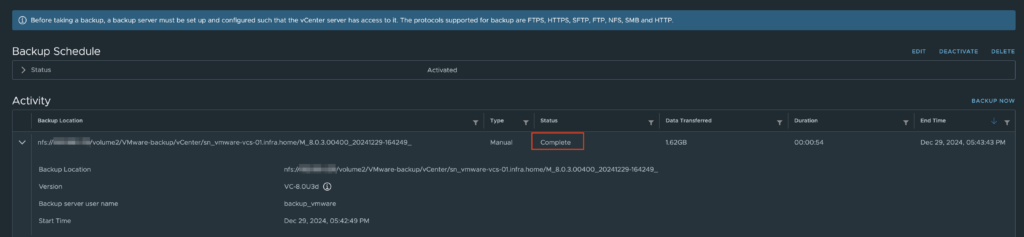
4. Backup completed!

3. Checking the latest backup
1. From the vCenter view, we can see confirmation about last completed File-Based Backup.

2. Also, on the NFS storage (here is Synology NAS) there was created separate folder to store VCSA backup data.

Summary
By following this instruction, you can ensure that your VMware vCenter Server Appliance is properly backed up and can be restored efficiently in case of data loss or corruption.