Red Hat OpenShift Container Platform is a container Kubernetes platform. With OpenShift, organizations can automate application deployment and management.
RH Openshift can be run in a private cloud infrastructure directly on the bare metal servers and on the virtualization platforms like VMware, Nutanix or Openstack. Also, it’s possible to install OCP in the public clouds like AWS, Azure, GCP or Alibaba. There are many more possibilities, platforms and ways to consume this tool.
Moreover, Red Hat OpenShift cluster can be installed with Assisted Installer which is like automation tool running in cloud. If you don’t want to use it, it’s possible to generate offline dedicated image and omit Assisted Installer.
In this article, I will show how to Install Red Hat OpenShift as Single-Node with Assisted Installer on the bare metal Dell server. Remember, Single-Node cluster is not a perfect idea for the production environment. Mainly due to the lack of HA as in standard Kubernetes/OpenShift clusters. But, it’s a great way to learn new concepts and get to know OCP better.
1. Prerequisites
1.1: Prepare dedicated subnet. In my case, I will use a new VLAN 13: 10.13.1.0/27
1.2: Add to DNS these three entries like below:
- Kubernetes API – api.<cluster_name>.<base_domain>
A/AAAA or CNAME record. This record must be resolvable by both clients external to the cluster and within the cluster. - Internal API – api-int.<cluster_name>.<base_domain>
A/AAAA or CNAME record when creating the ISO manually.
This record must be resolvable by nodes within the cluster.
// I think in this case, Internal API is not an necessary. Because, we’re not creating ISO manually. The ISO will be generated by Assisted Installer. - Ingress route – *.apps.<cluster_name>.<base_domain>
Wildcard DNS A/AAAA or CNAME record that targets the node. This record must be resolvable by both clients external to the cluster and within the cluster.

api.rho-sno.infra.home. IN      A       10.13.1.2
api-int.rho-sno.infra.home.     IN      A       10.13.1.2
*.apps.rho-sno.infra.home.      IN      A       10.13.1.2
1.3: Make sure you have access and proper privileges to login iDrac/BMC in the bare metal server. For this tutorial, I want to use have Dell XC430.
1.4: Make sure, the bare metal server has minimum resource requirements; 8 vCPUs, 16 GB of RAM and 120 GB of storage.
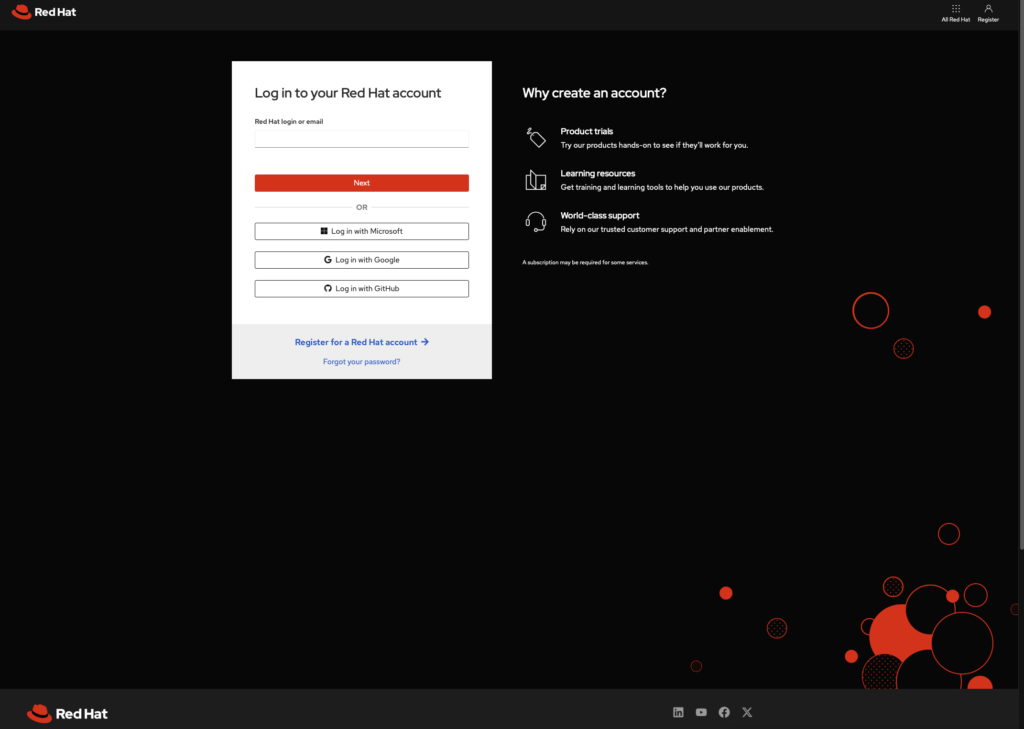
1.5: If you don’t have, create a new Red Hat account: https://console.redhat.com
2. Installation with Assisted Installer
Let’s start! At the beginning, we need to generate discovery ISO to connect bare metal server with Red Hat Console. Then, you can start installing OpenShift.
1. Go to the https://console.redhat.com and log in.
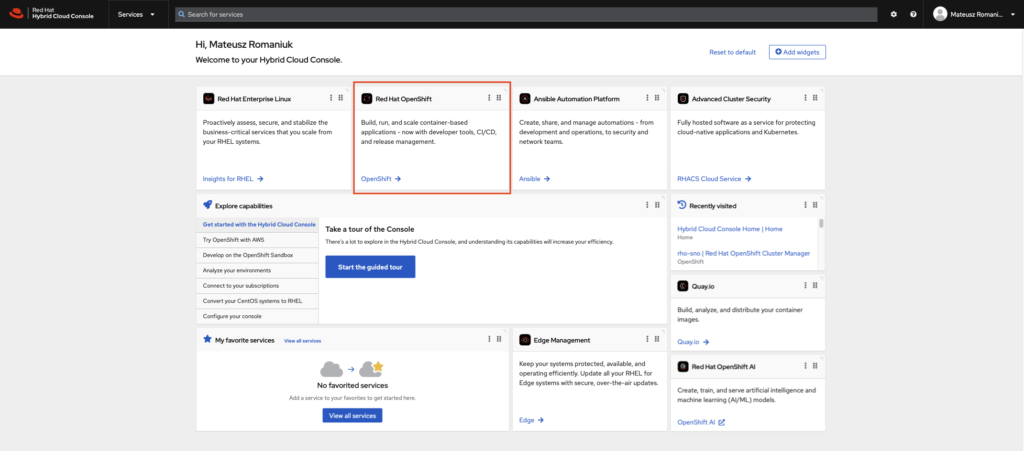
2. Choose Red Hat OpenShift tile.
3. Go to the Cluster List.
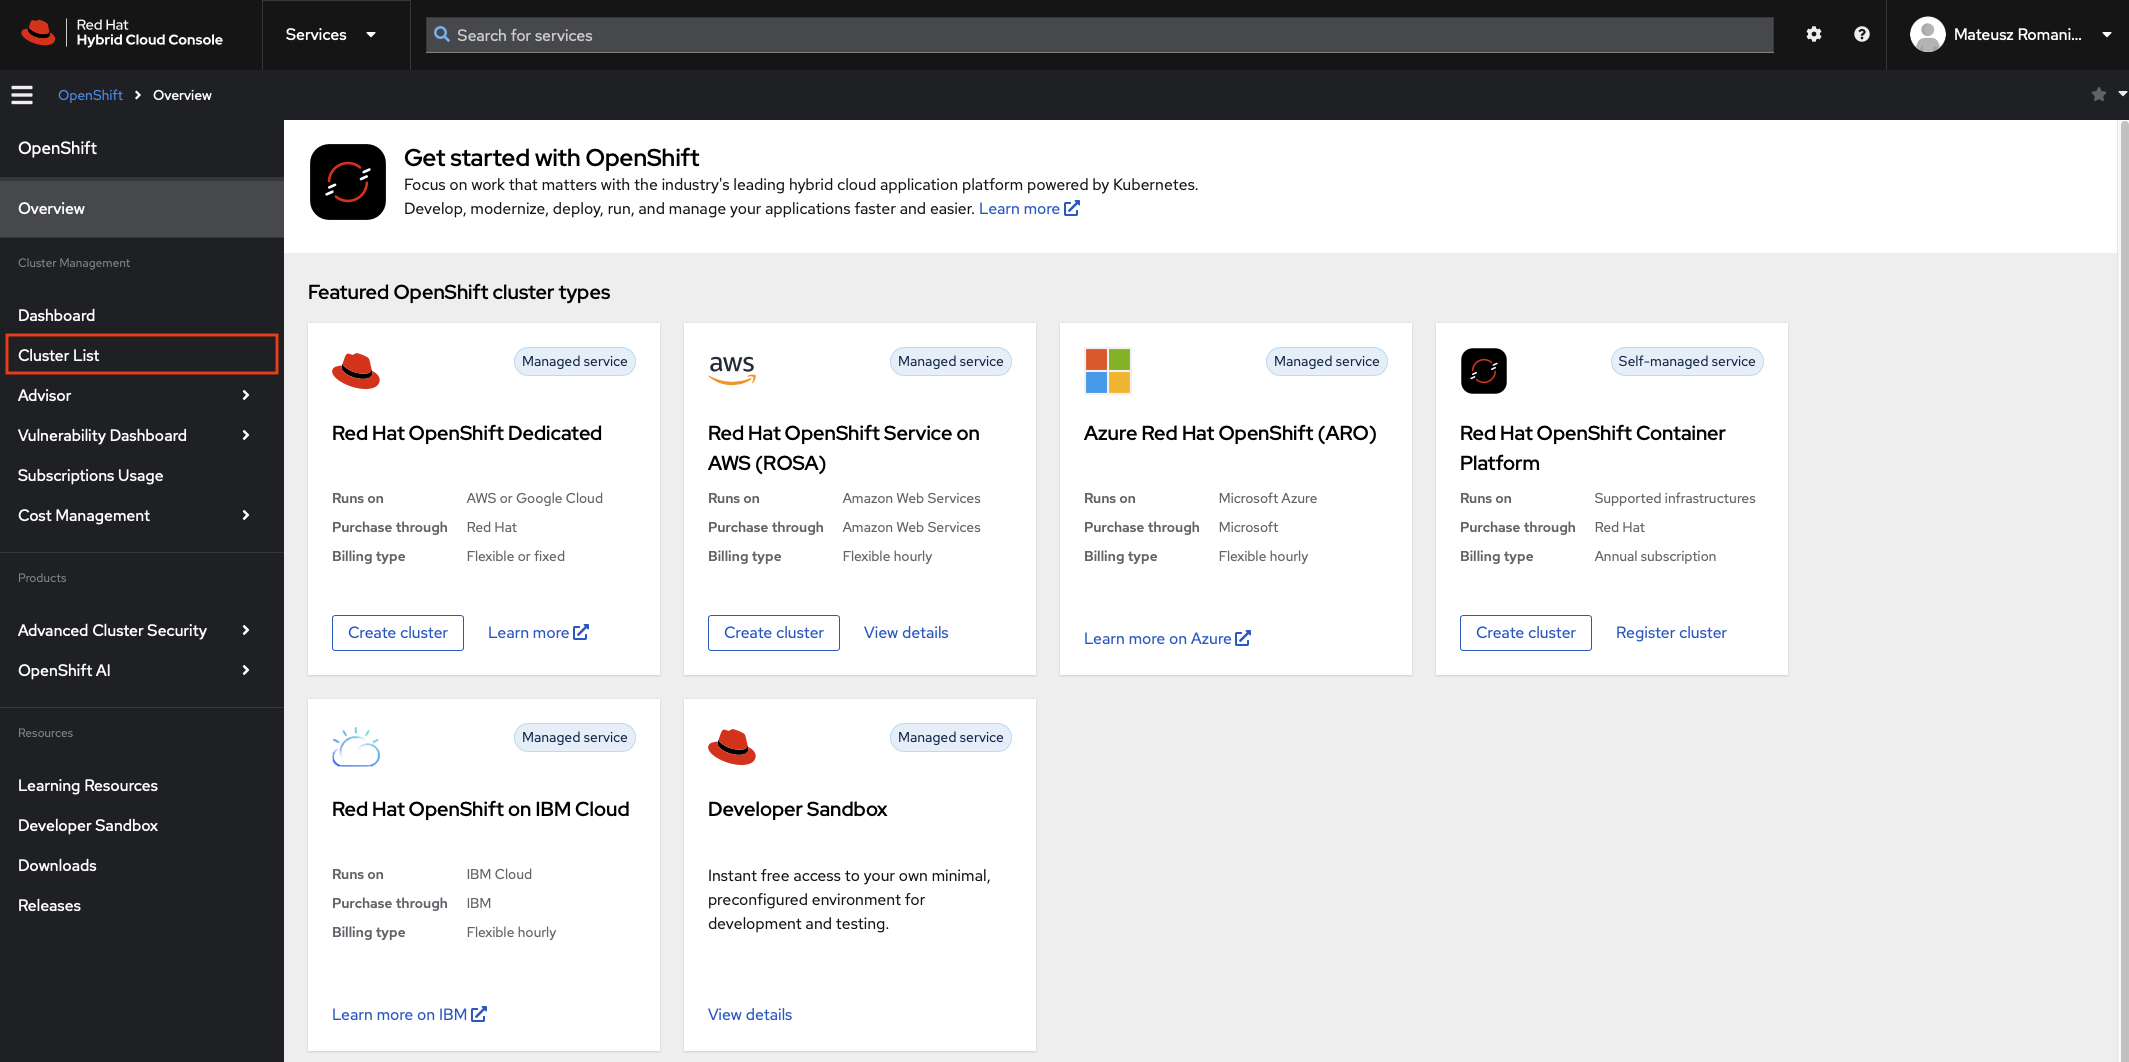
4. Choose Assisted installer cluster.

5. Click blue button: Create New Cluster
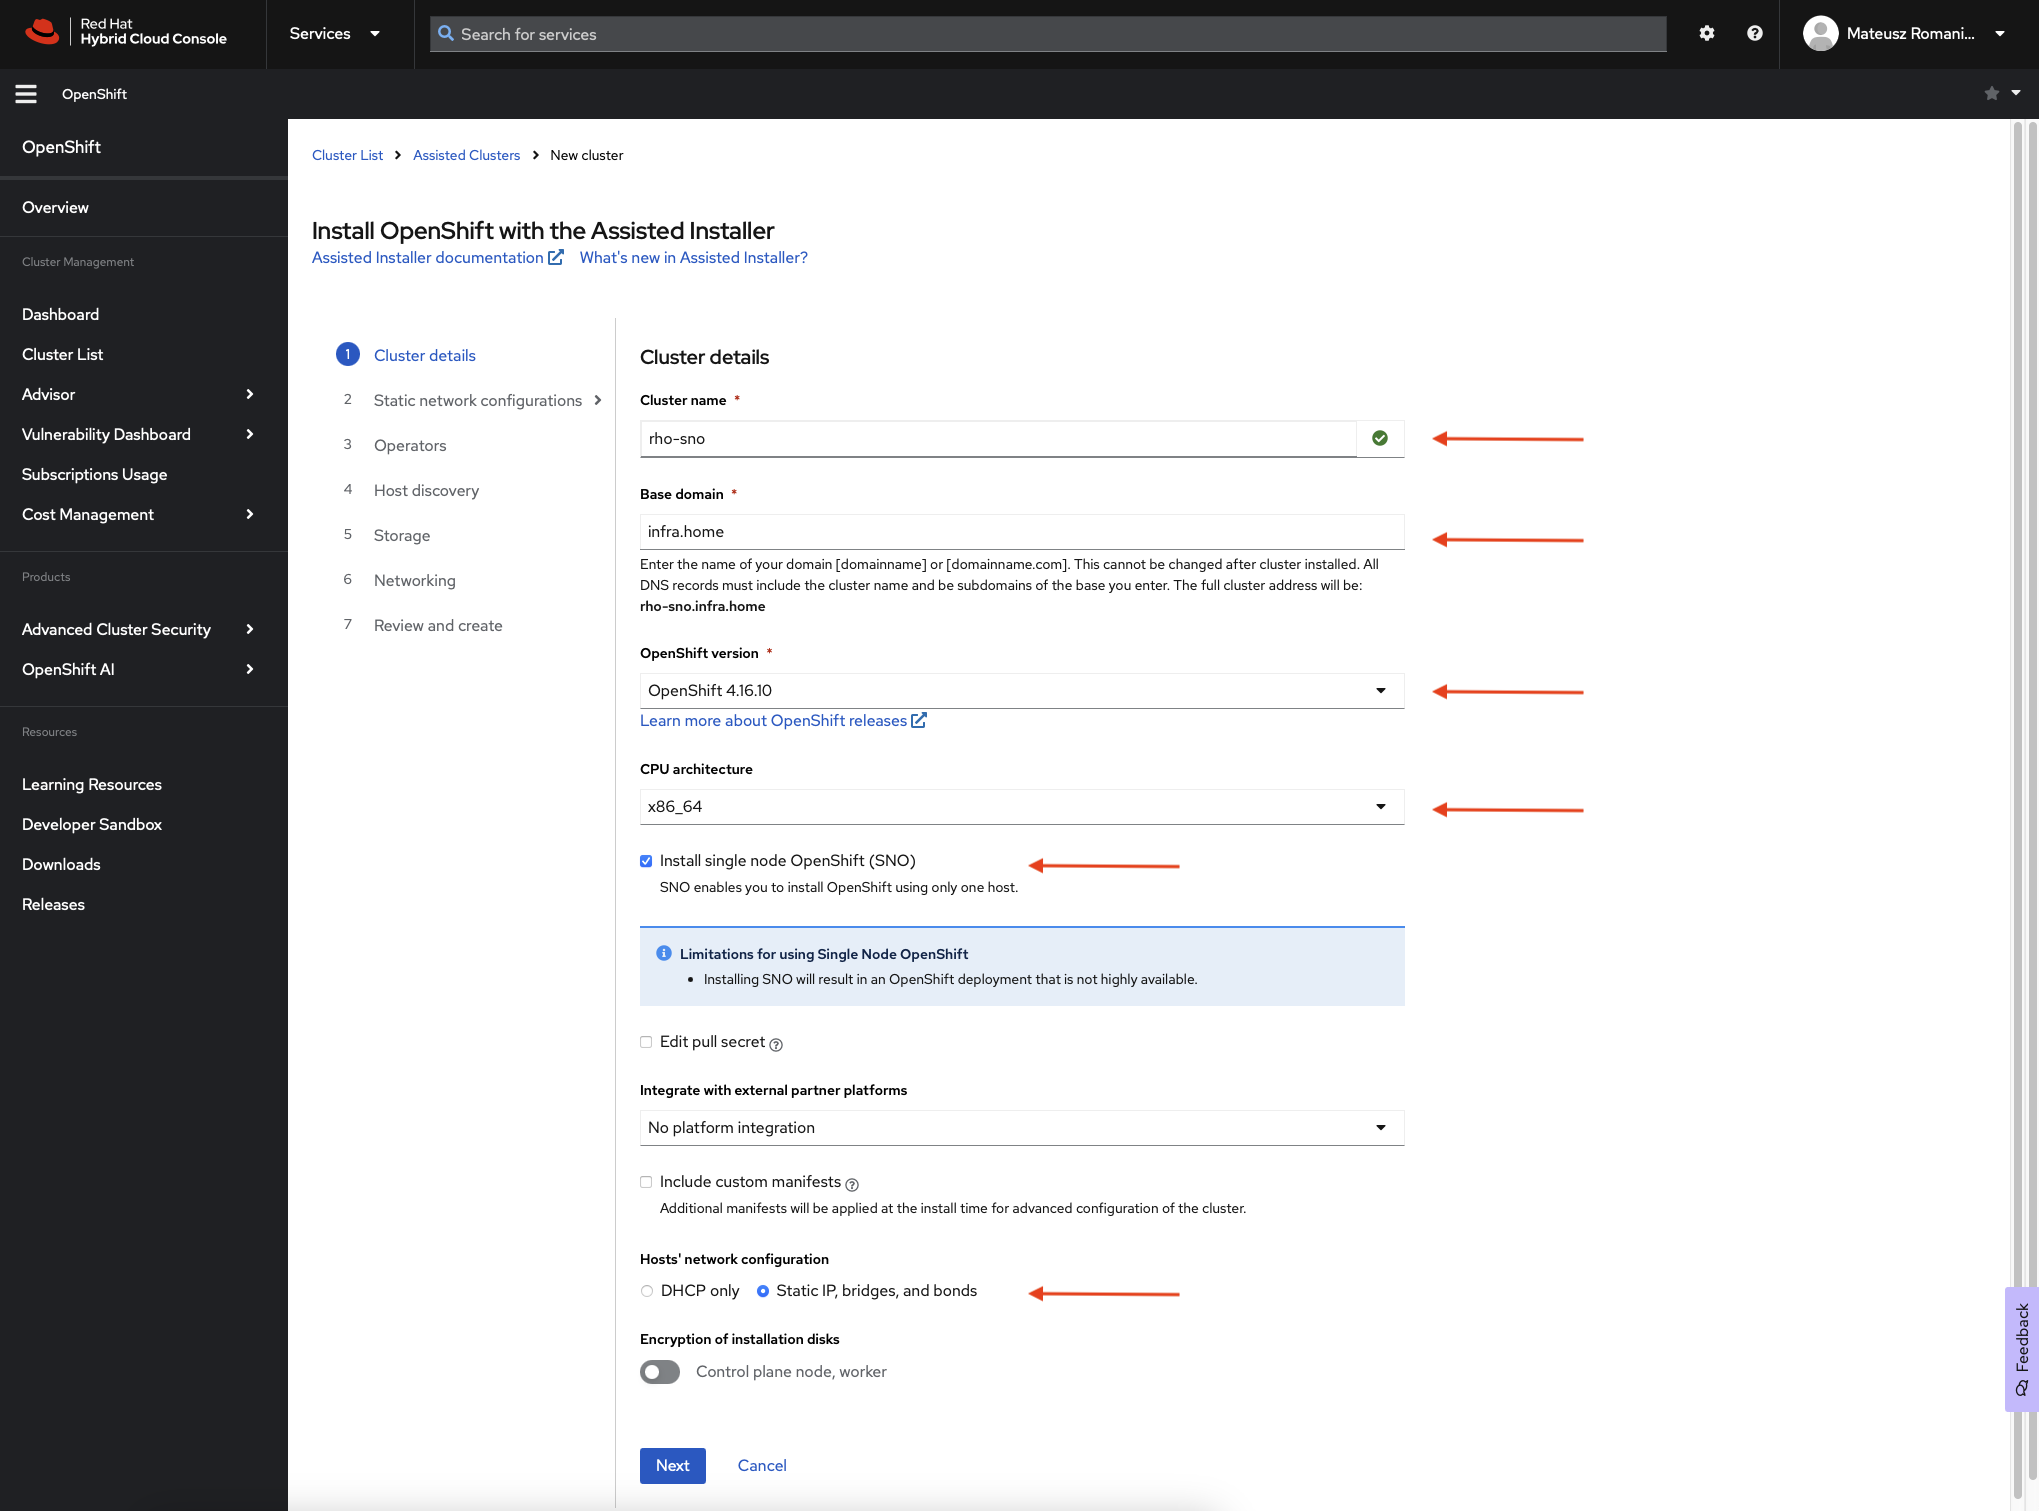
6. Here is an OpenShfit with the Assisted Installer wizard:
– Cluster name: type a cluster name, the same like in your DNS.
– Base domain: type a domain name, the same like in your DNS.
– OpenShift version: choose one of the available versions In this post, I will go with 4.16.10
– CPU architecture: choose CPU architecture from available options: x86_64, arm64, ppc64le, and s390x. My bare metal server is a Dell with Intel CPU, so x86_64 is my choice.
– Install single node OpenShift (SNO) – check this option.
– Hosts network configuration – choose Static IP, bridges and bonds
Go to the Next page.
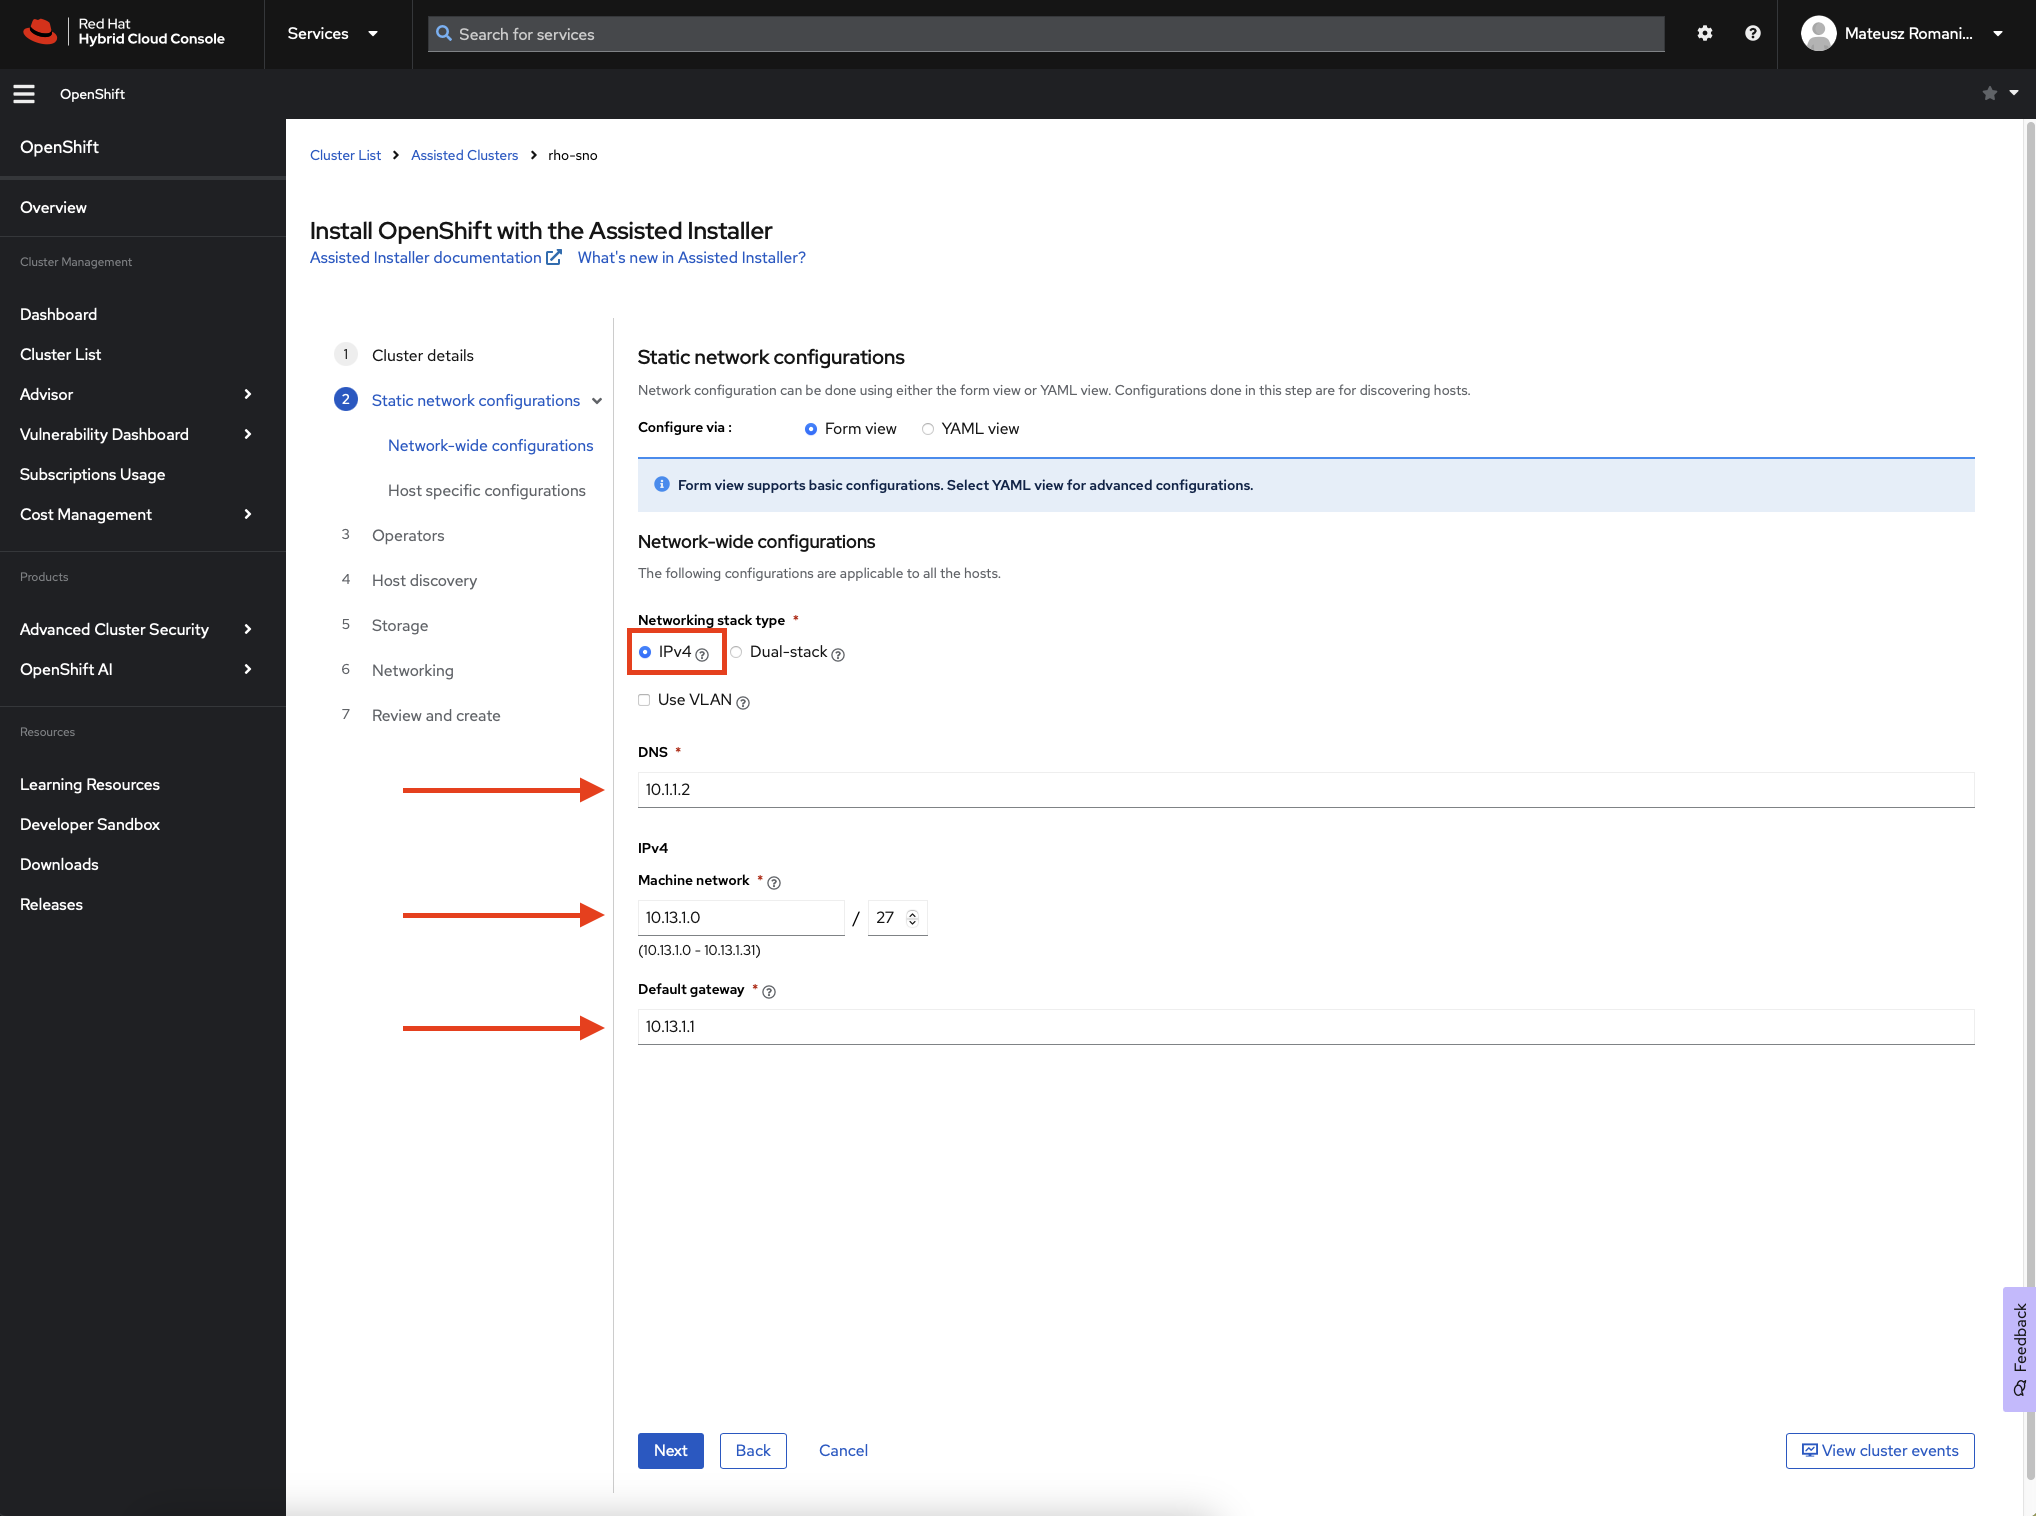
7. Configure Static network configurations:
– Networking stack type: IPv4.
– DNS: Type DNS server.
– Machine network: Type subnet of your machine network.
– Default gateway: Type default gateway of your machine network.
Go to the Next page.
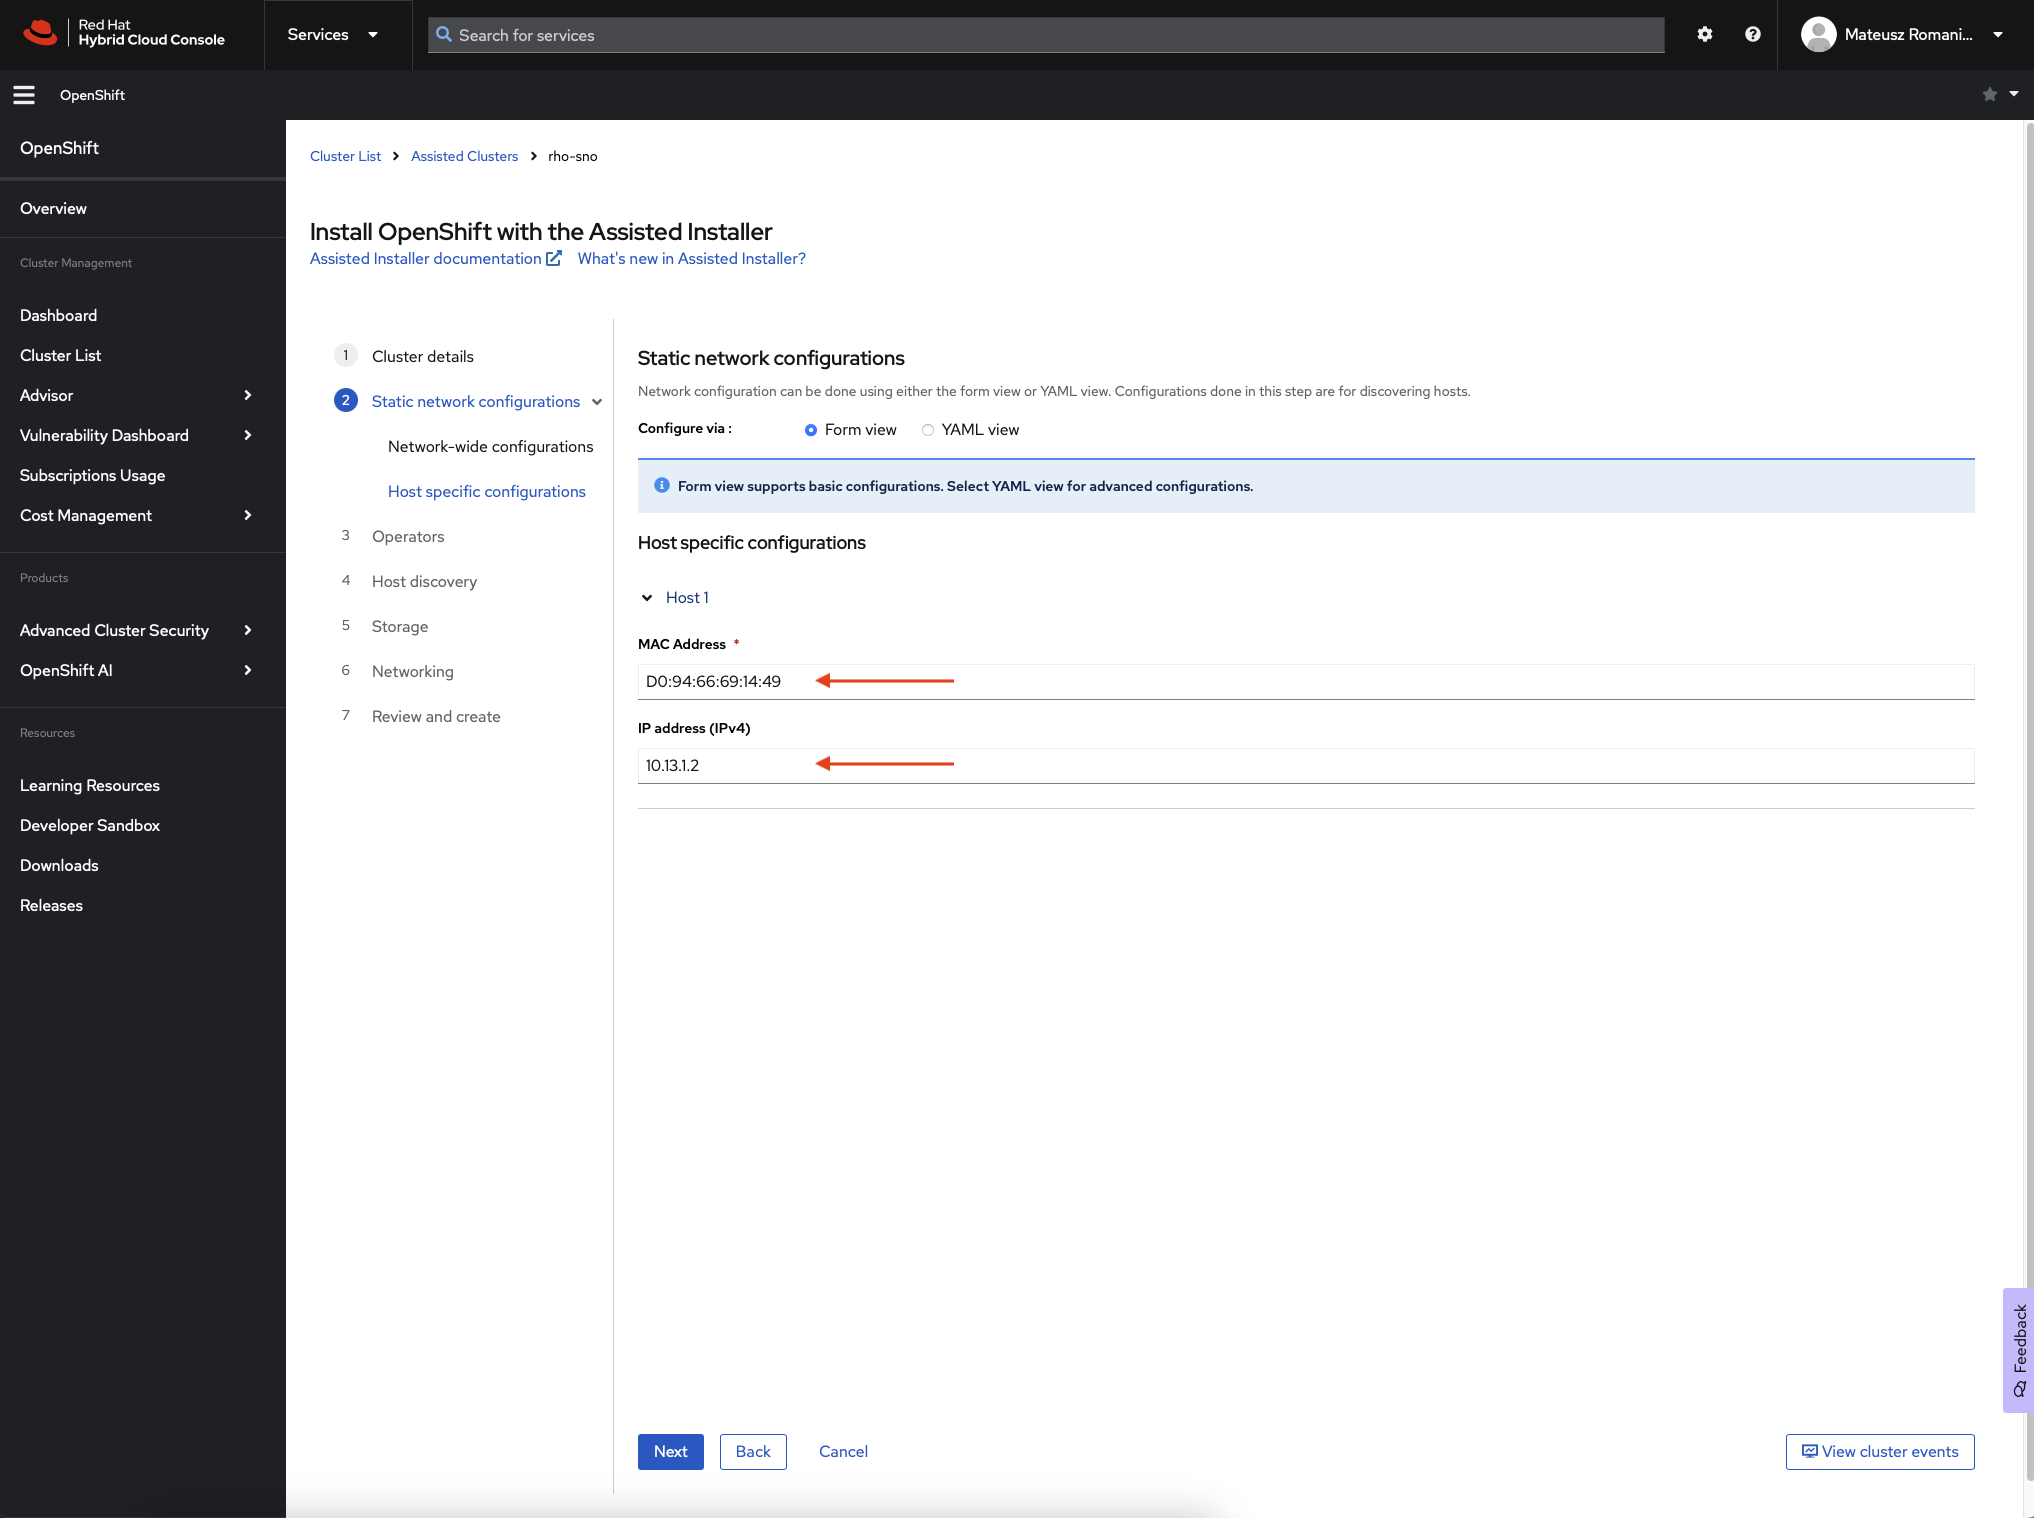
8. Configure Host specific configurations:
– MAC Address: Type a MAC address of dedicated network card from bare metal server. This should be NIC with tagged Machine Network VLAN.
– IP address (IPv4): type a IP address for the API, the same like in your DNS.
Go to the Next page.
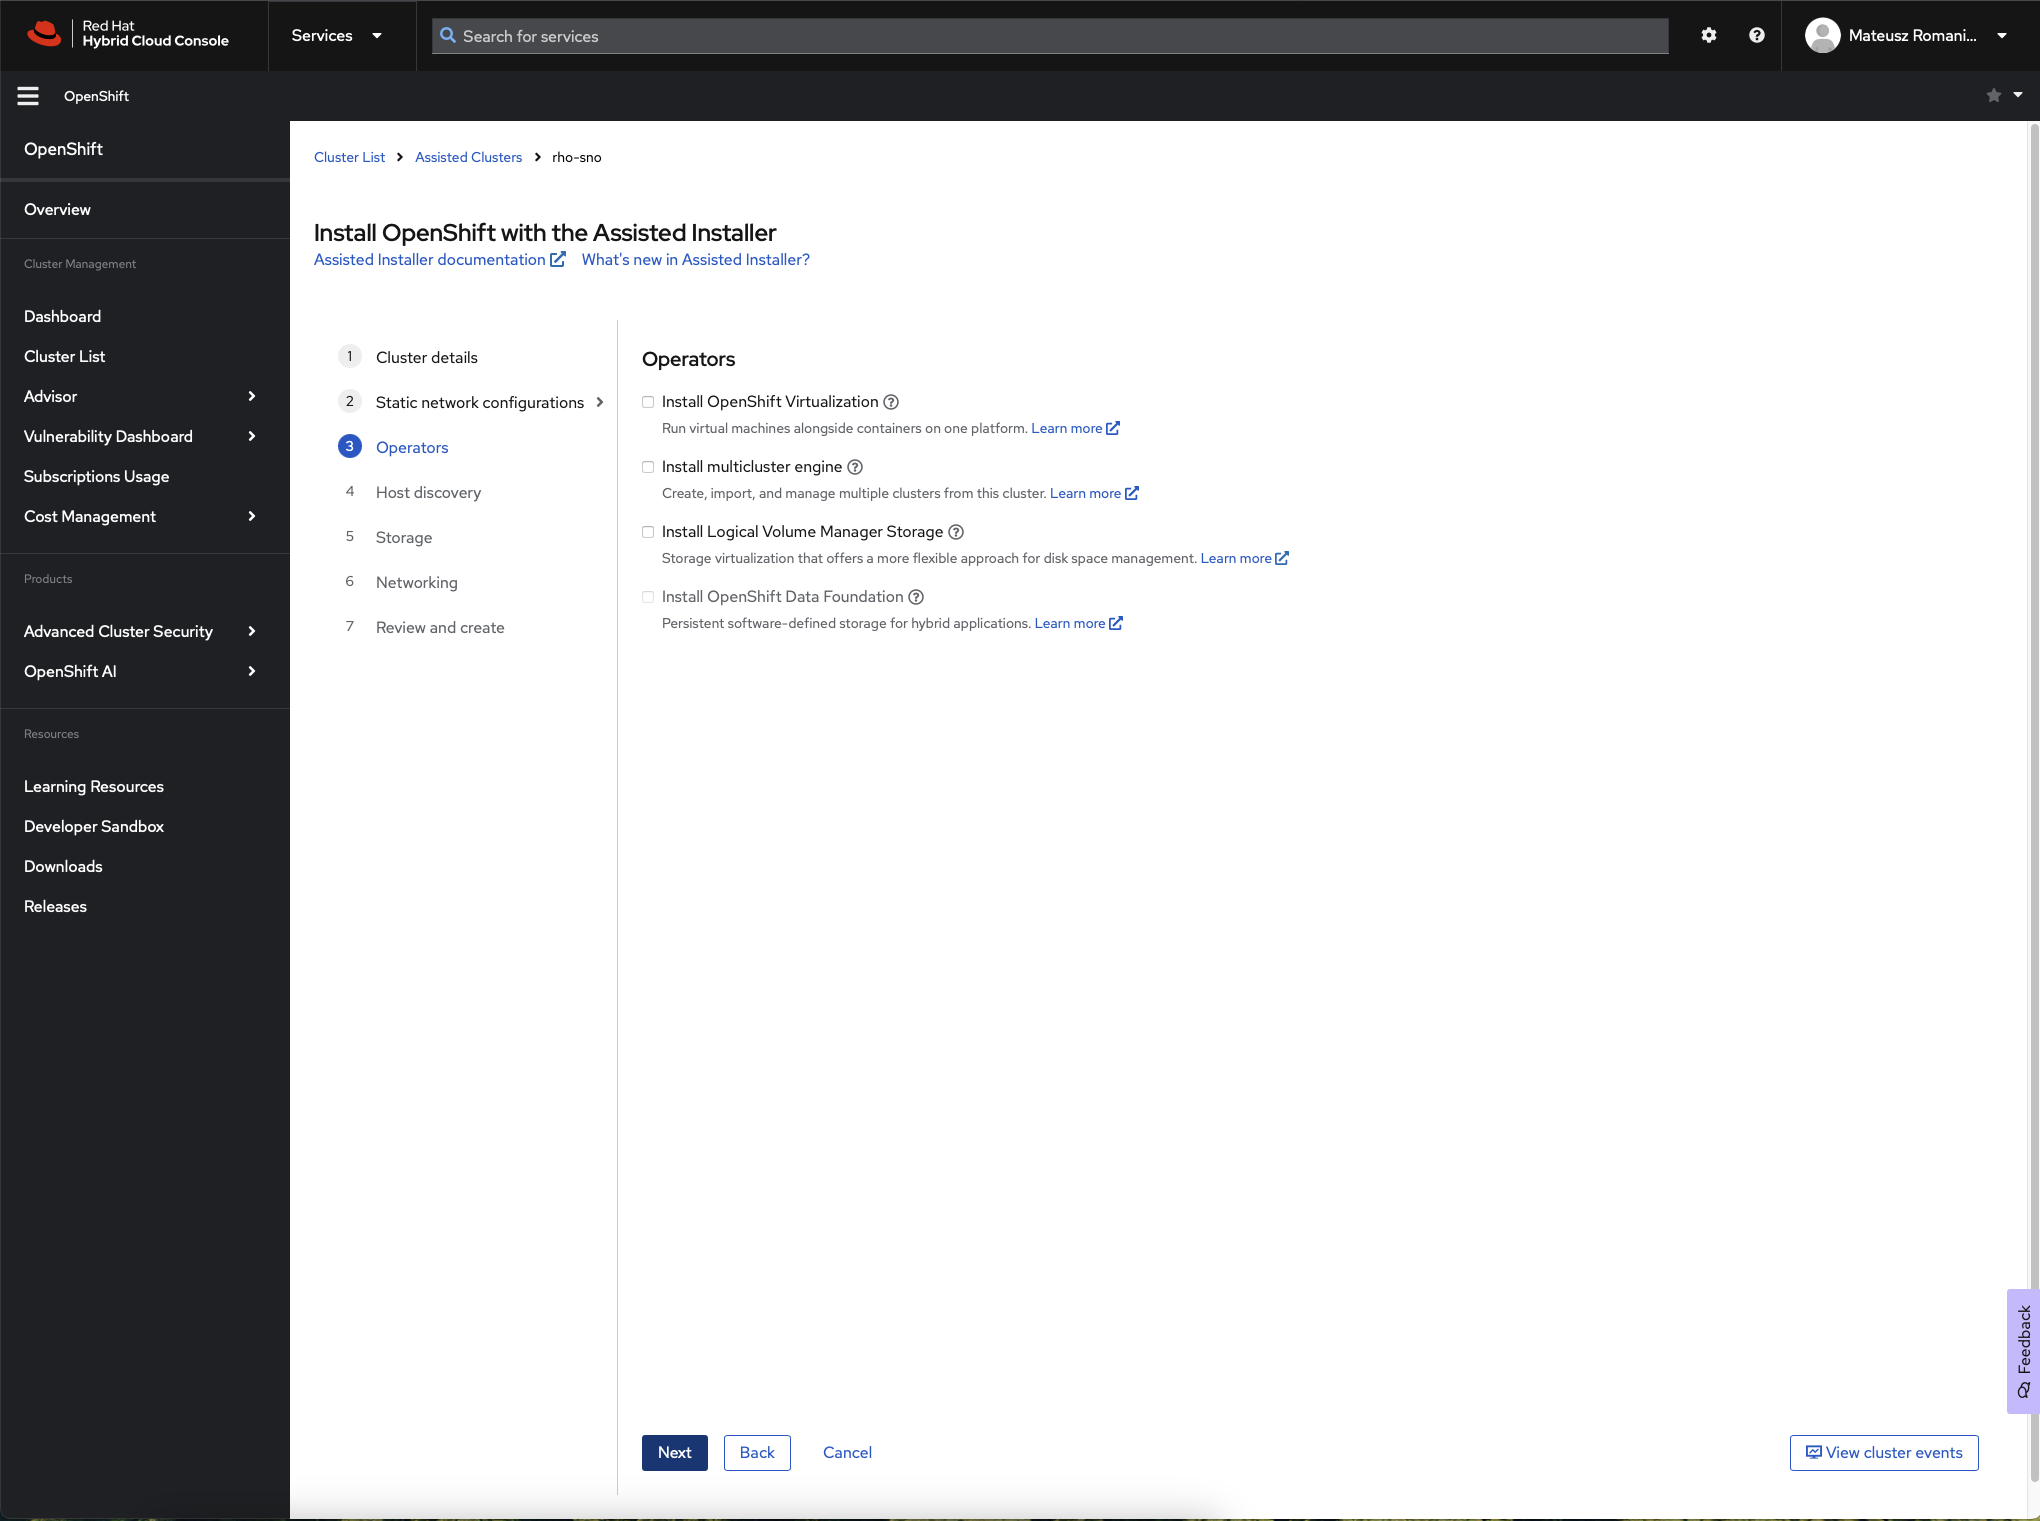
9. On this page, you can choose to automatically install a few Operators. At this moment, leave it as is. I’m going to install Operators in the upcoming blog posts 😉
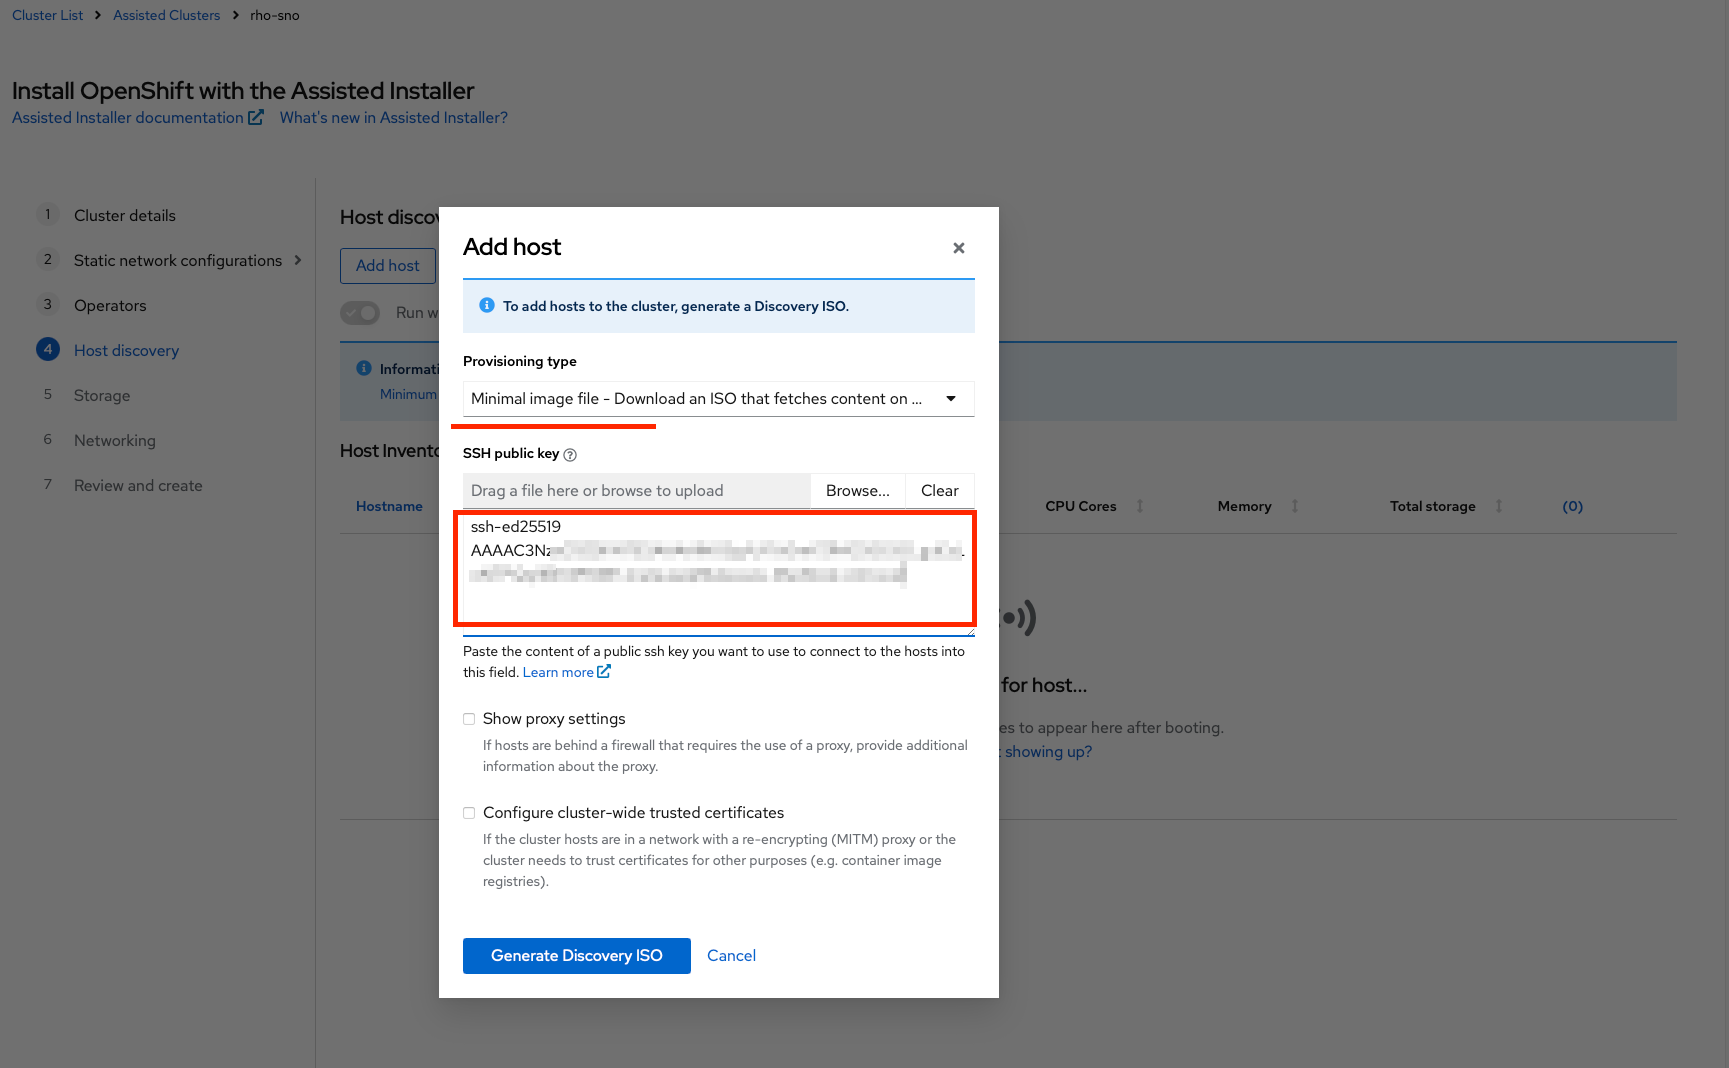
10. Now it’s time to Add host, click this button:
Provisioning type: Choose Minimal Image file instead of Full Image file.
SSH Public key: Upload your .pub key file or paste a proper key value.
To generate public/private key pair, type a command ssh-keygen in your terminal.
You can find existing or new keys in: /Users/<username>/.ssh/<filename>.pub
Click Generate Discovery ISO.

11. Copy ISO URL to the web browser and download an image or use wget command from terminal.
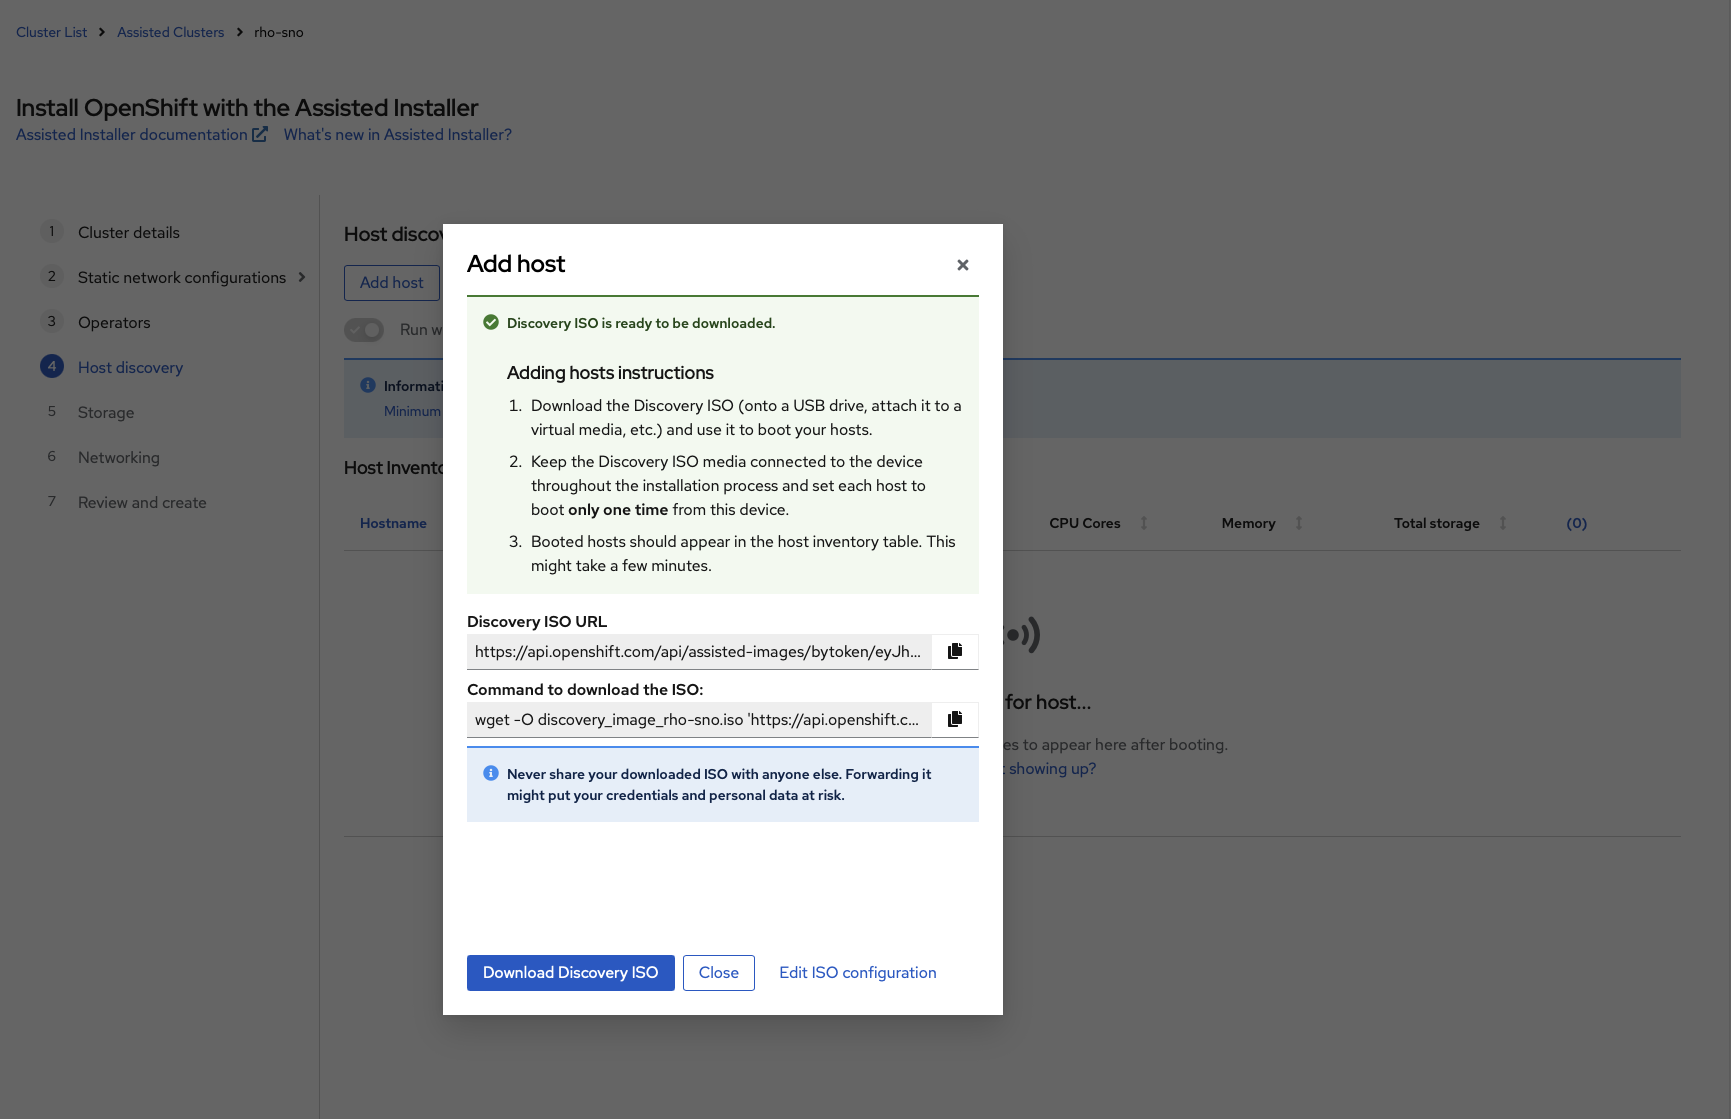
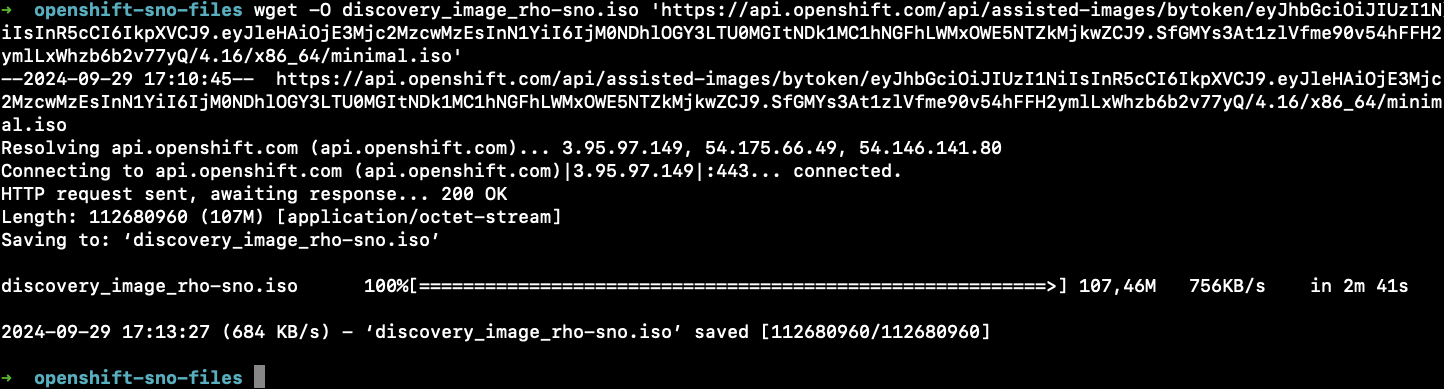
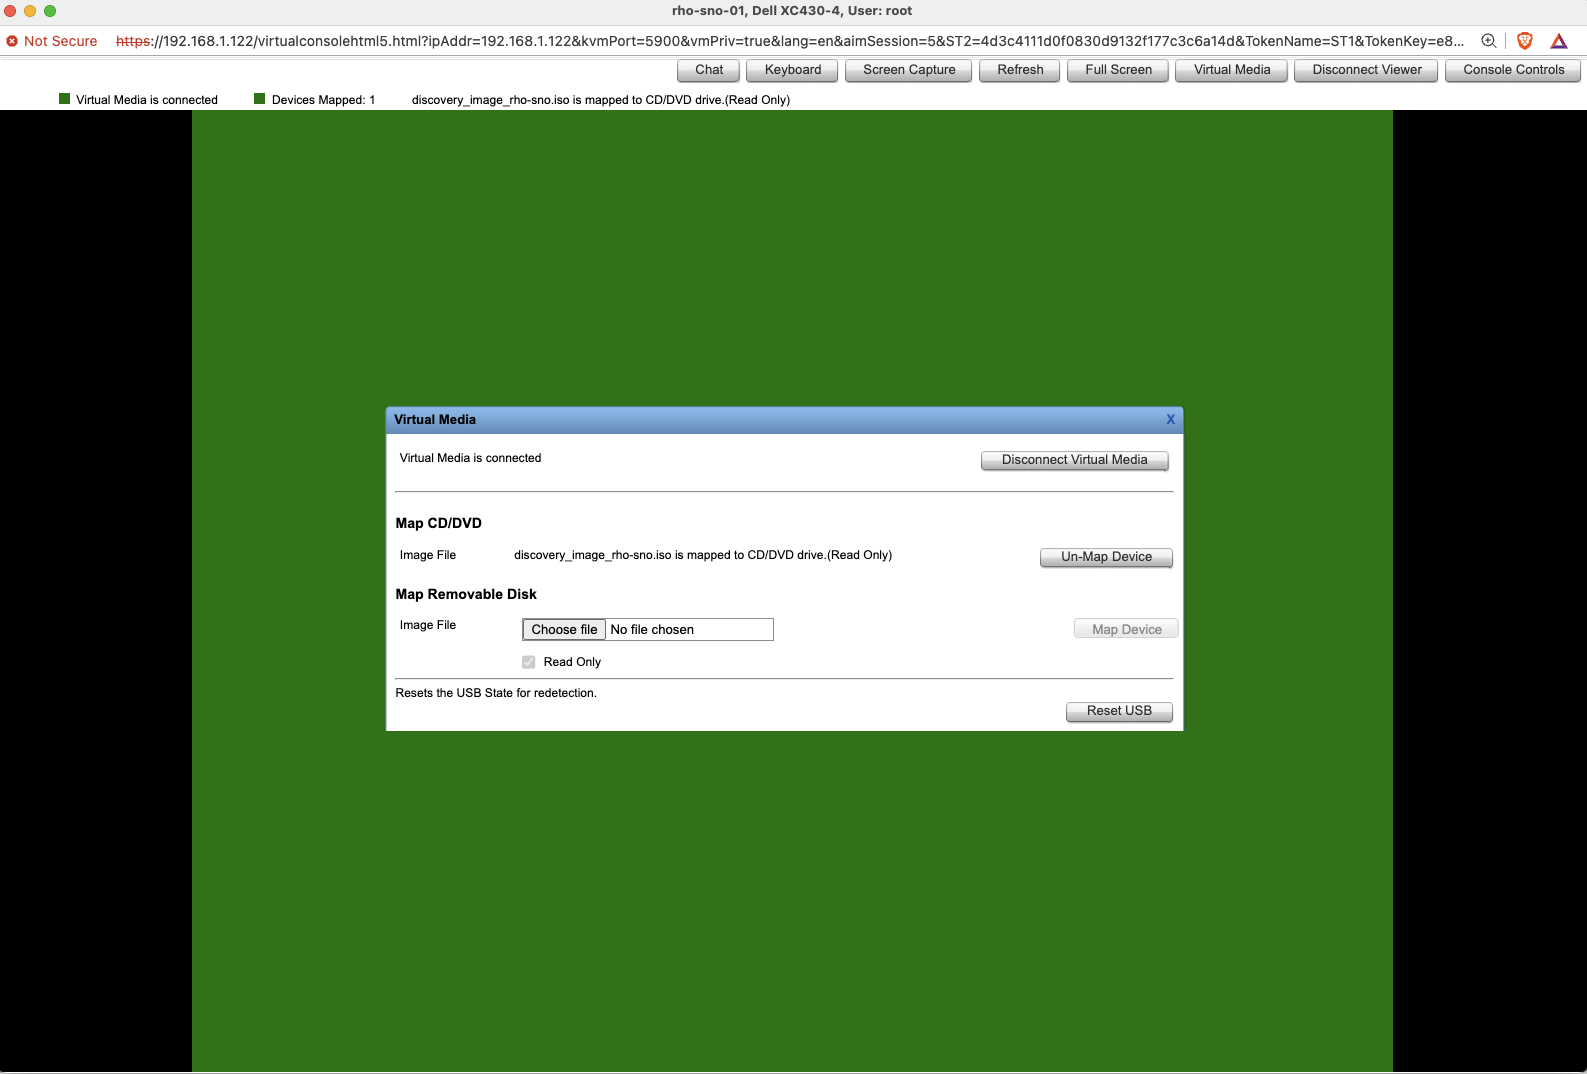
12. discovery_image_rho-sno.iso is an initial ISO image used to run Red Hat Enterprise Linux CoreOS (RHCOS)on bare metal server. It’s needed to discover machine and proceed with the next steps.
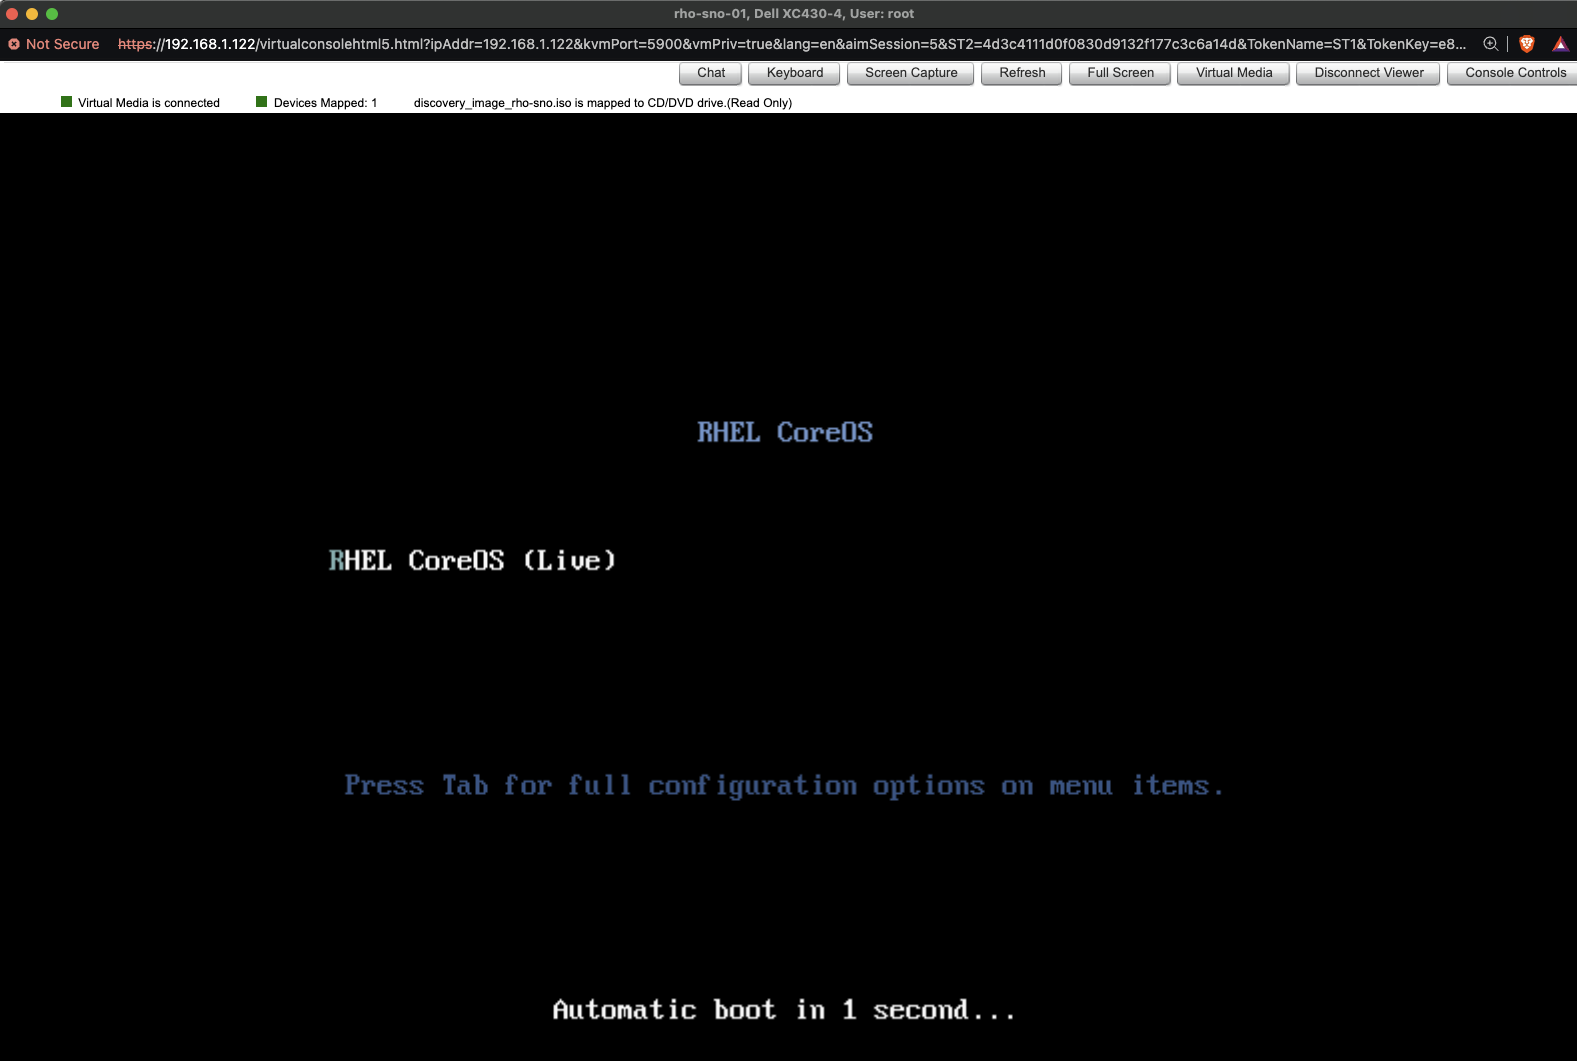
Log in to the iDrac in bare metal server. Open virtual console and attach/mount ISO file. Reboot machine. Wait until server is booted from the attached ISO
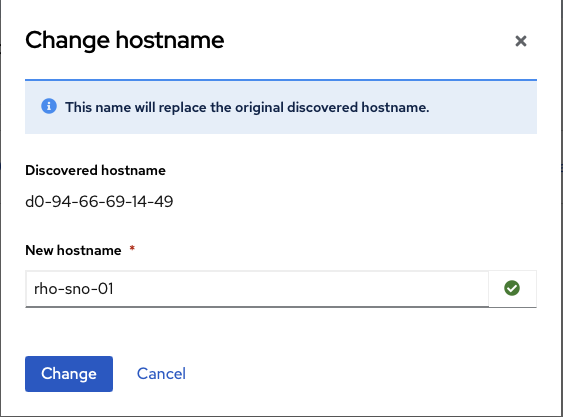
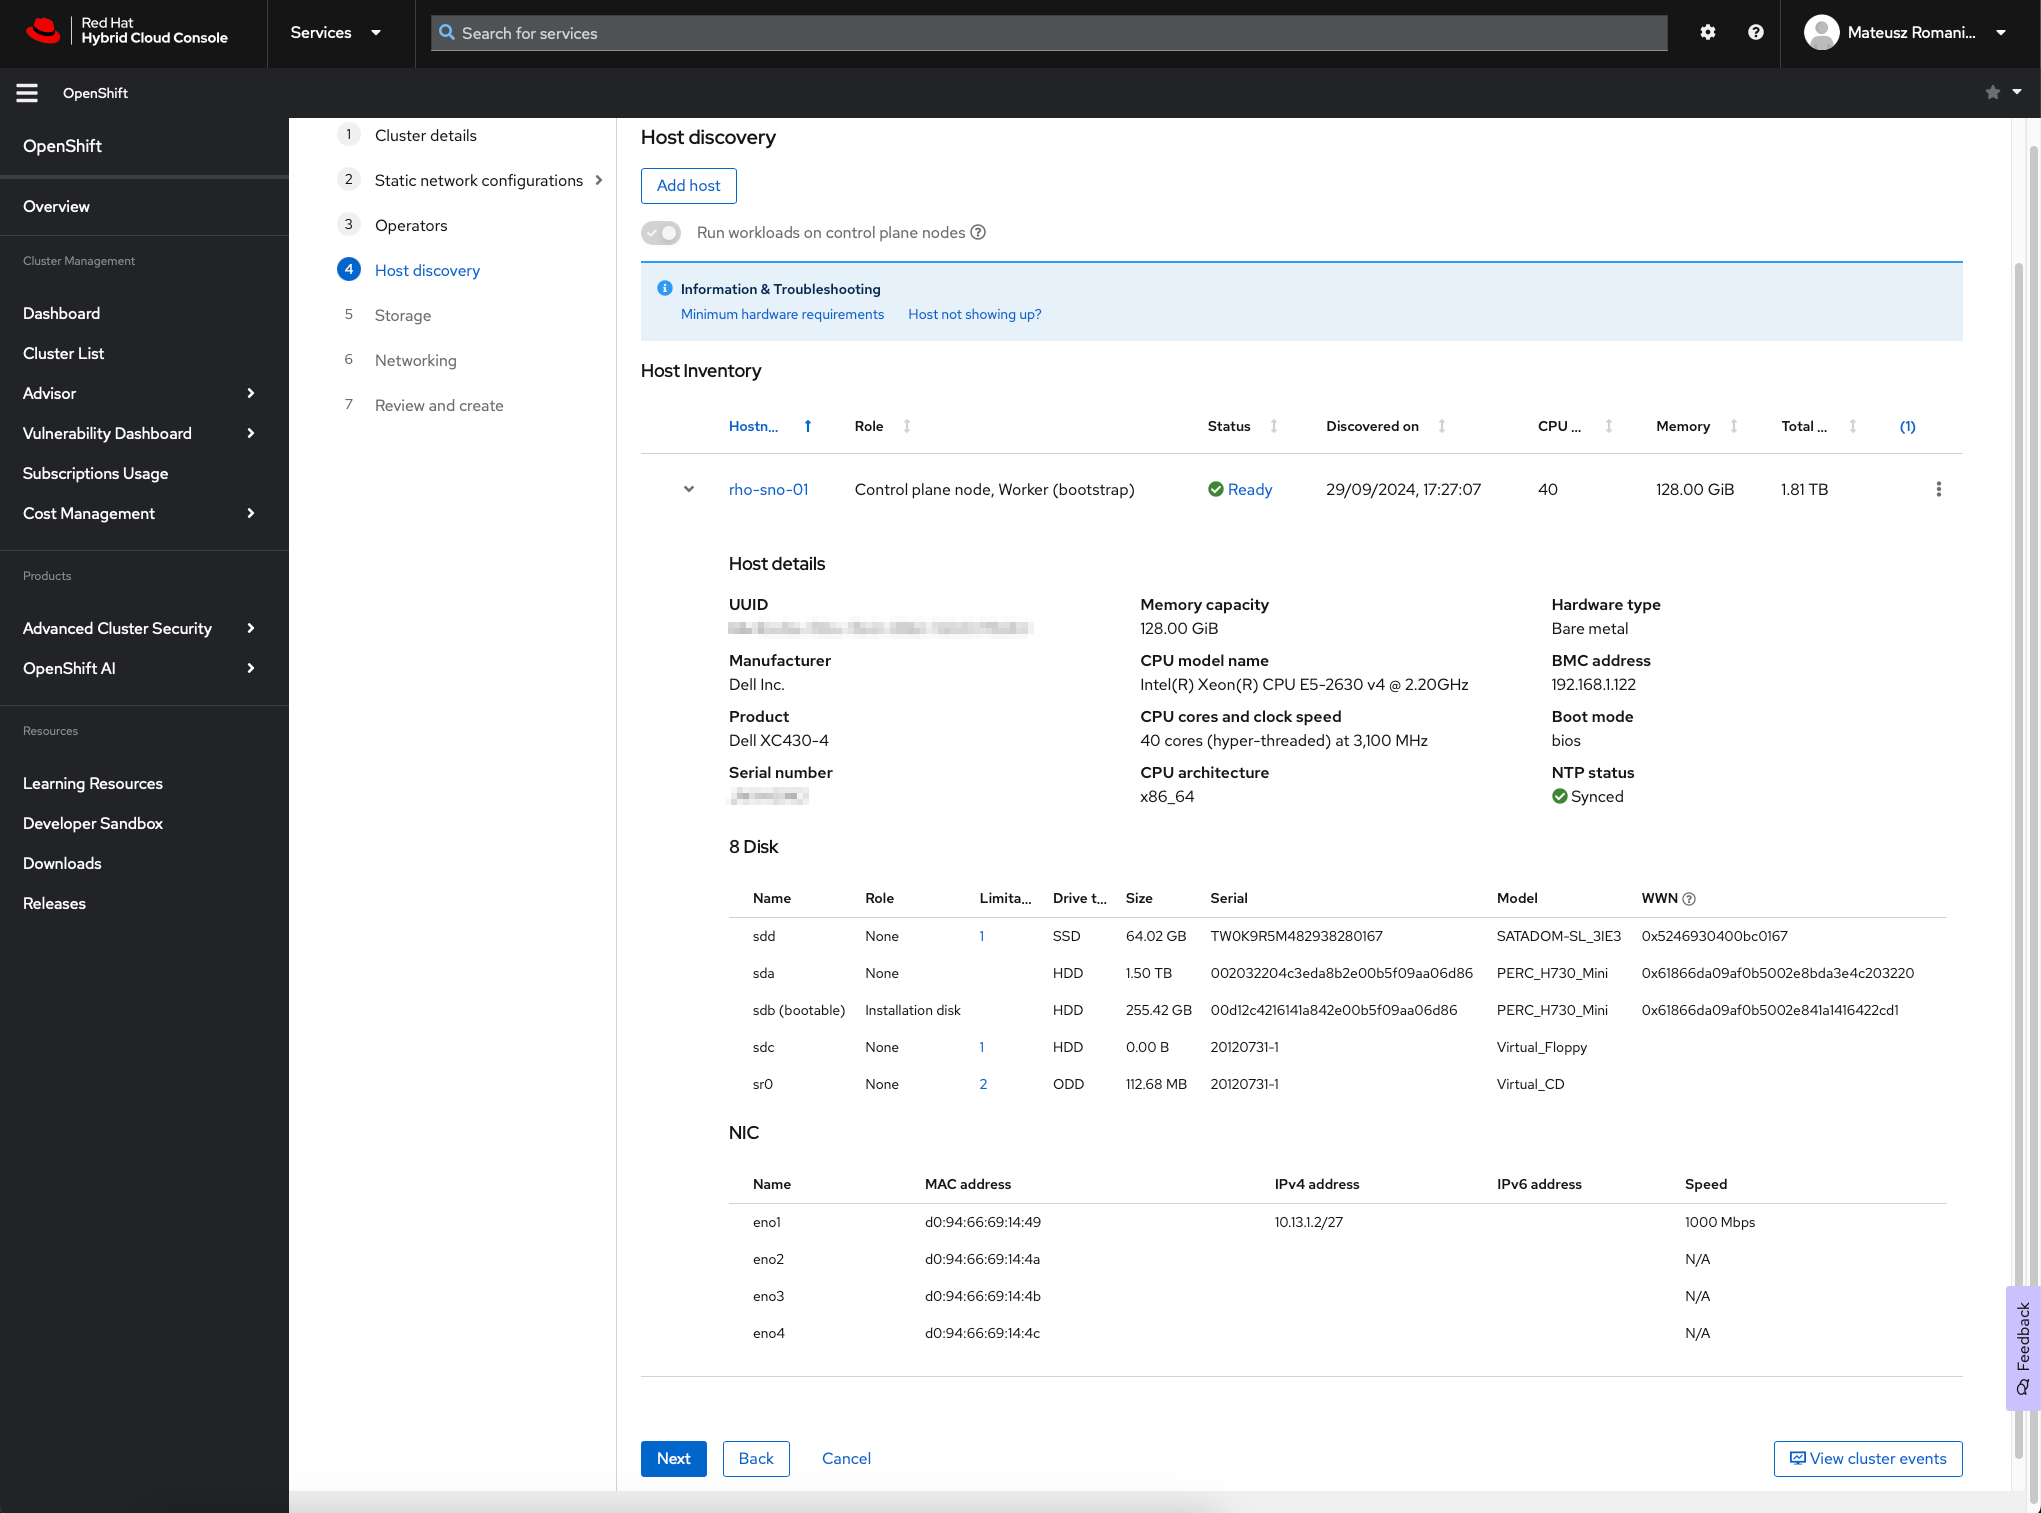
13. OK, Dell bare metal server was discovered! To make life easier, let’s rename default name to a new one. Click on the hostname and change it. You don’t need to add this name in the DNS.
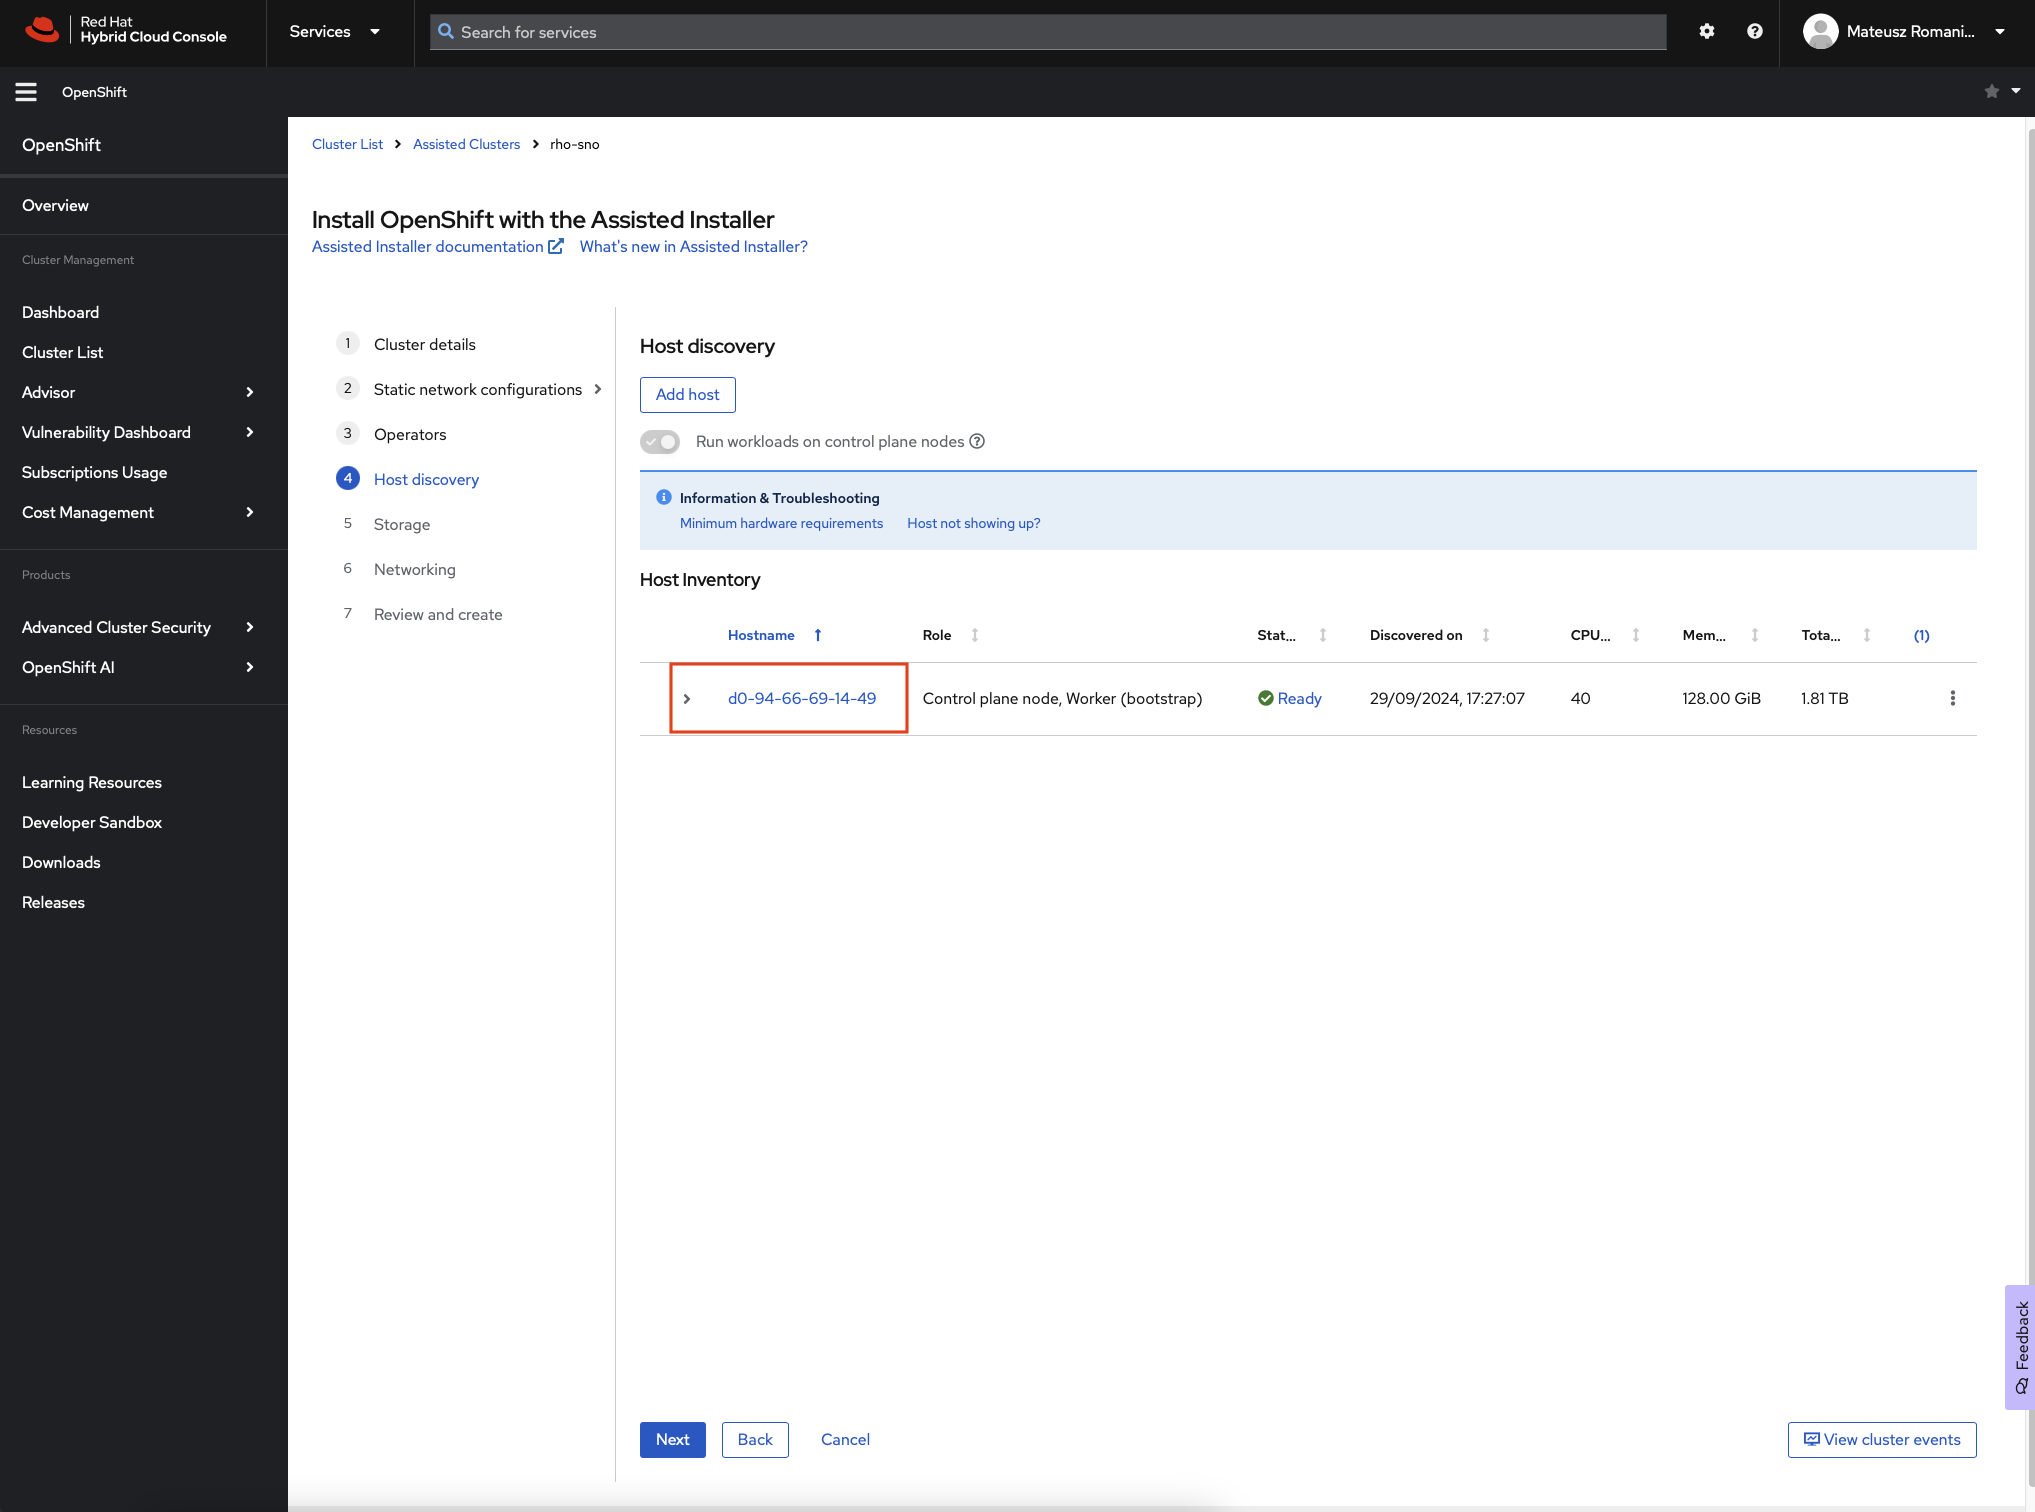
14. There you can find more information about this host. It’s details about specification, storage and network.
Go to the Next page.
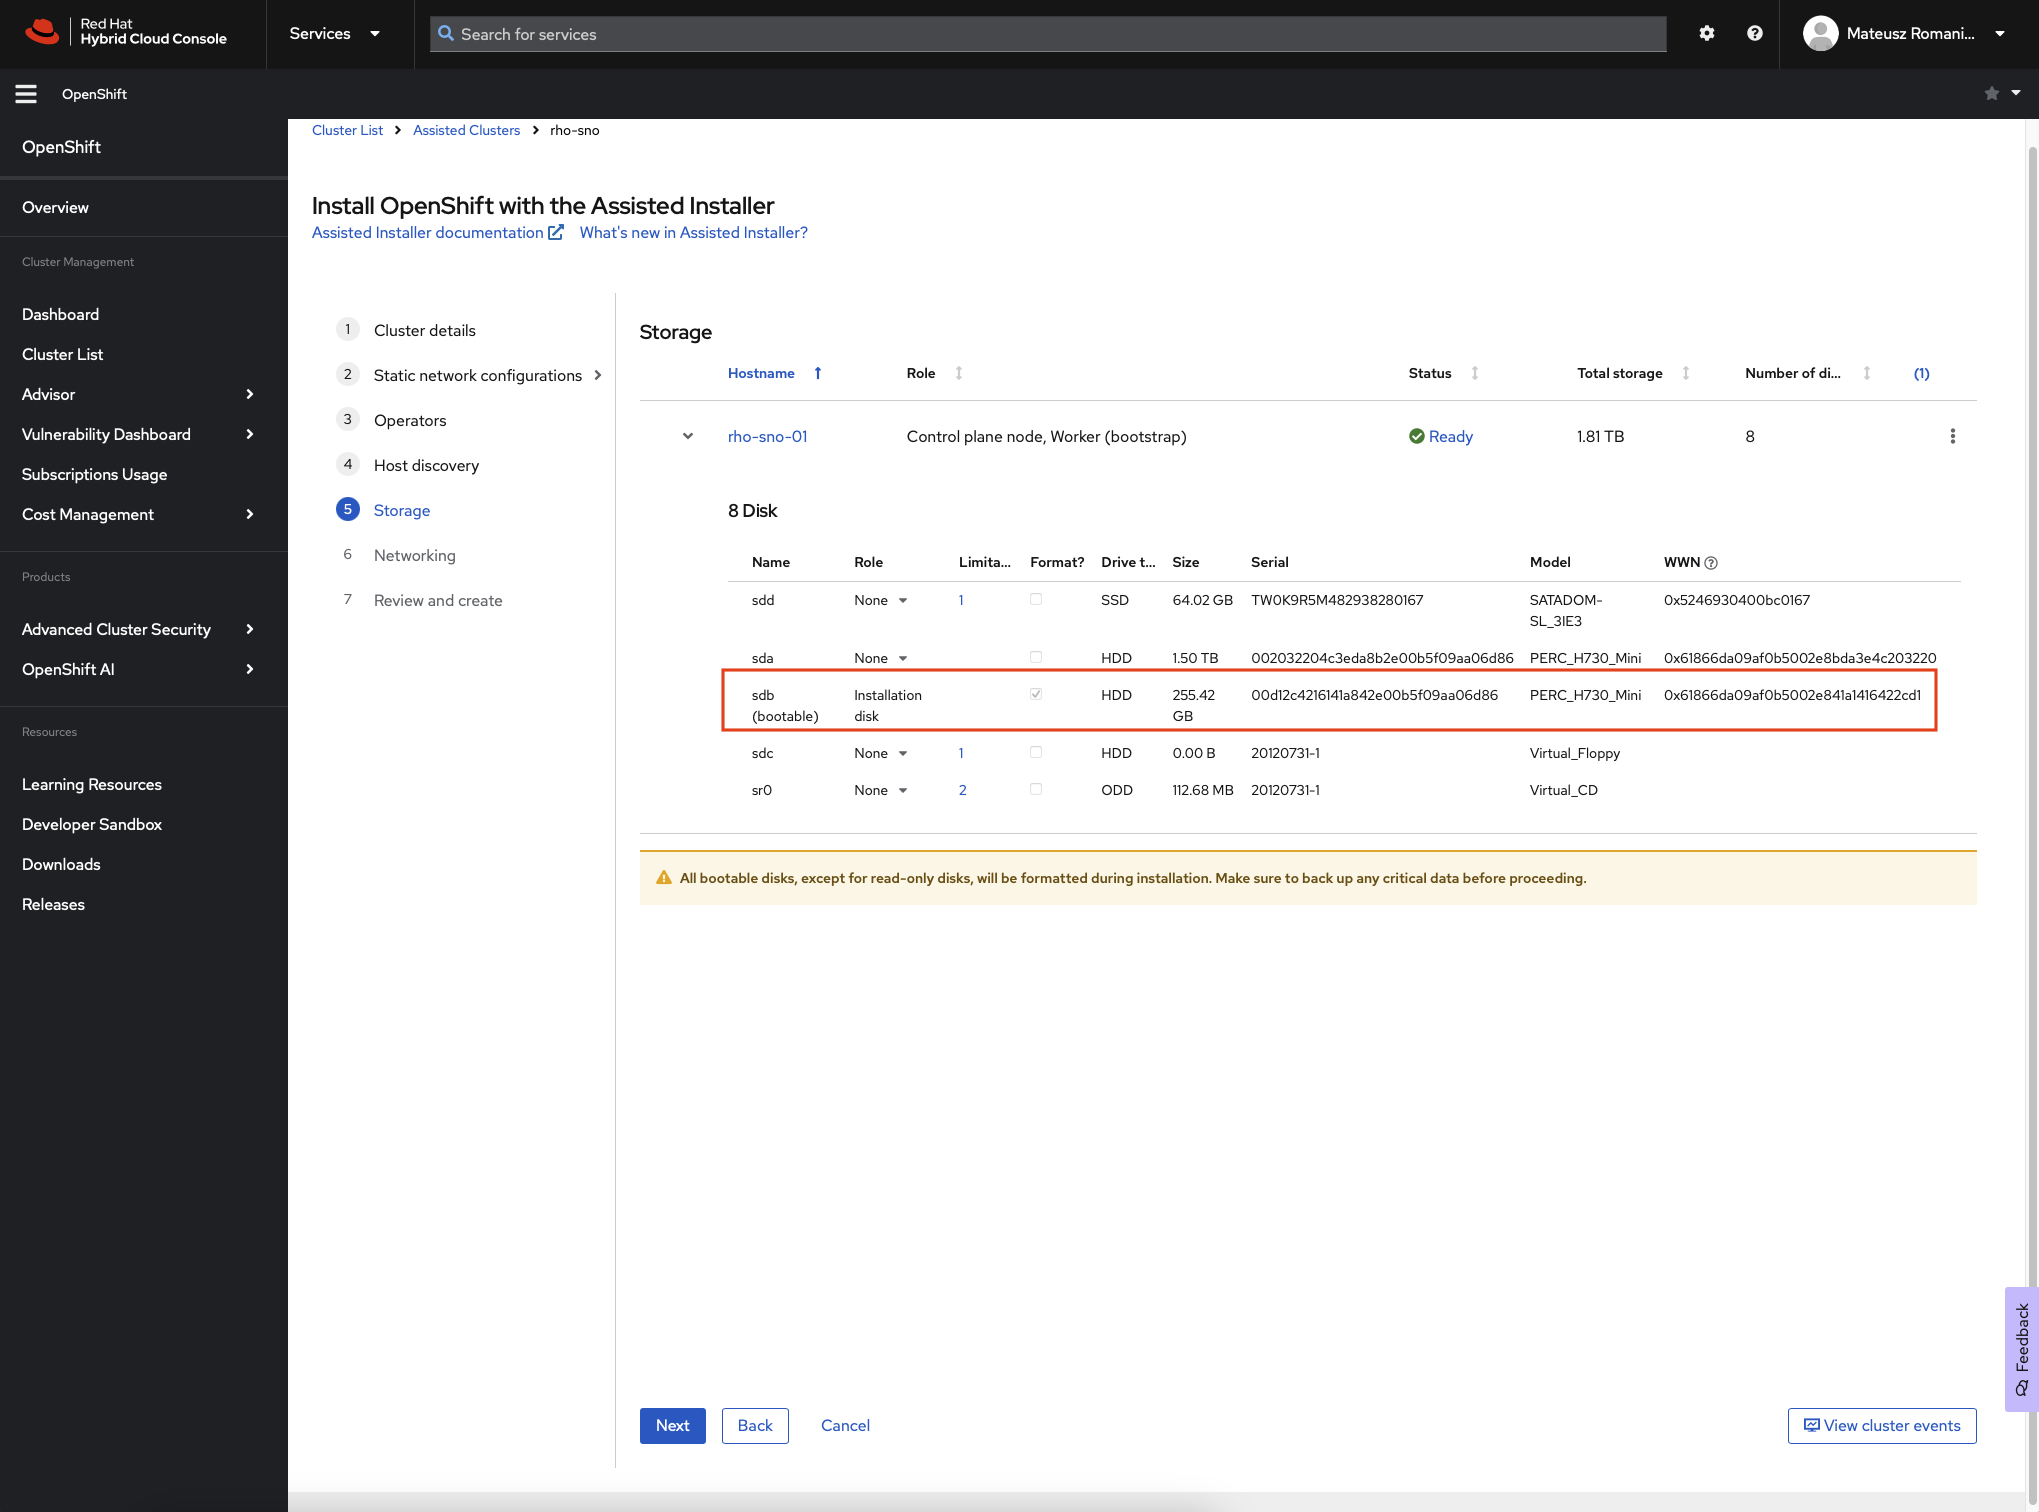
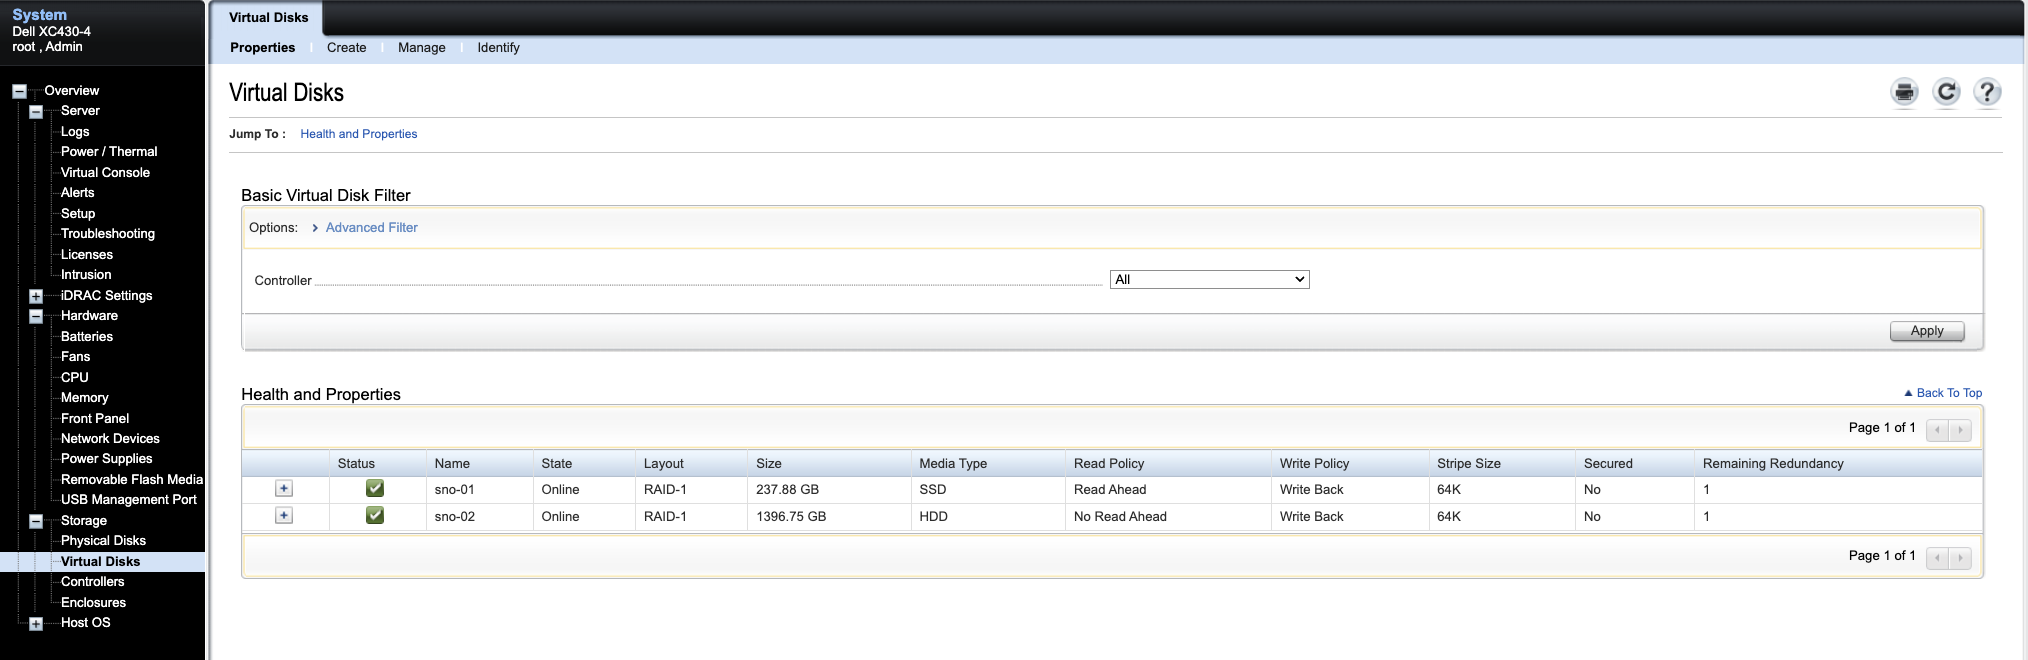
15. Storage – Confirm installation place/disk. In my case, there is over 250 GB sdb SSD disk.
1,5 TB sda HDD is prepared for other OpenShift purposes (don’t need it for an initial deployment)
Go to the Next page.
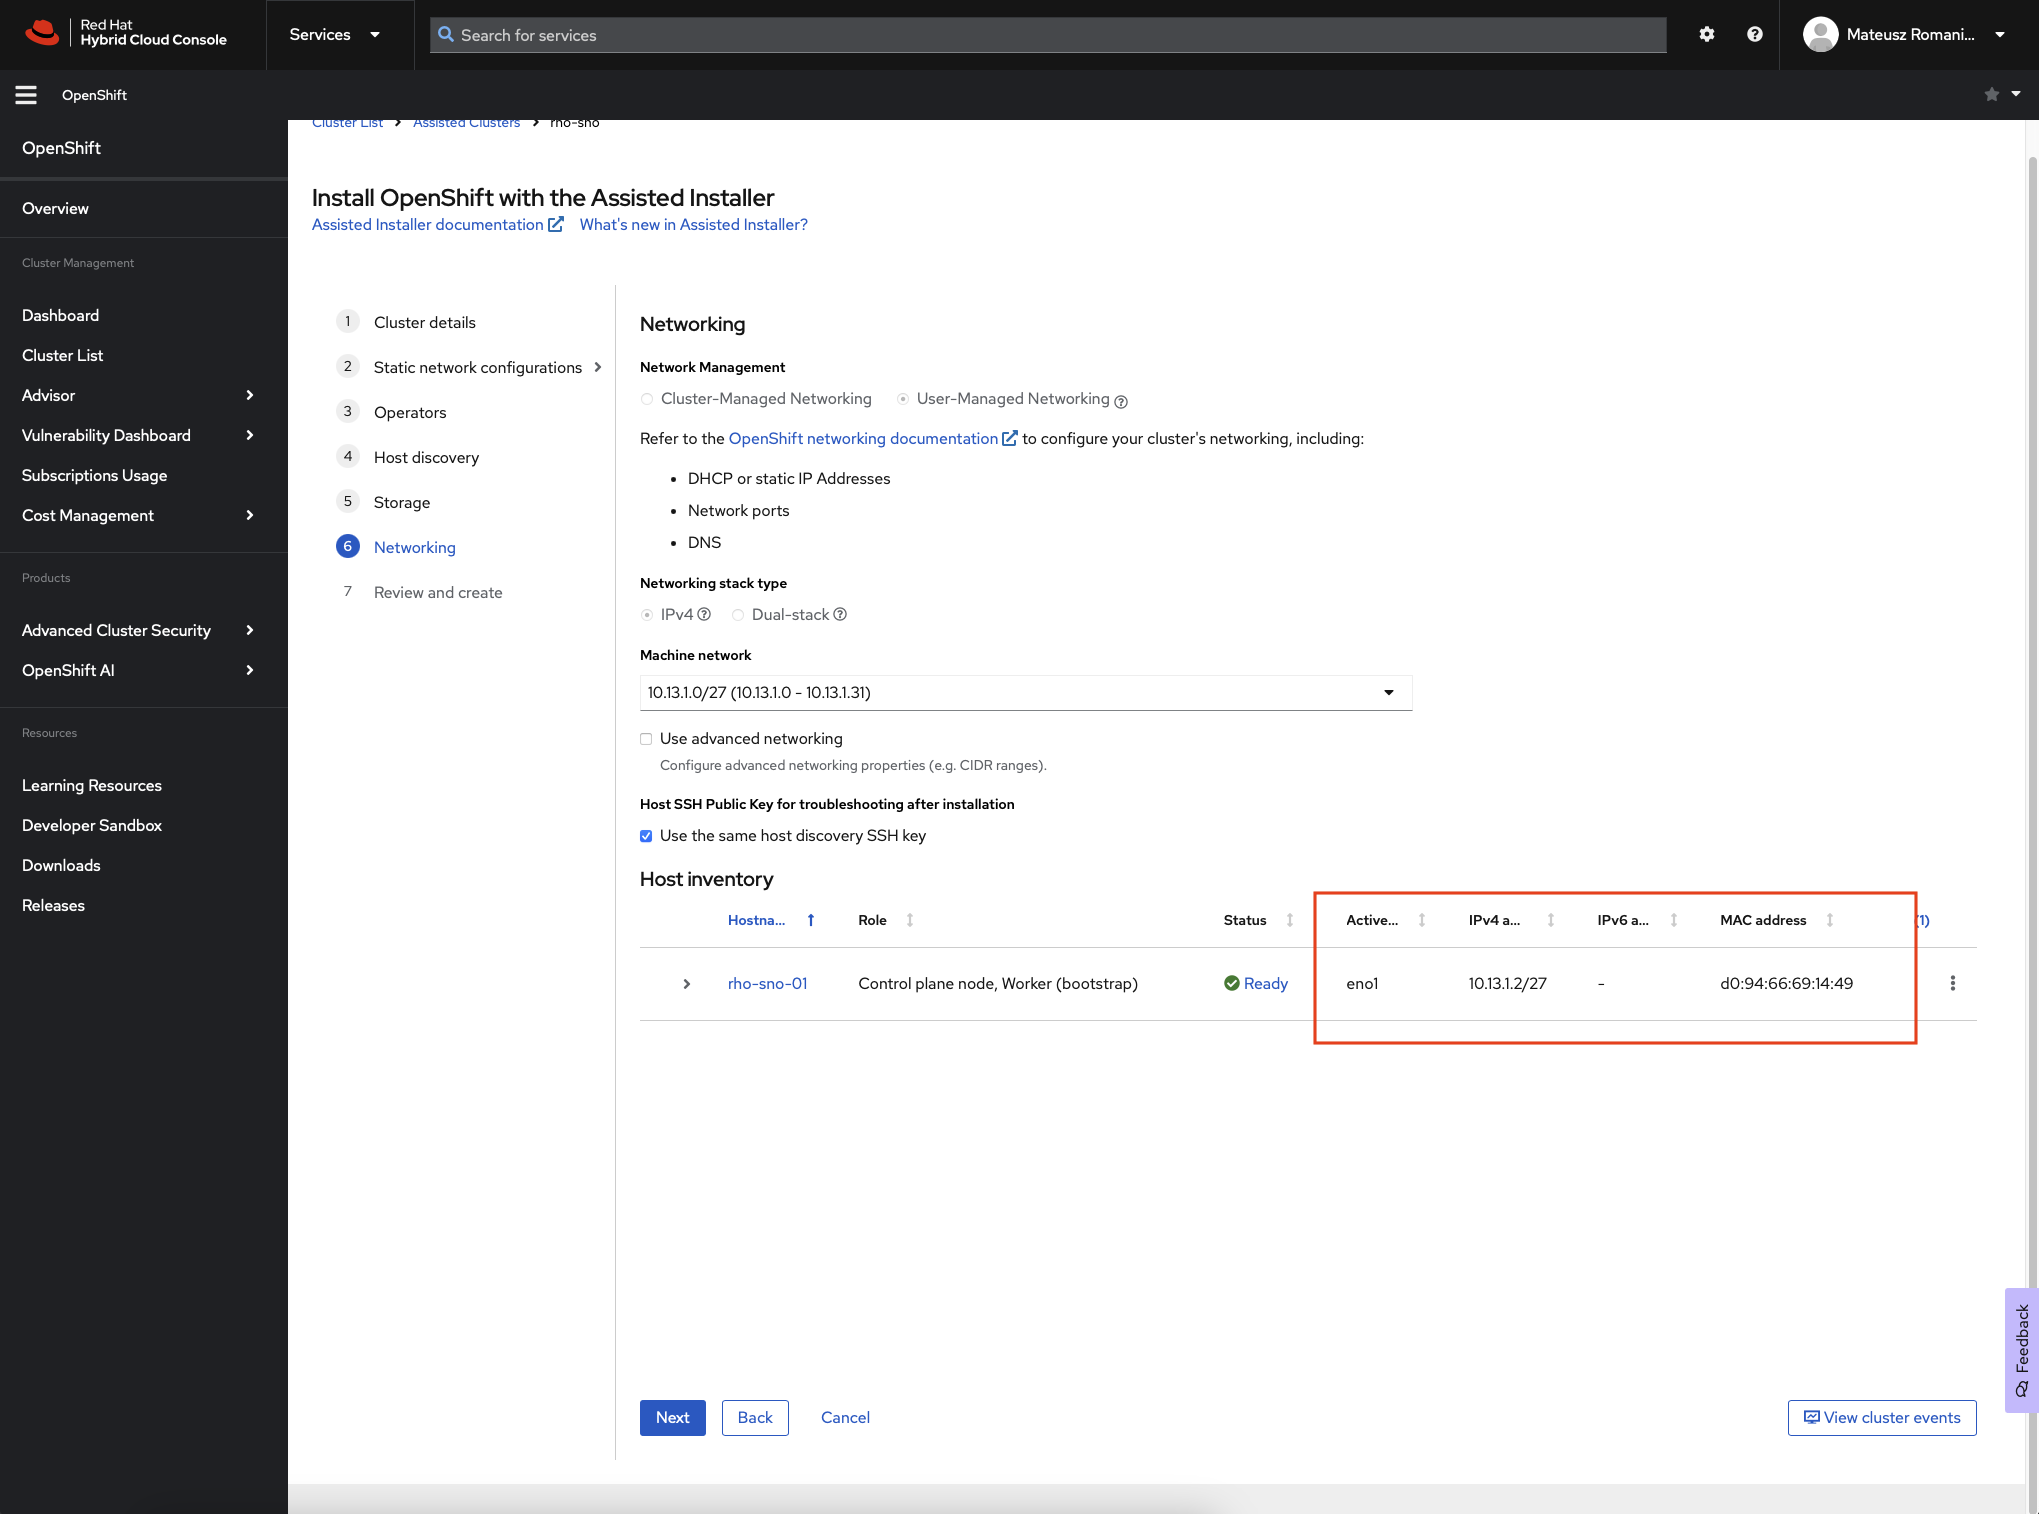
16. Networking – Confirm IP address.
Go to the Next page.
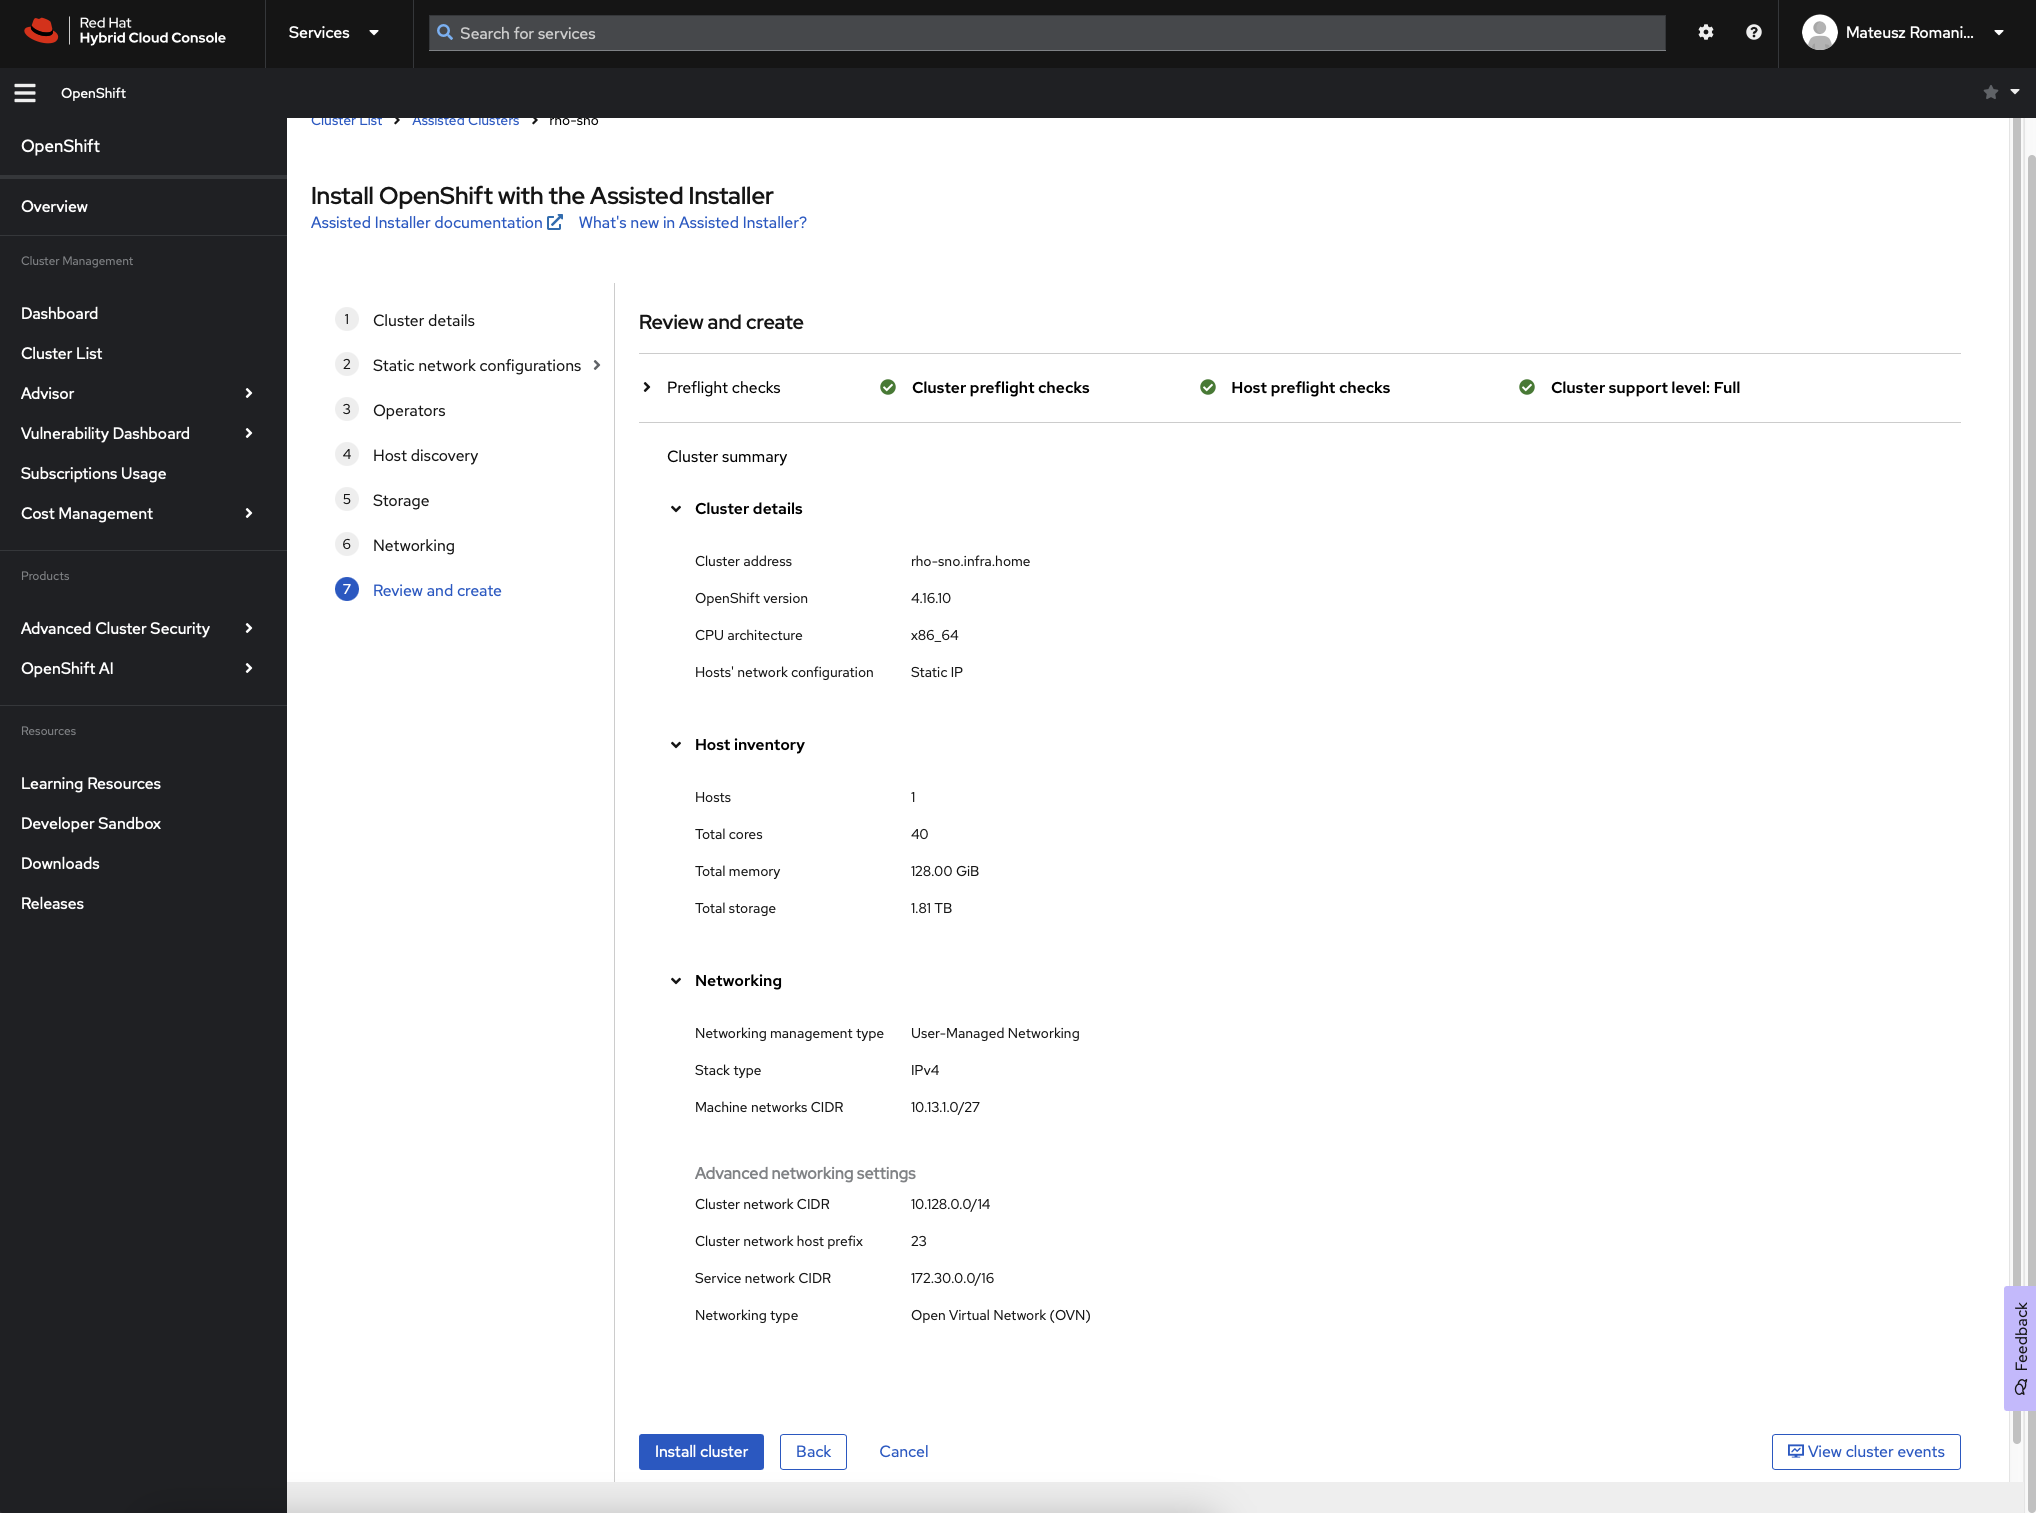
17. Look at the summary page. If everything is good, let’s install cluster.
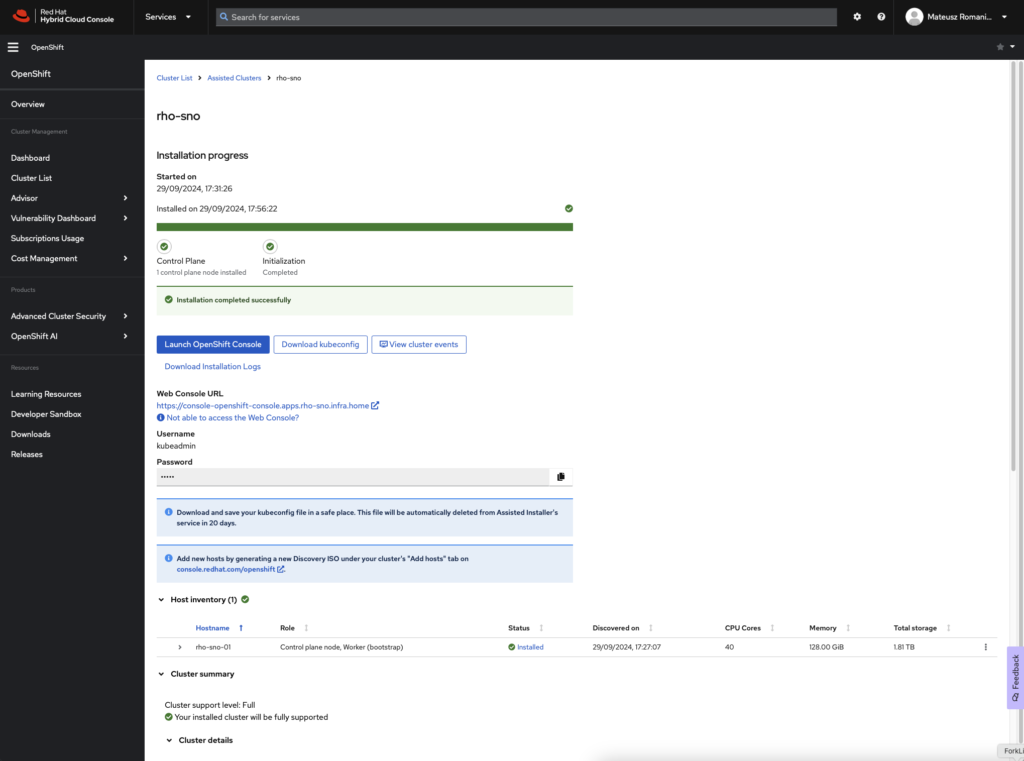
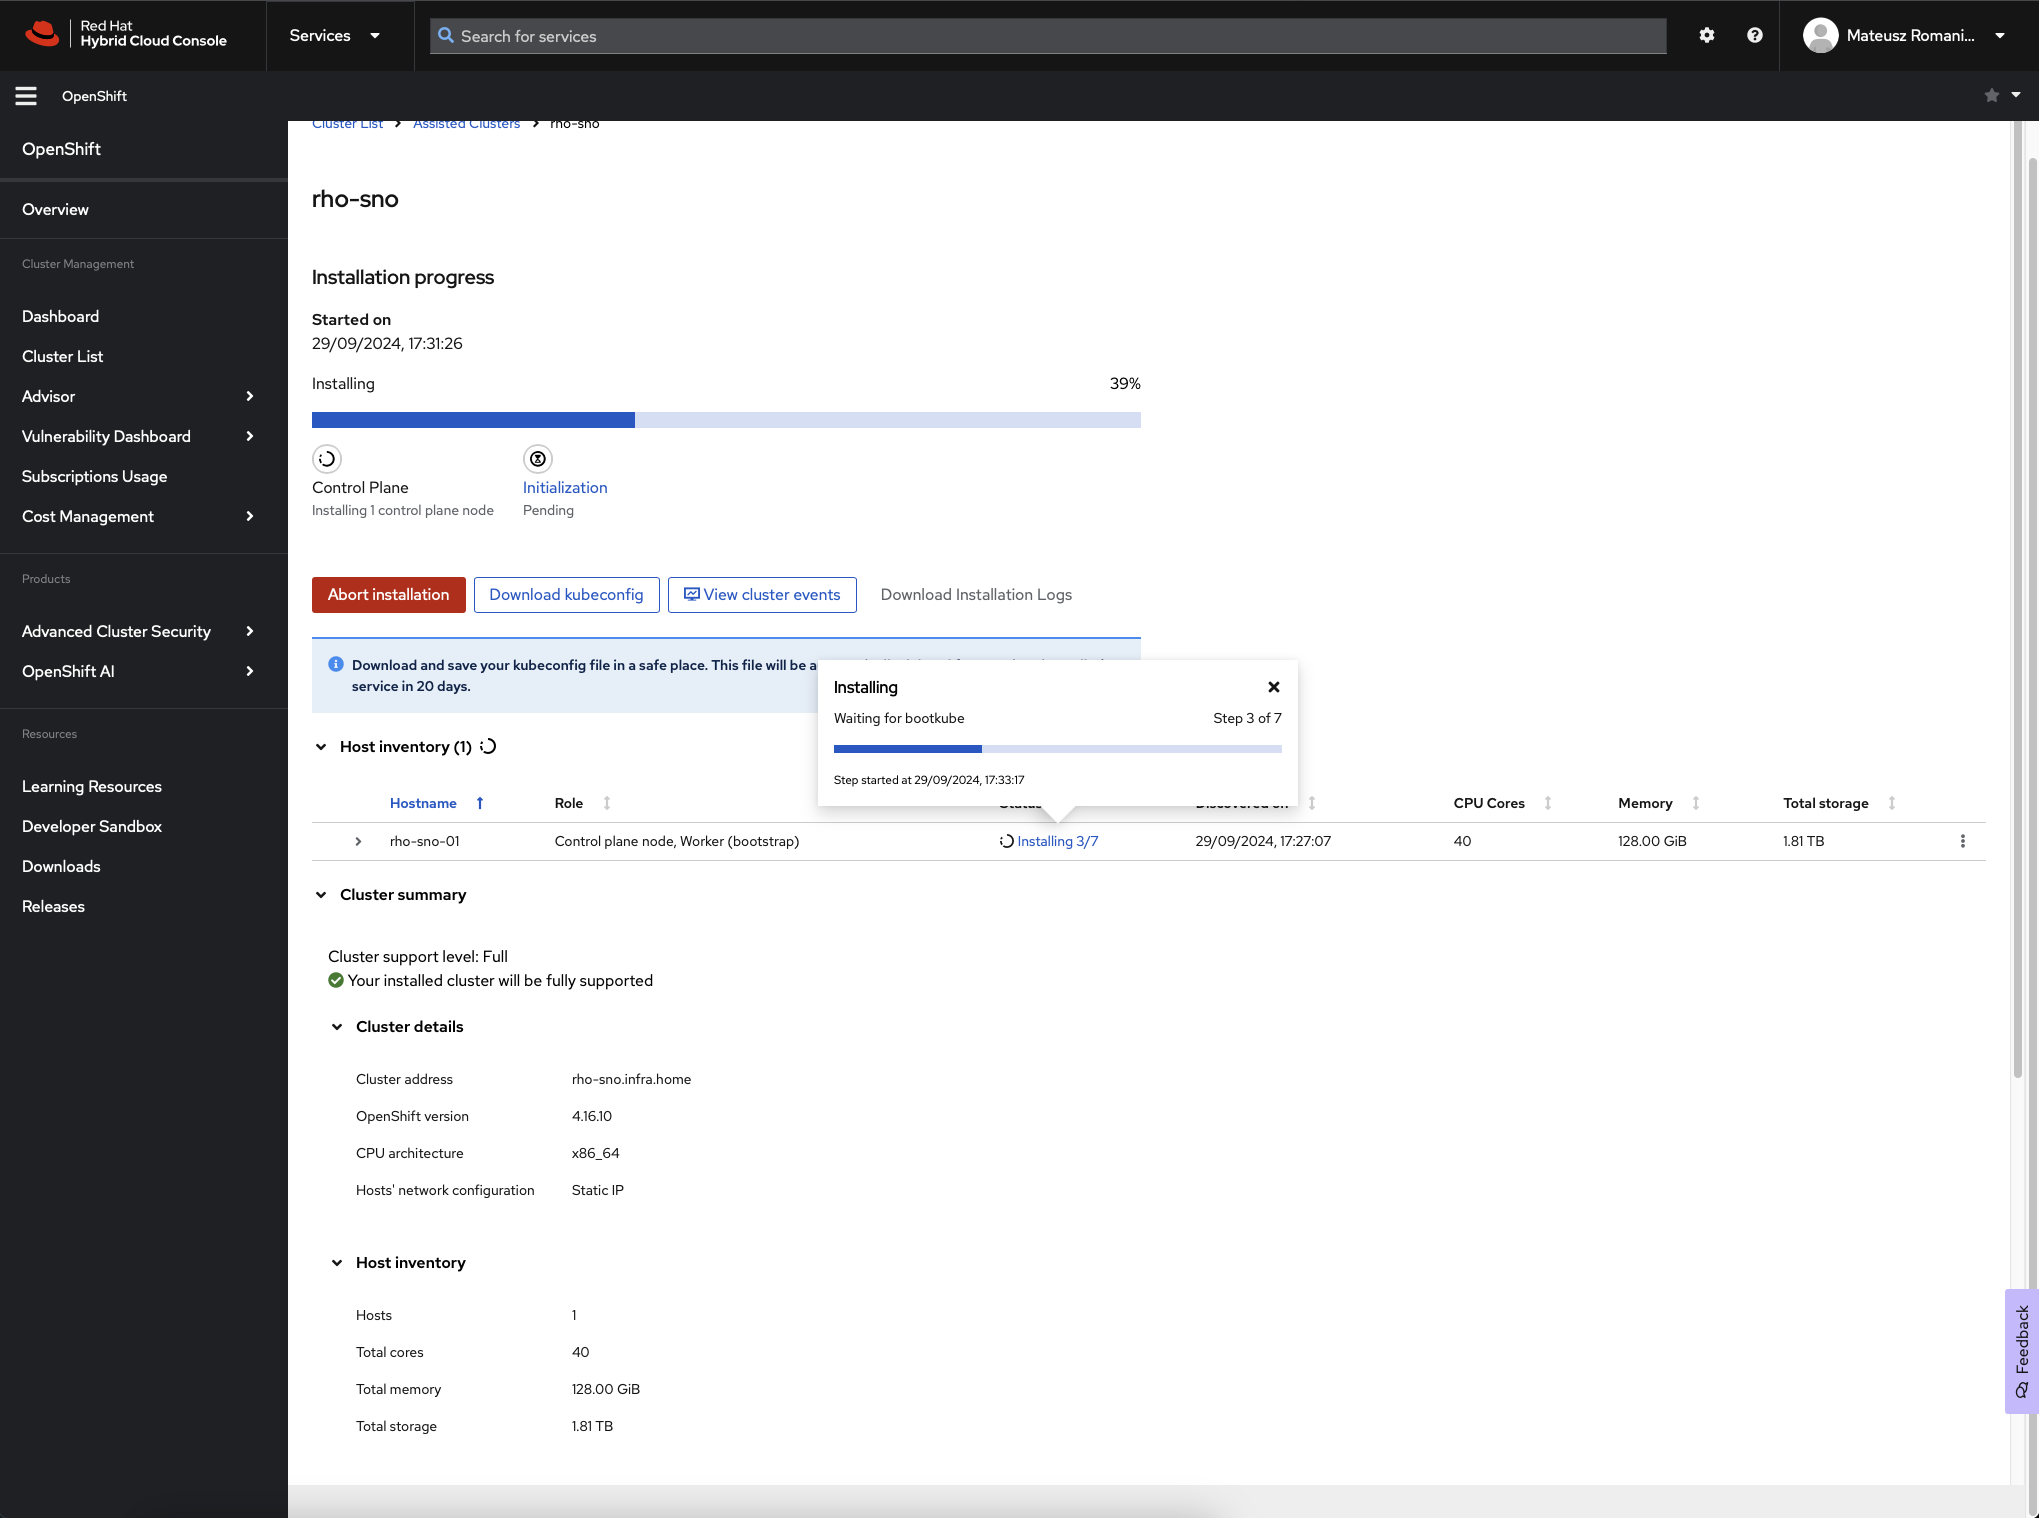
18. Installation in progress…
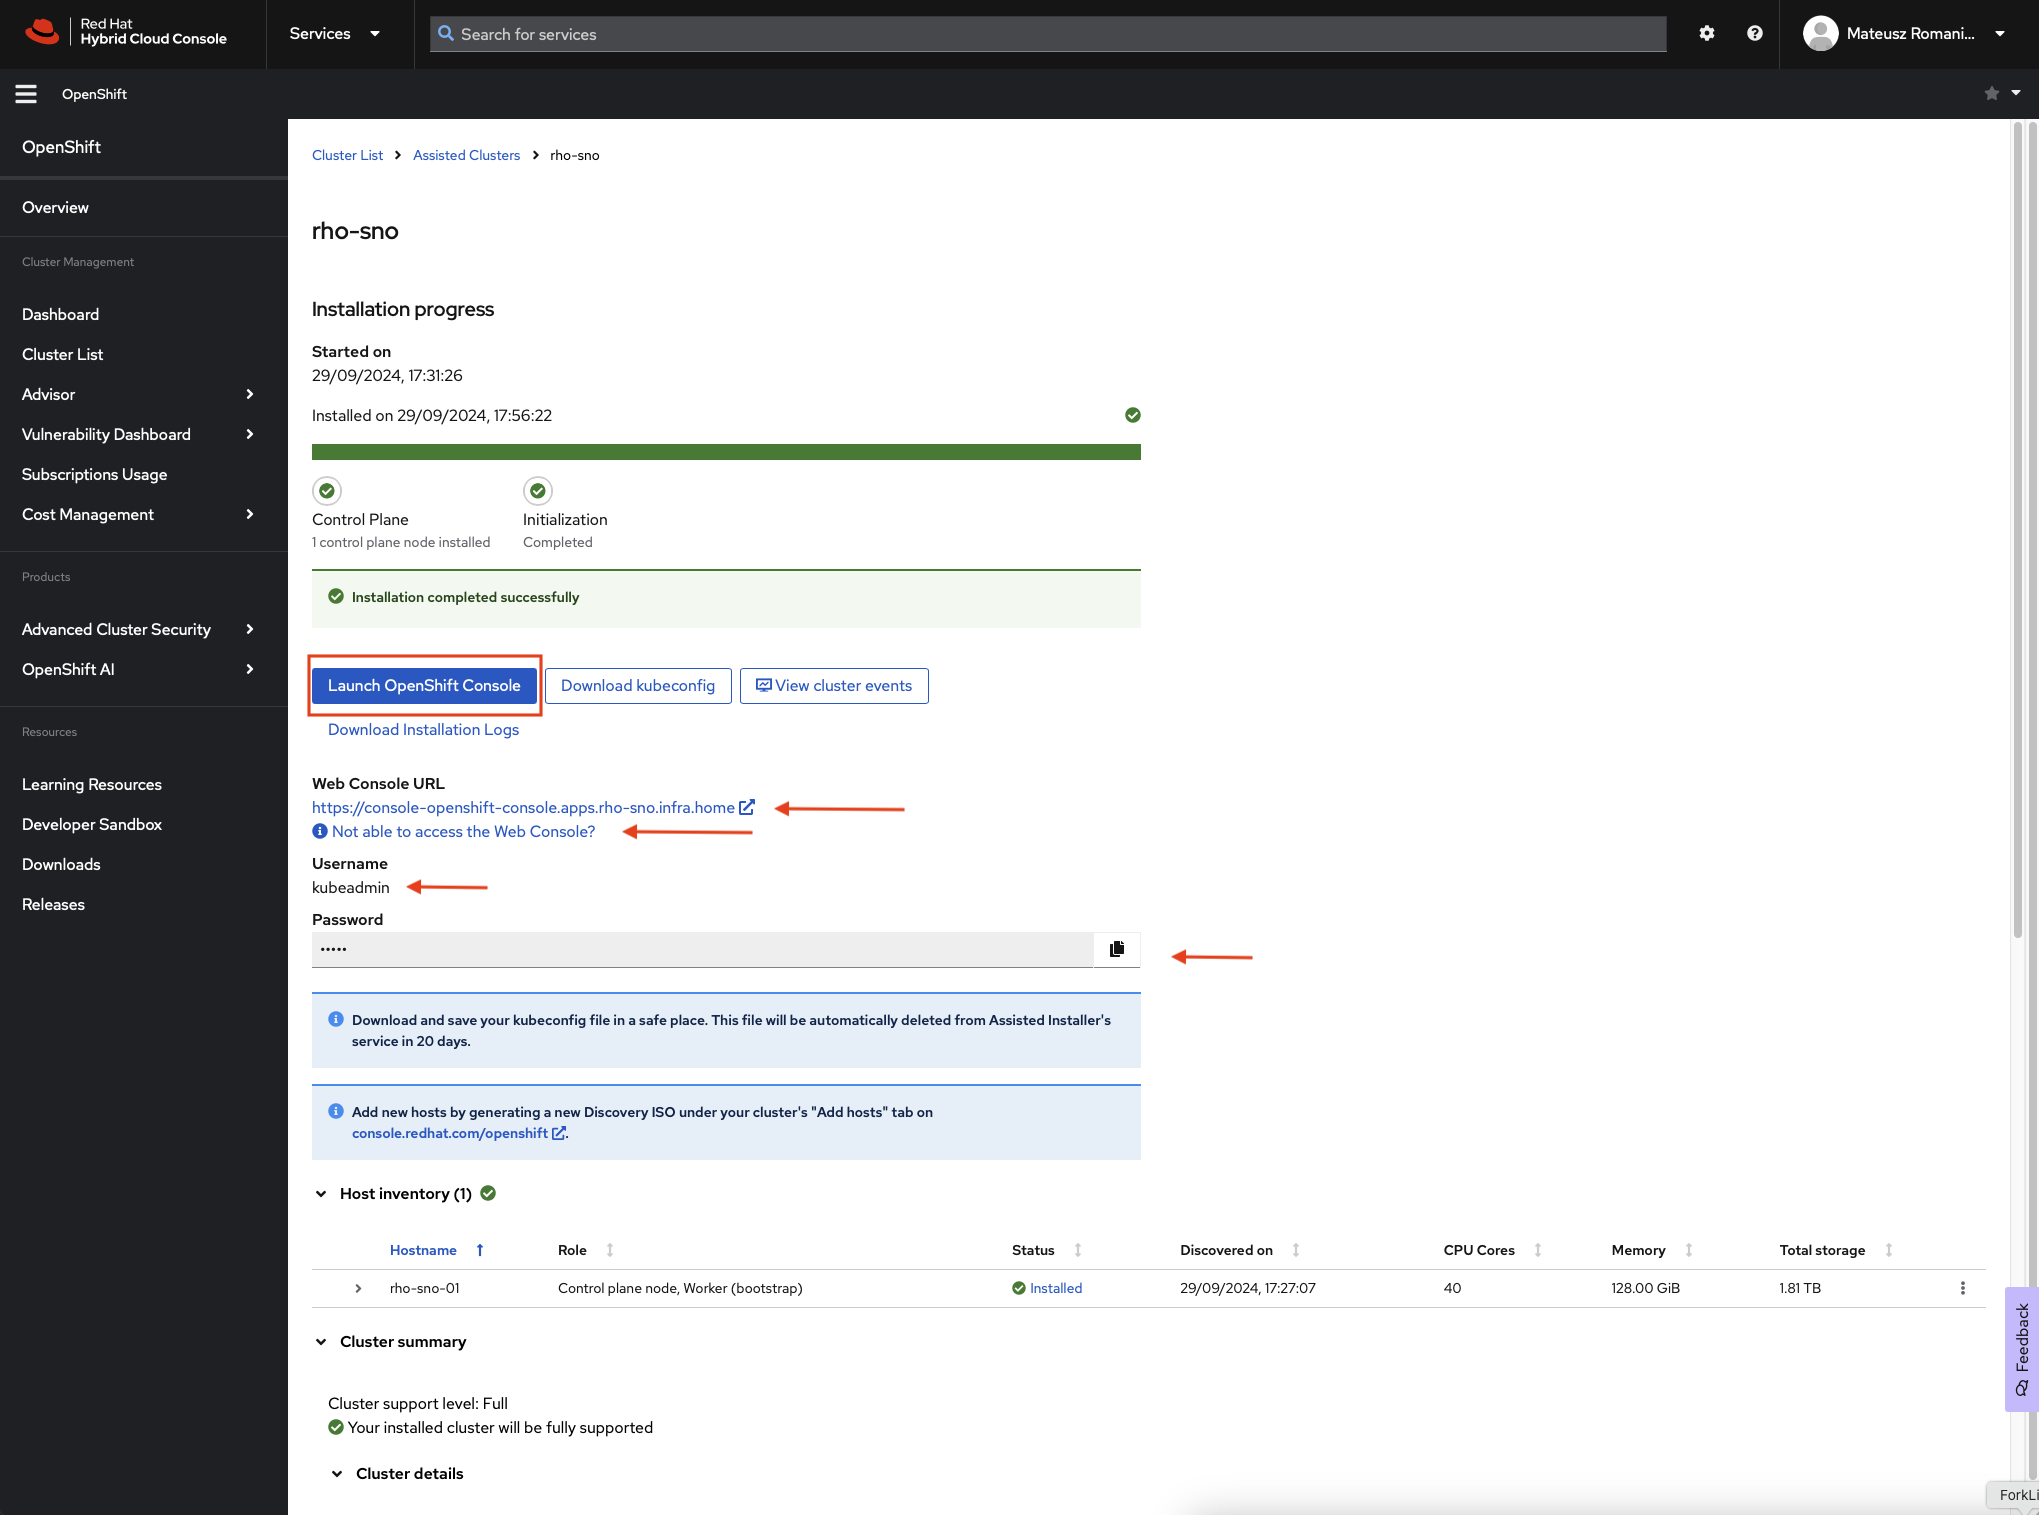
19. Cluster was deployed successfully!

3. Accessing the OpenShift cluster
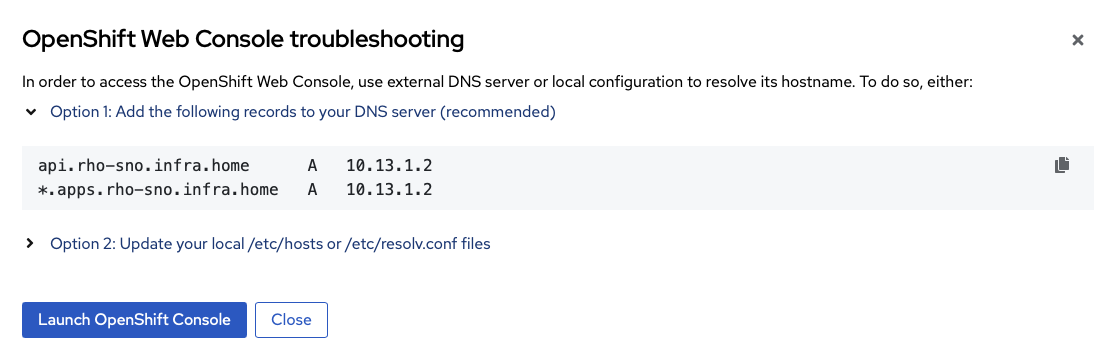
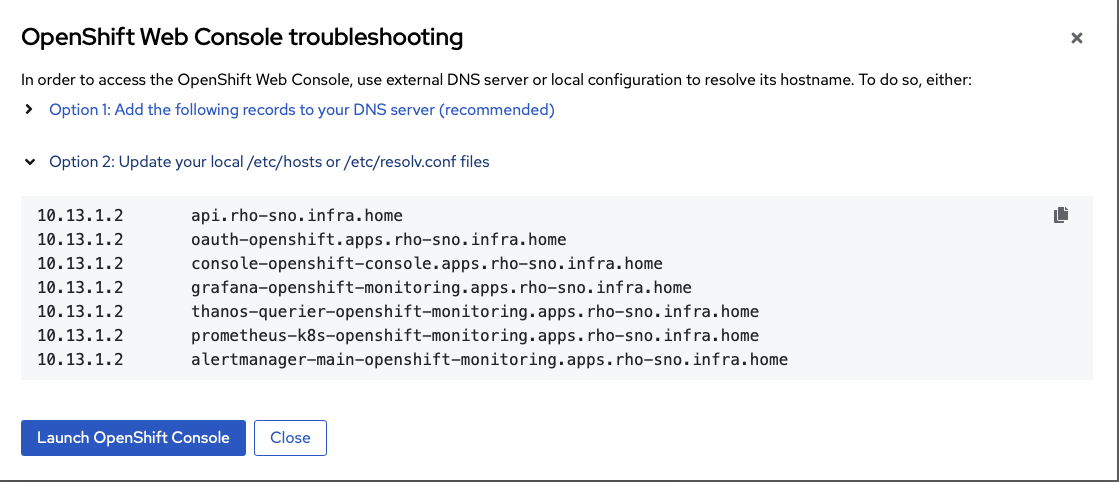
At first, remember to add entries to your local /etc/hosts file. You can find it if you click in “Not able to access the Web Console?”
Access OpenShfit using web console
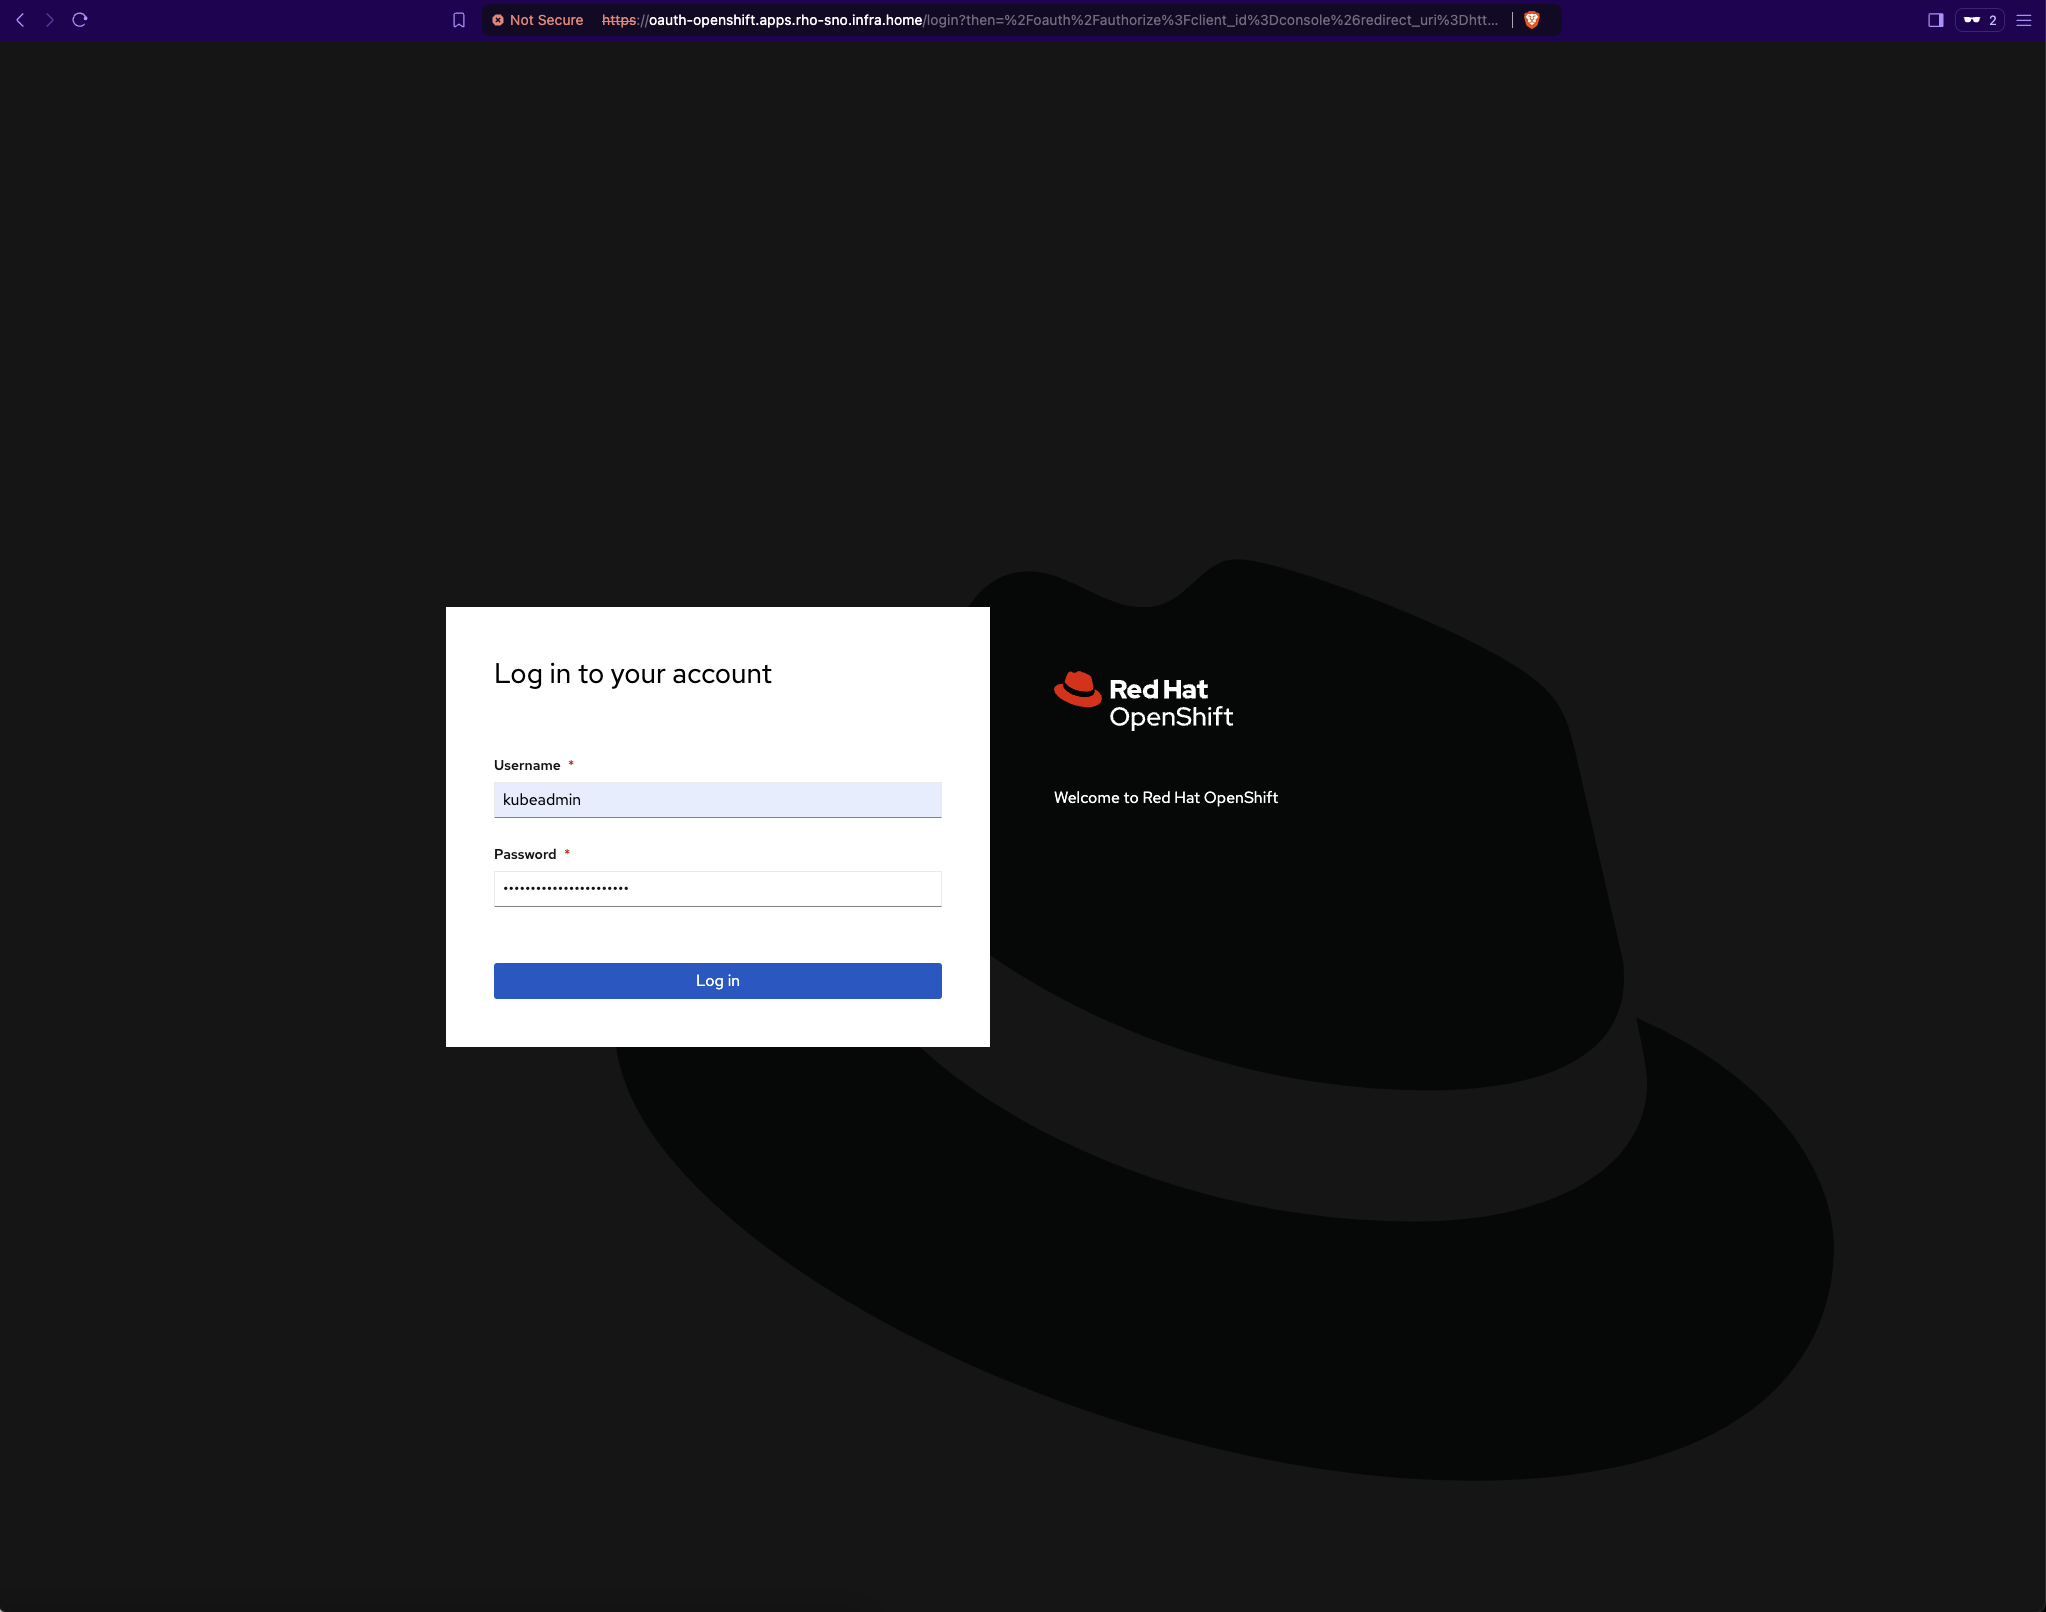
1. Click on Launch OpenShift Console or paste in the browser Web Console URL.
You will be redirected to oauth-openshift.apps.<cluster-name>
Enter username kubeadmin and password
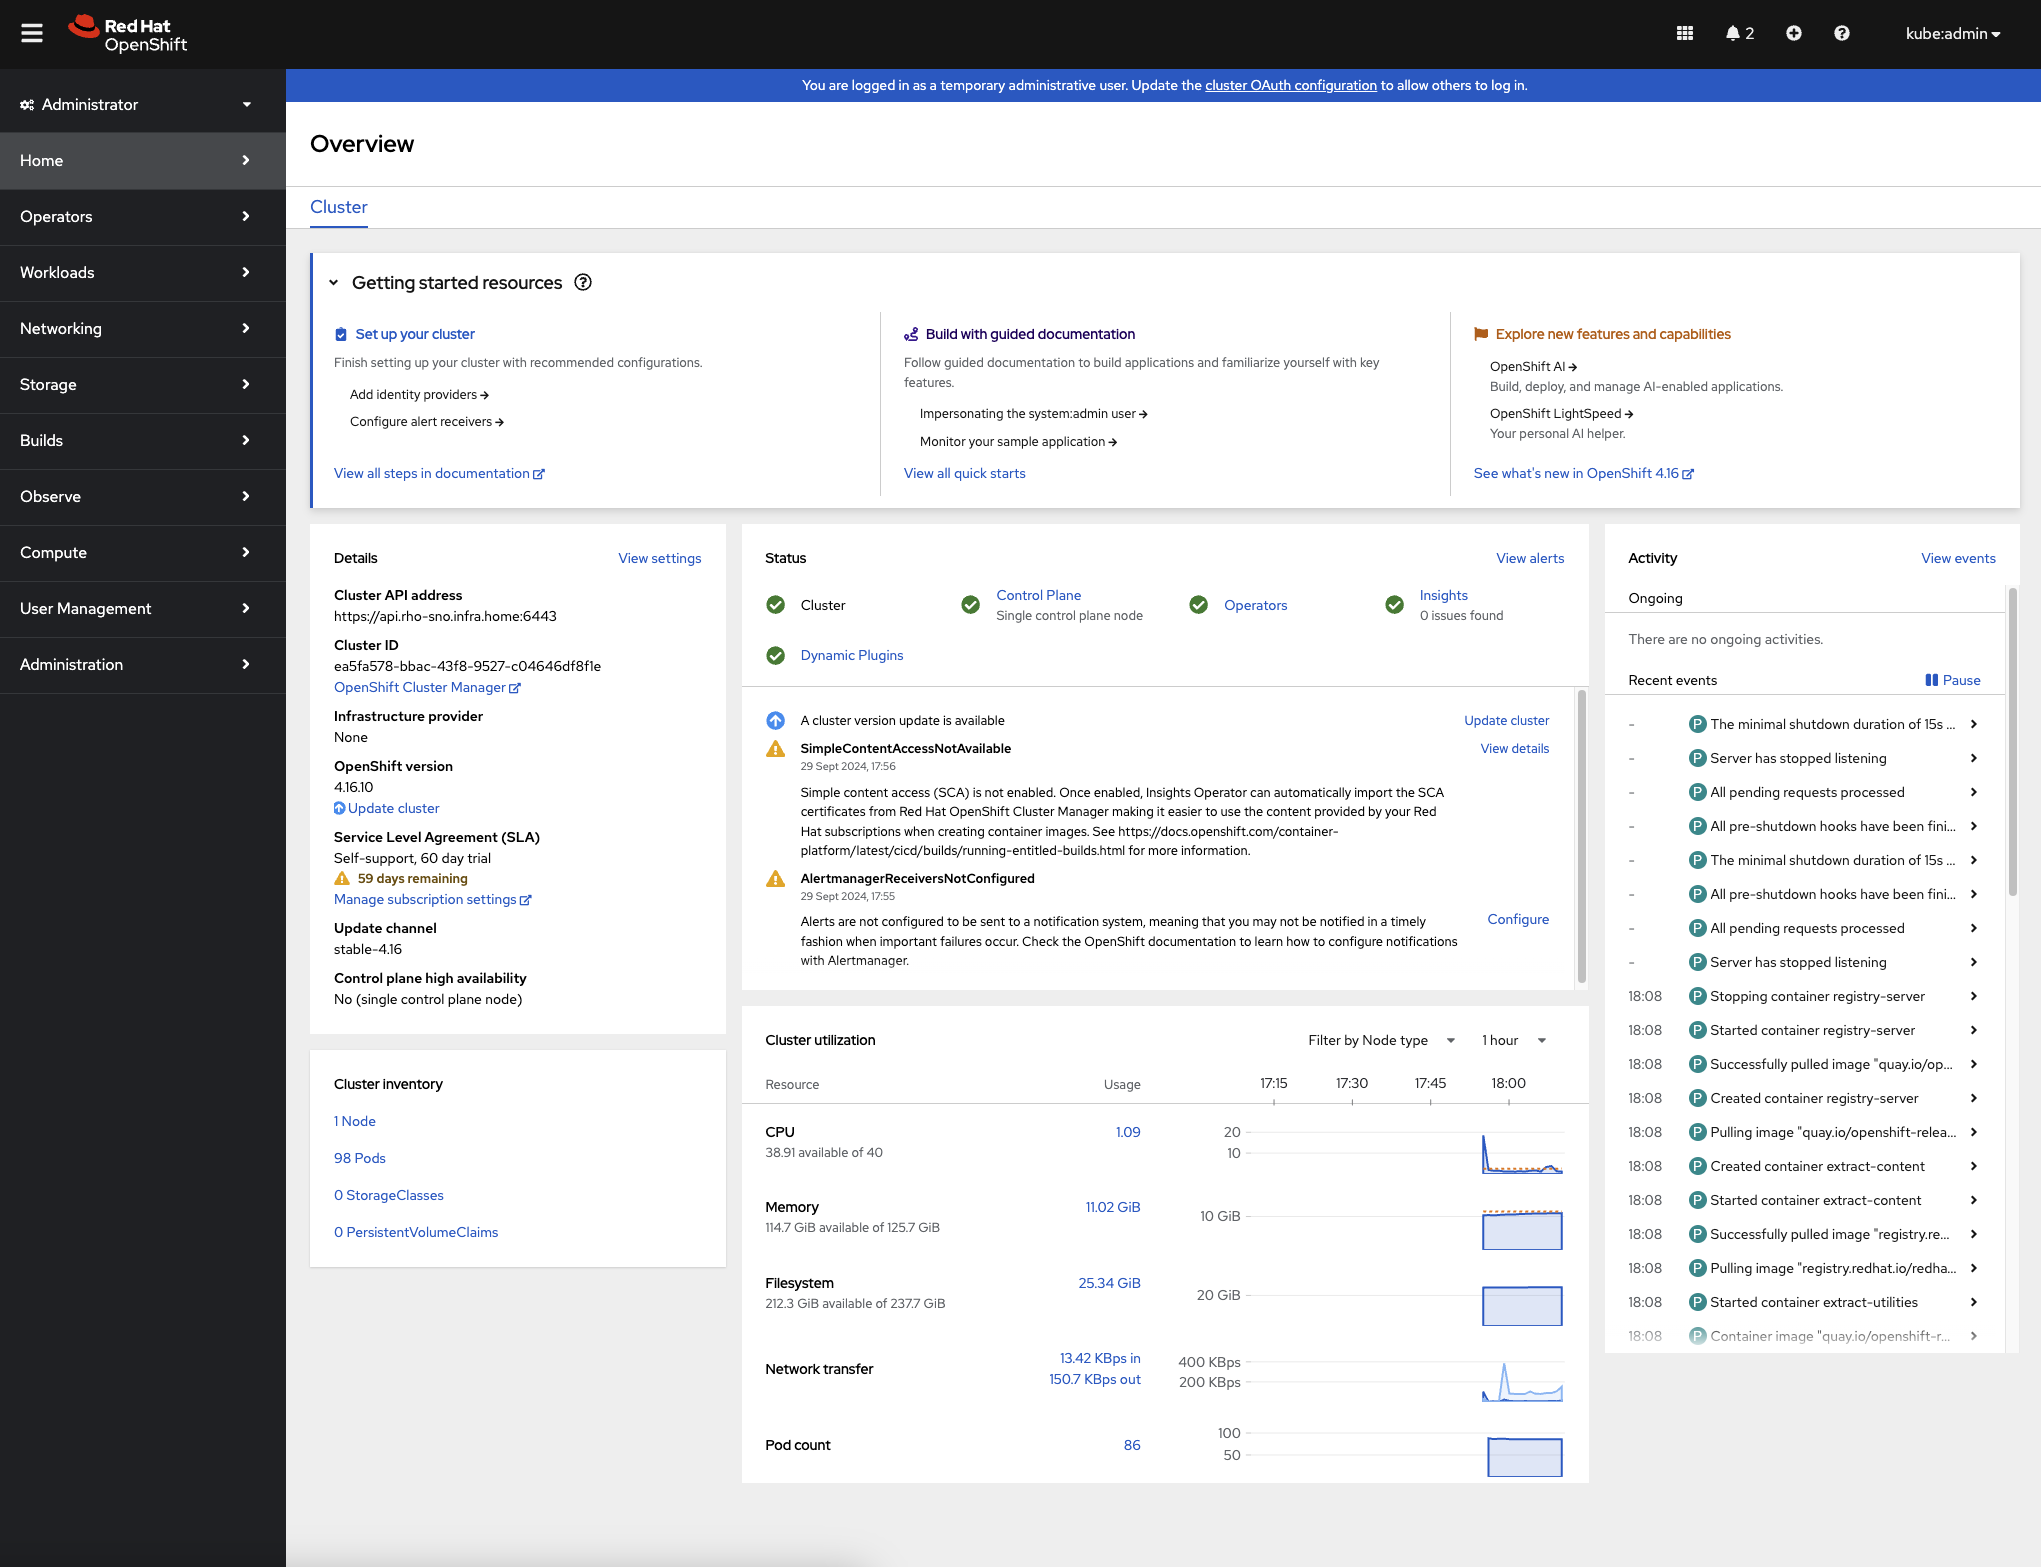
2. And you’re inside the Red Hat OpenShift cluster.
Access OpenShfit using terminal
Remember, to use oc commands, you need to install oc binary.
– Download binary https://mirror.openshift.com/pub/openshift-v4/clients/oc/latest/ for your operating system and architecture.
– Unpack the archive with a command: tar xvf <file>
– Place the oc binary in a directory that is on your PATH
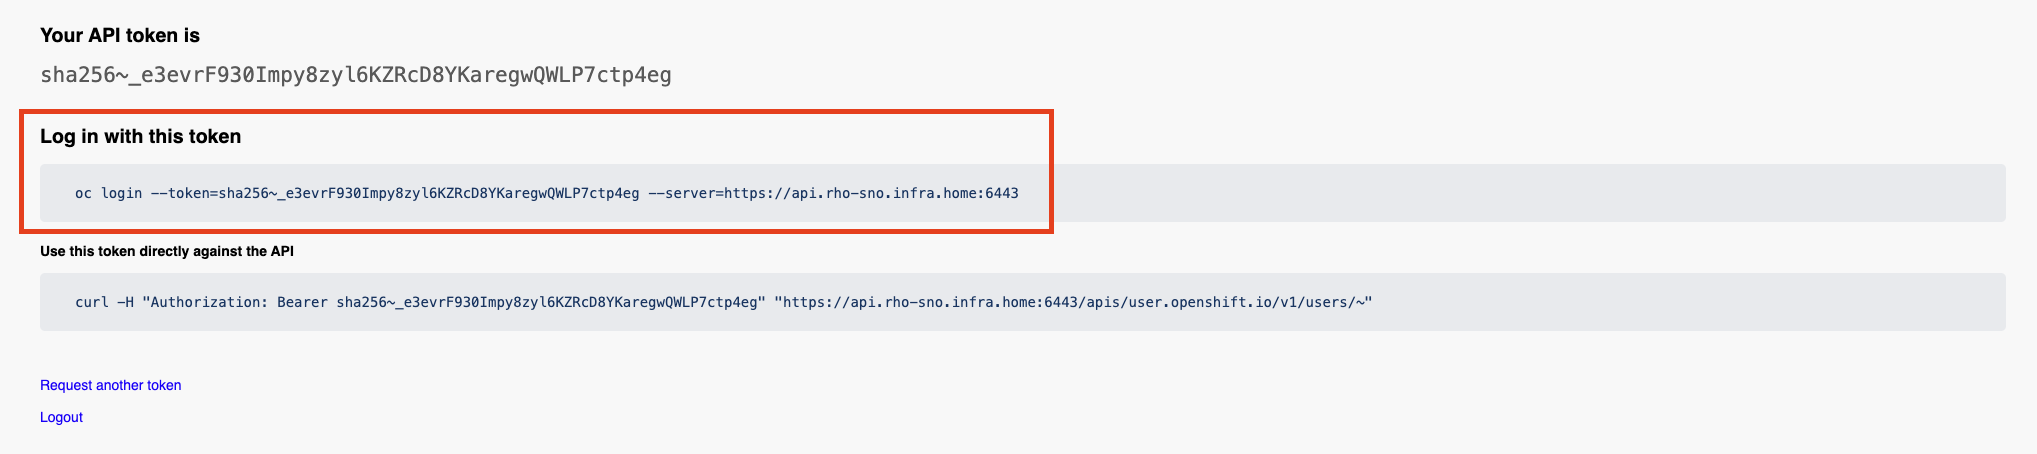
1. If you want to access the cluster from terminal, click in the up right up corner kube:admin and Copy login command
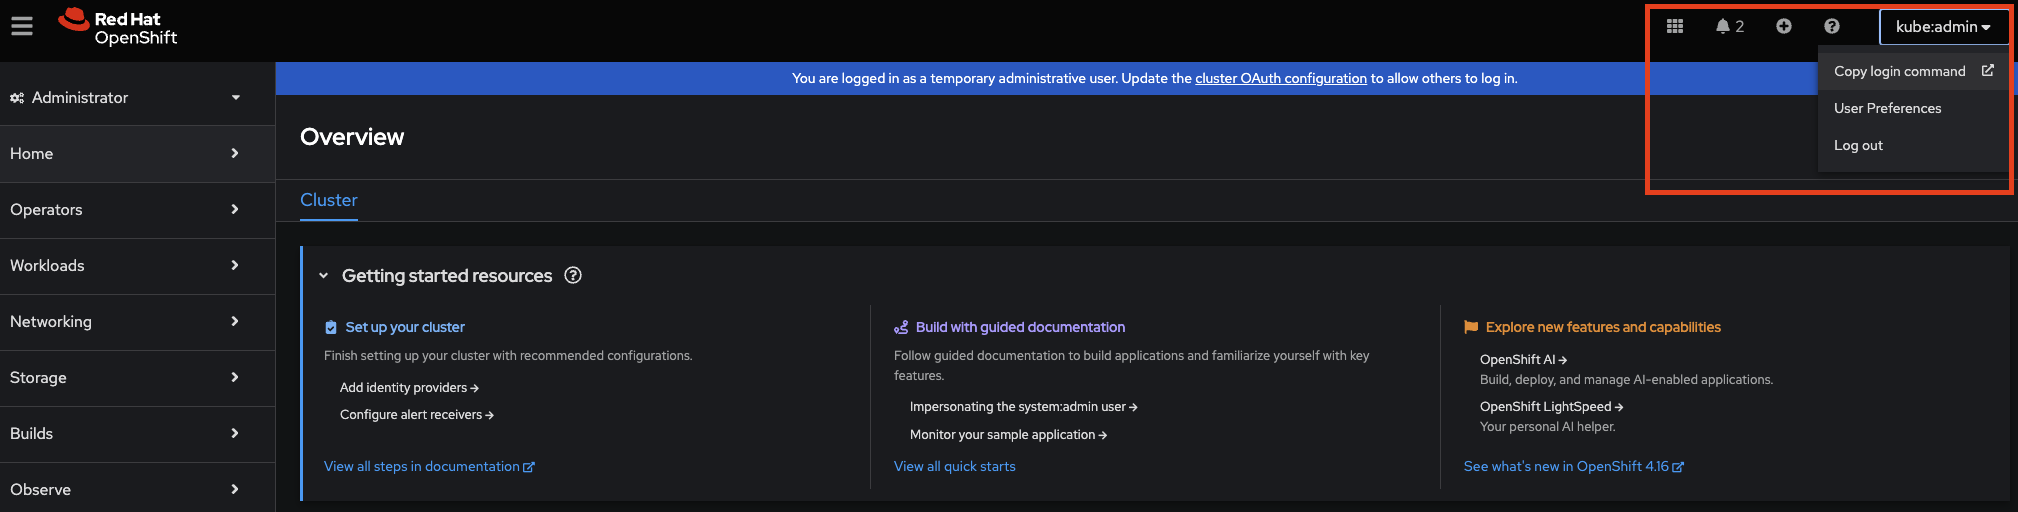
2. Click Display Token

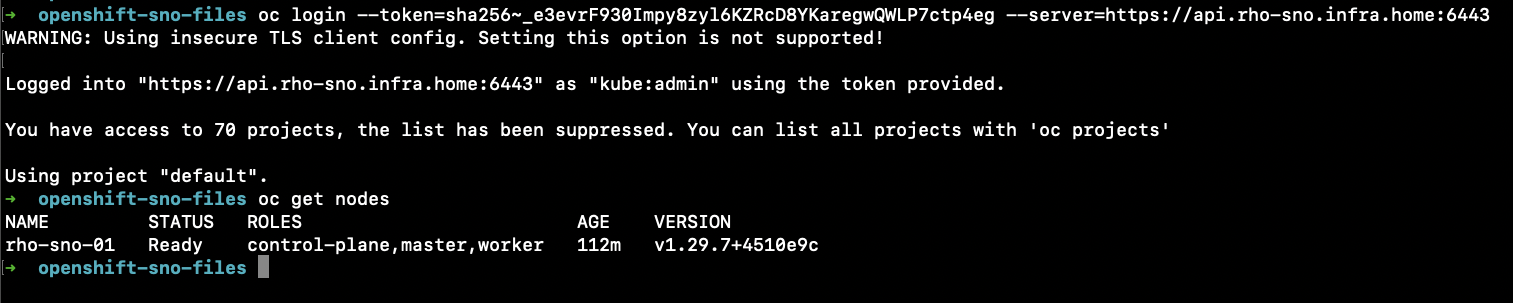
3. Copy command from “Log in with this token” and paste to your terminal. You’re logged into the cluster.
Summary
Red Hat OpenShift was installed on a single bare metal server. It’s an initial deployment without any additional features. Simply as possible.
I hope this tutorial was helpful for you and installation runs smoothly on your environments.
If you have any questions, don’t hesitate to contact with me via mail, LI, Twitter or in comments.
Link for the Red Hat OpenShift Container Platform documentation:
https://docs.openshift.com/container-platform/4.16/welcome/index.html
Keep looking at my blog, new posts are coming! There is so much more great features to explore 😉


One Comment