Red Hat OpenShift Virtualization is a feature integrated into the Red Hat OpenShift platform acting as Operator. It’s designed to allow organizations to run and manage both: virtual machines (VMs) and container workloads side by side. This capability provides a modern approach to infrastructure management, enabling seamless migration and operation of traditional VM workloads within a cloud-native environment.
In this tutorial, I will show how to configure OpenShfit Virtualization capabilities.
Requirements:
- Red Hat OpenShift cluster (SNO here).
Remember, SNO (Singe Node) does not support some features like: High availability, Pod disruption, Live migration and Virtual machines or templates that have an eviction strategy configured. More info in the docs.
1. Creating a StorageClass
1. Prepare a dedicated default StorageClass definition. In my case, it will be a new StorageClass using Synology CSI.
apiVersion: storage.k8s.io/v1
kind: StorageClass
metadata:
  name: synology-iscsi-storage-virtualization
  annotations:
    storageclass.kubernetes.io/is-default-class: "true"
provisioner: csi.san.synology.com
parameters:
   dsm: Synology_NAS_IP_Address
   location: '/volume2'
   fsType: 'ext4'
   protocol: 'iscsi'
reclaimPolicy: Delete
allowVolumeExpansion: true
2. Apply a yaml file, confirm that new sc was created and is marked as default.

3. Depending on your CSI/Storage provider, you need to edit StorageProfile object. More info HERE.
Make sure to set this parameters in the spec section:
accessModes to ReadWriteOnce;
volumeMode to Filesystem.
oc edit storageprofile [default_storageclass_for_virtualization]
2. Installing OpenShift Virtualization Operator
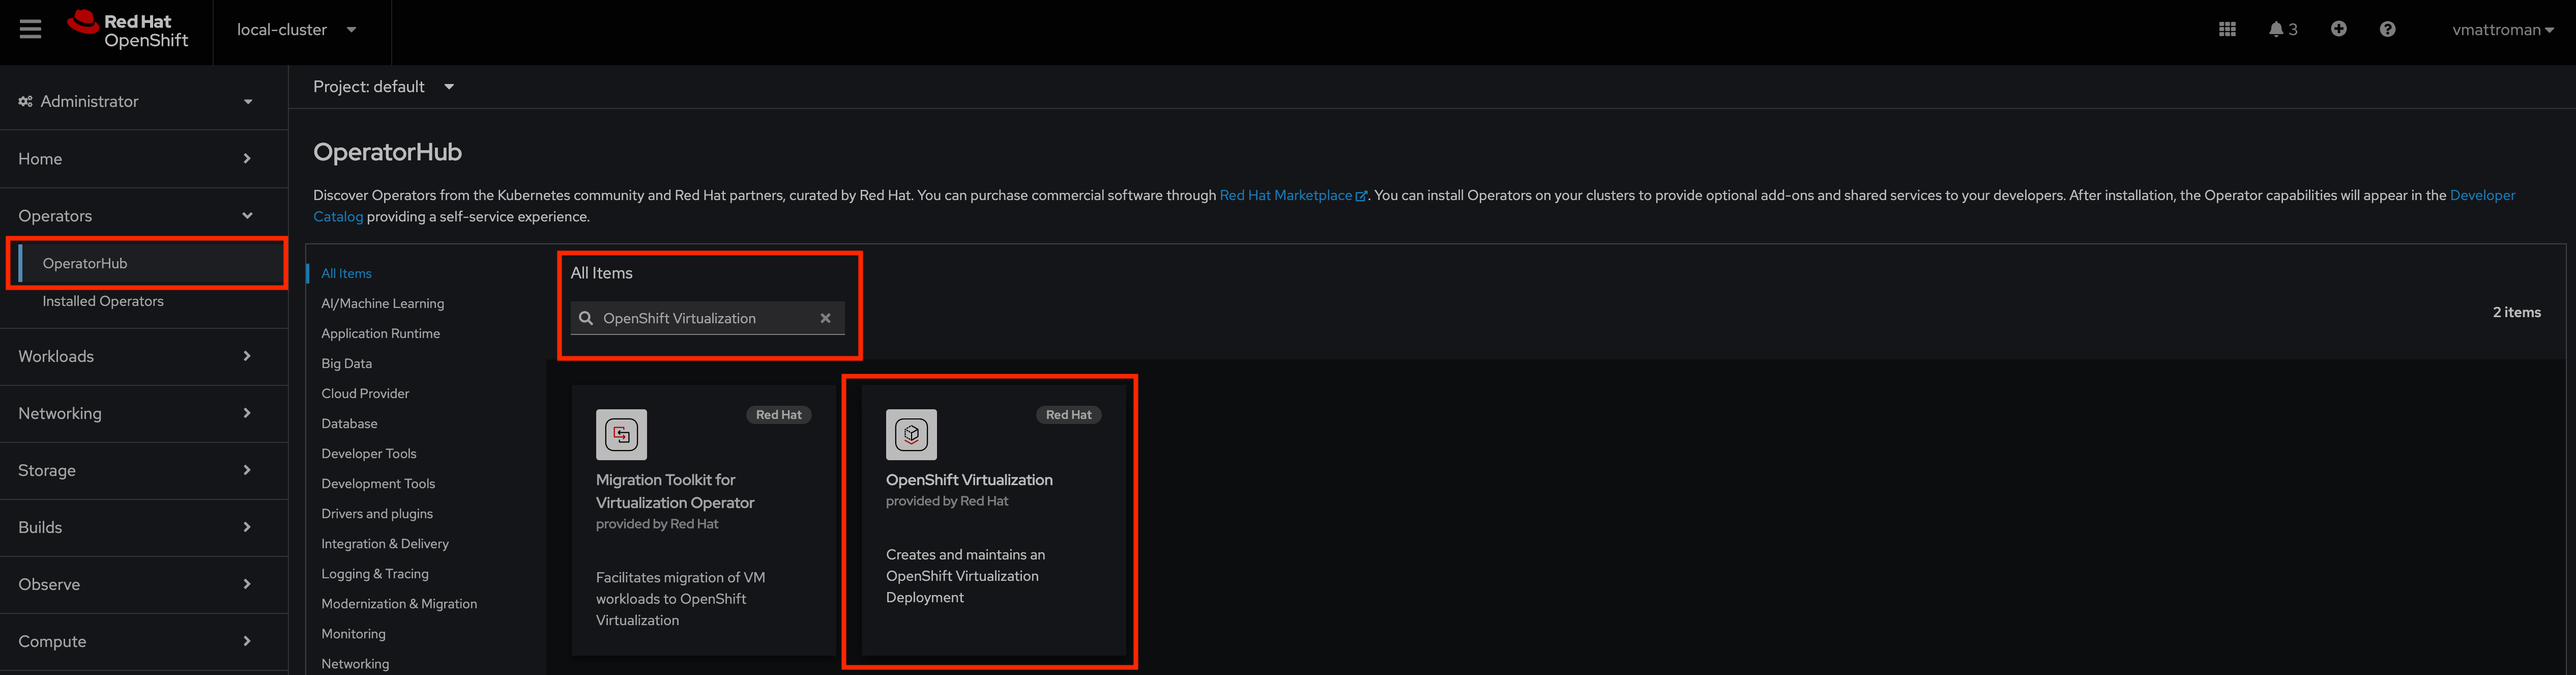
1. Log in the to OpenShift Web Console. Go to the OperatorHub and in the search box type: OpenShift Virtualization. Select OpenShift Virtualization Operator.
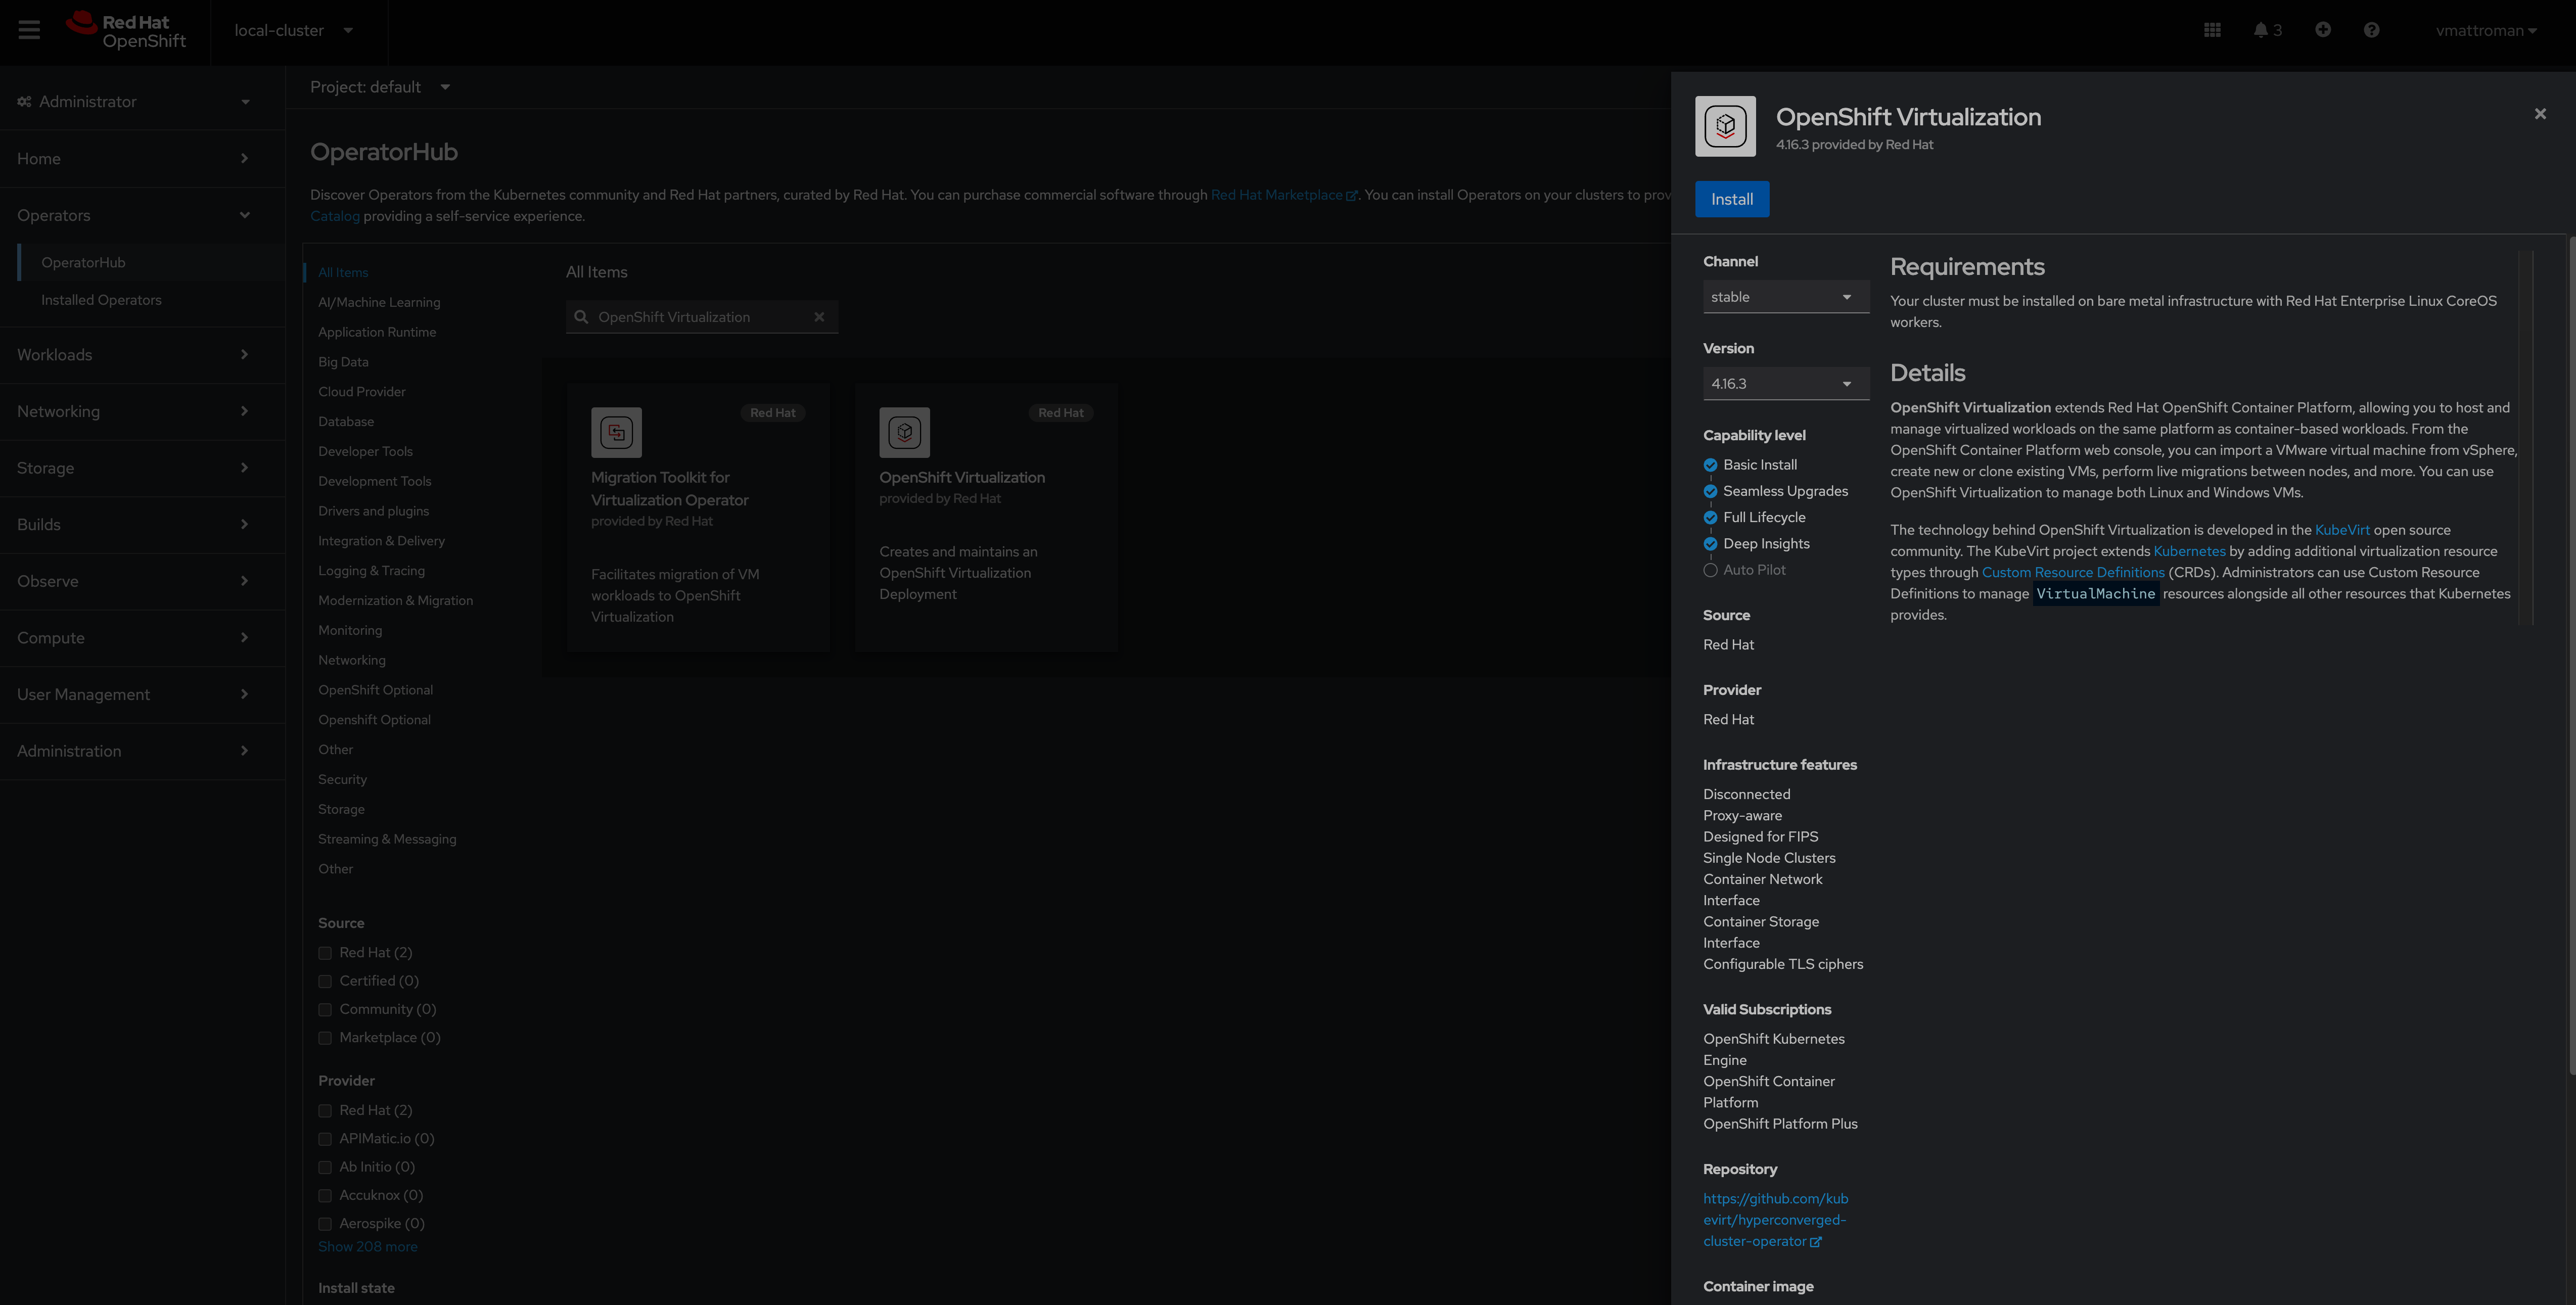
2. Review Operator details, leave a Channel and Version as is. Click Install.
3. Leave all settings without any changes and click Install button.

4. Installation in progress. Click in the “View installed Operators in Namespace openshift-cnv” to monitor progress.

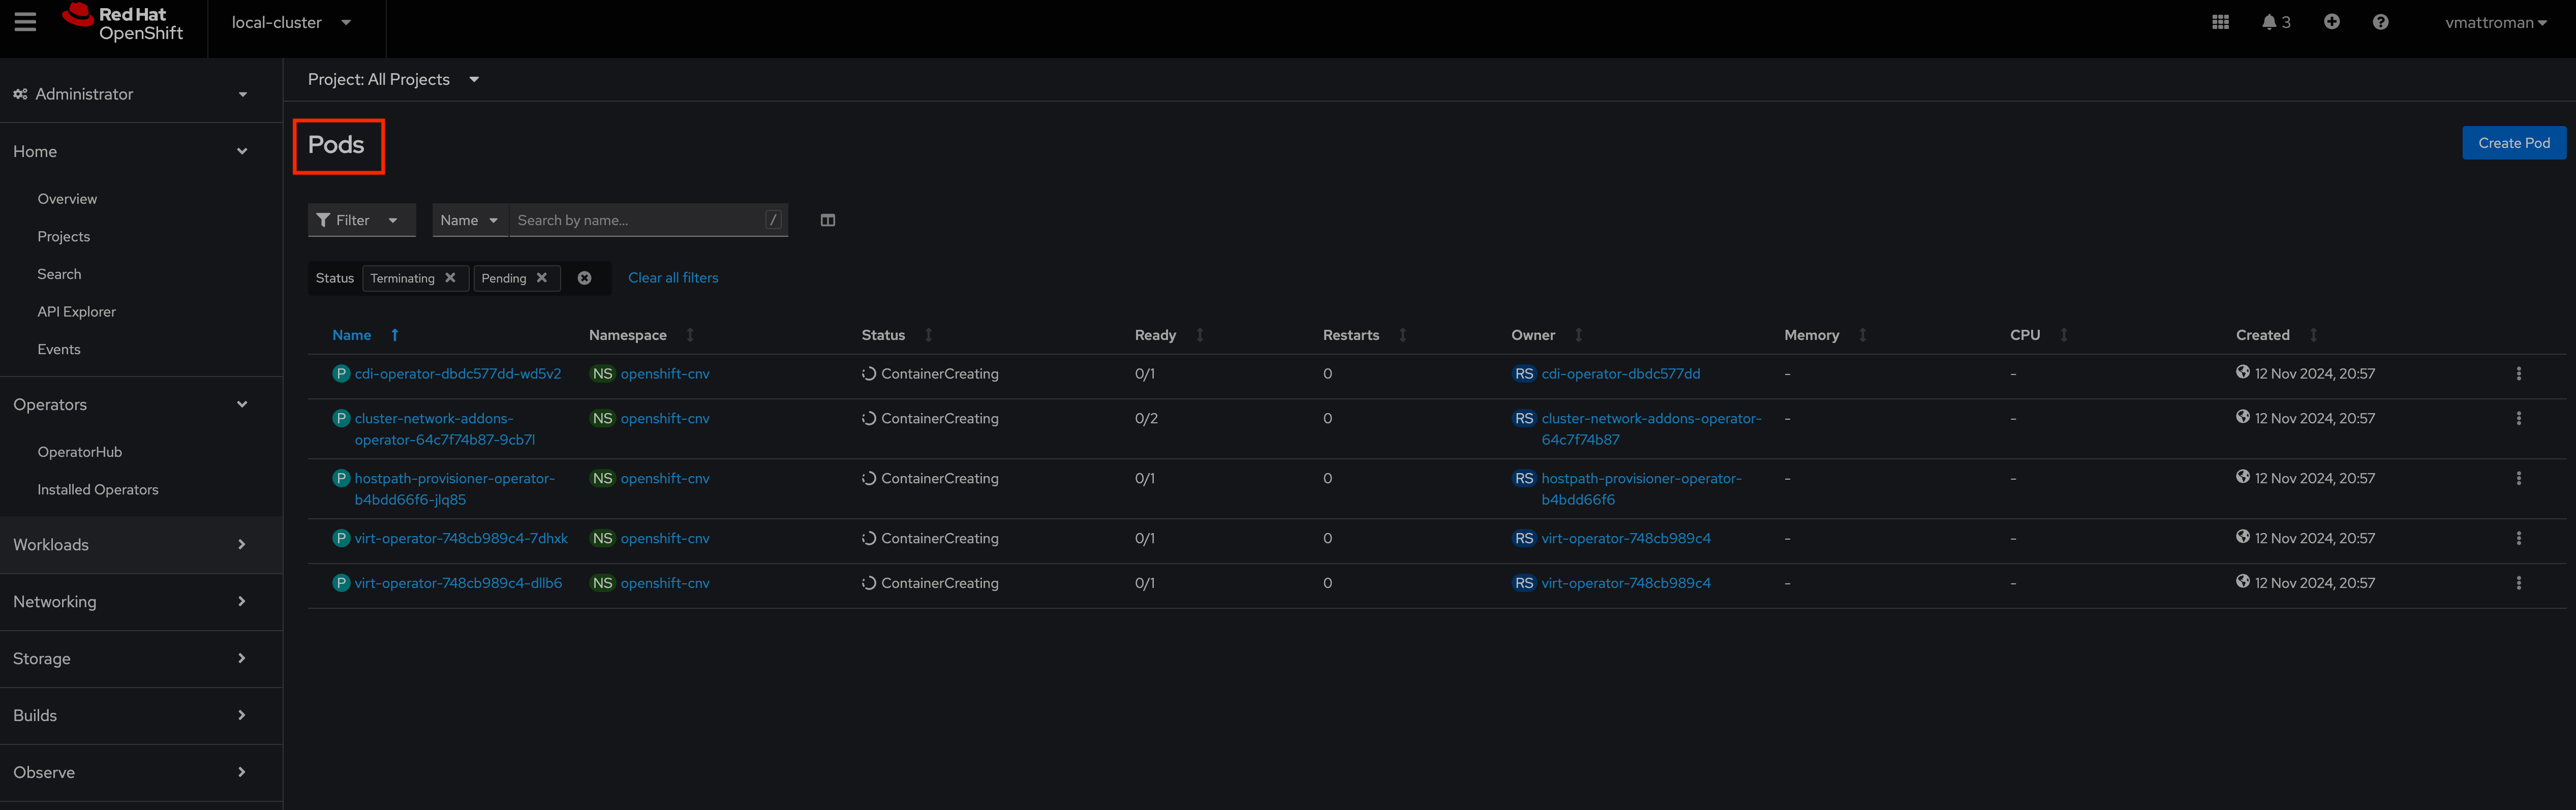
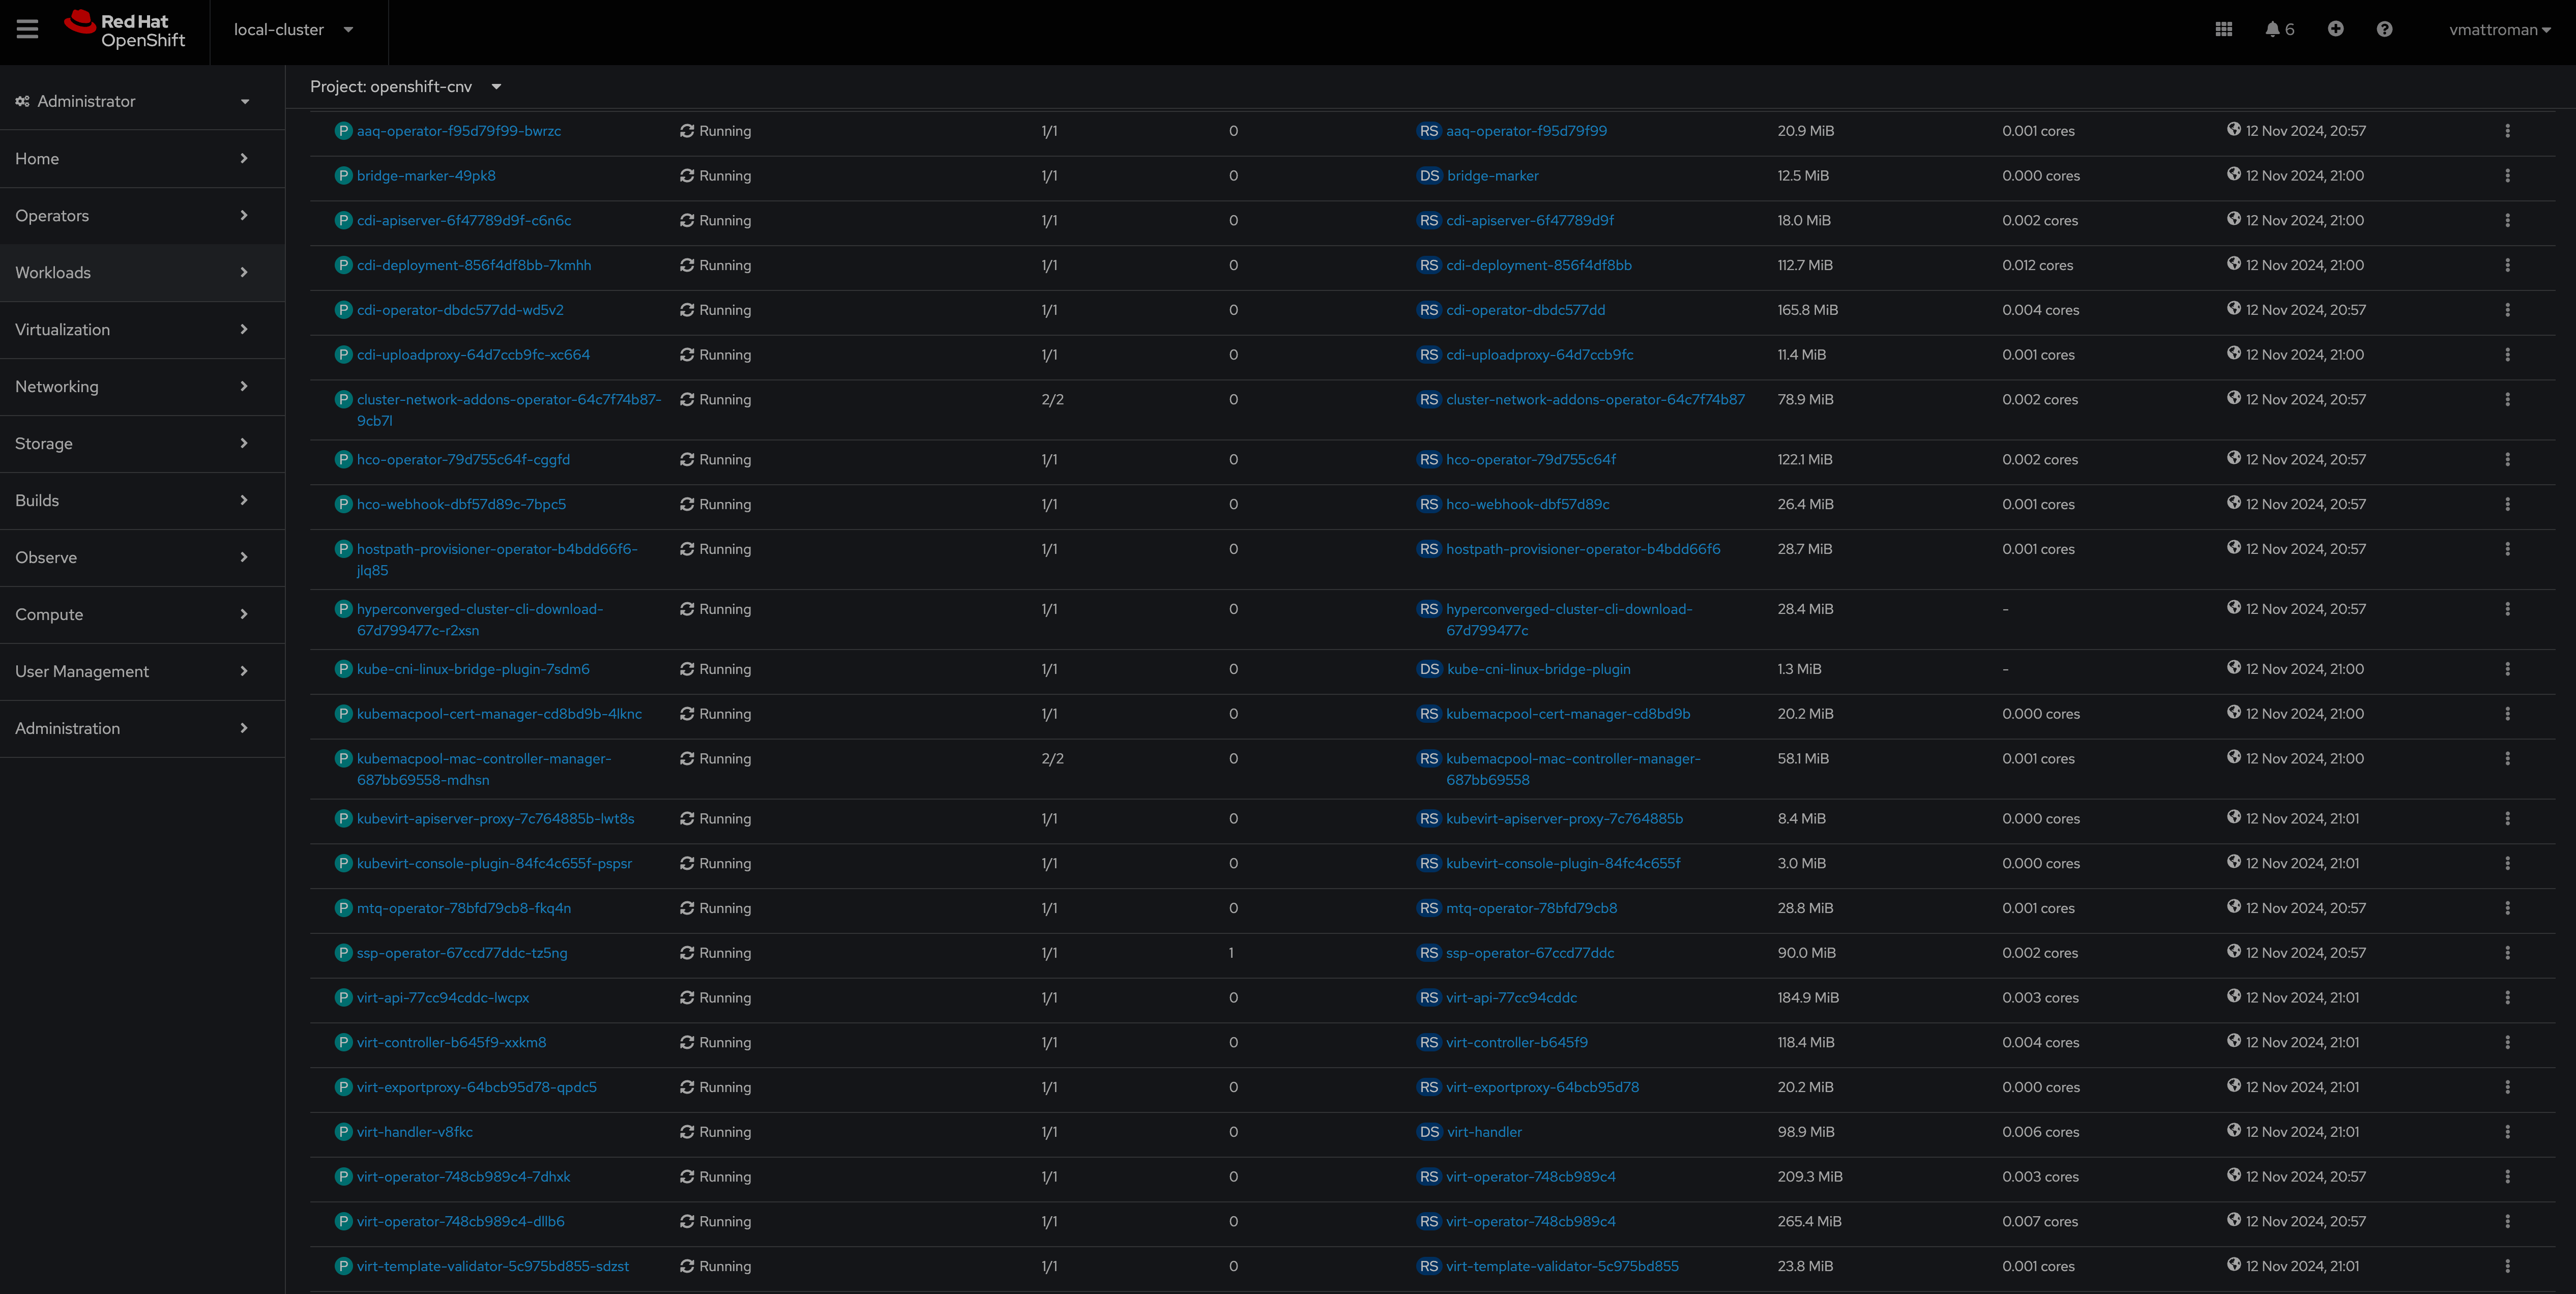
5. During the instillation, you can look in to the Pods section to monitor deployment of the new components.

6. Red Hat OpenShift Virtualization Operator was installed. Click in the name of the Operator to continue configuration.

7. In the next step, we need to create a CR named HyperConverged – click on the blue button. HyperConverged custom resource serves a configuration hub for other operators.

8. Review details and leave all settings as is. Scroll down to the end of this page and click Create button.


9. During the instillation, you can look in to the Pods section to monitor deployment of the new components.
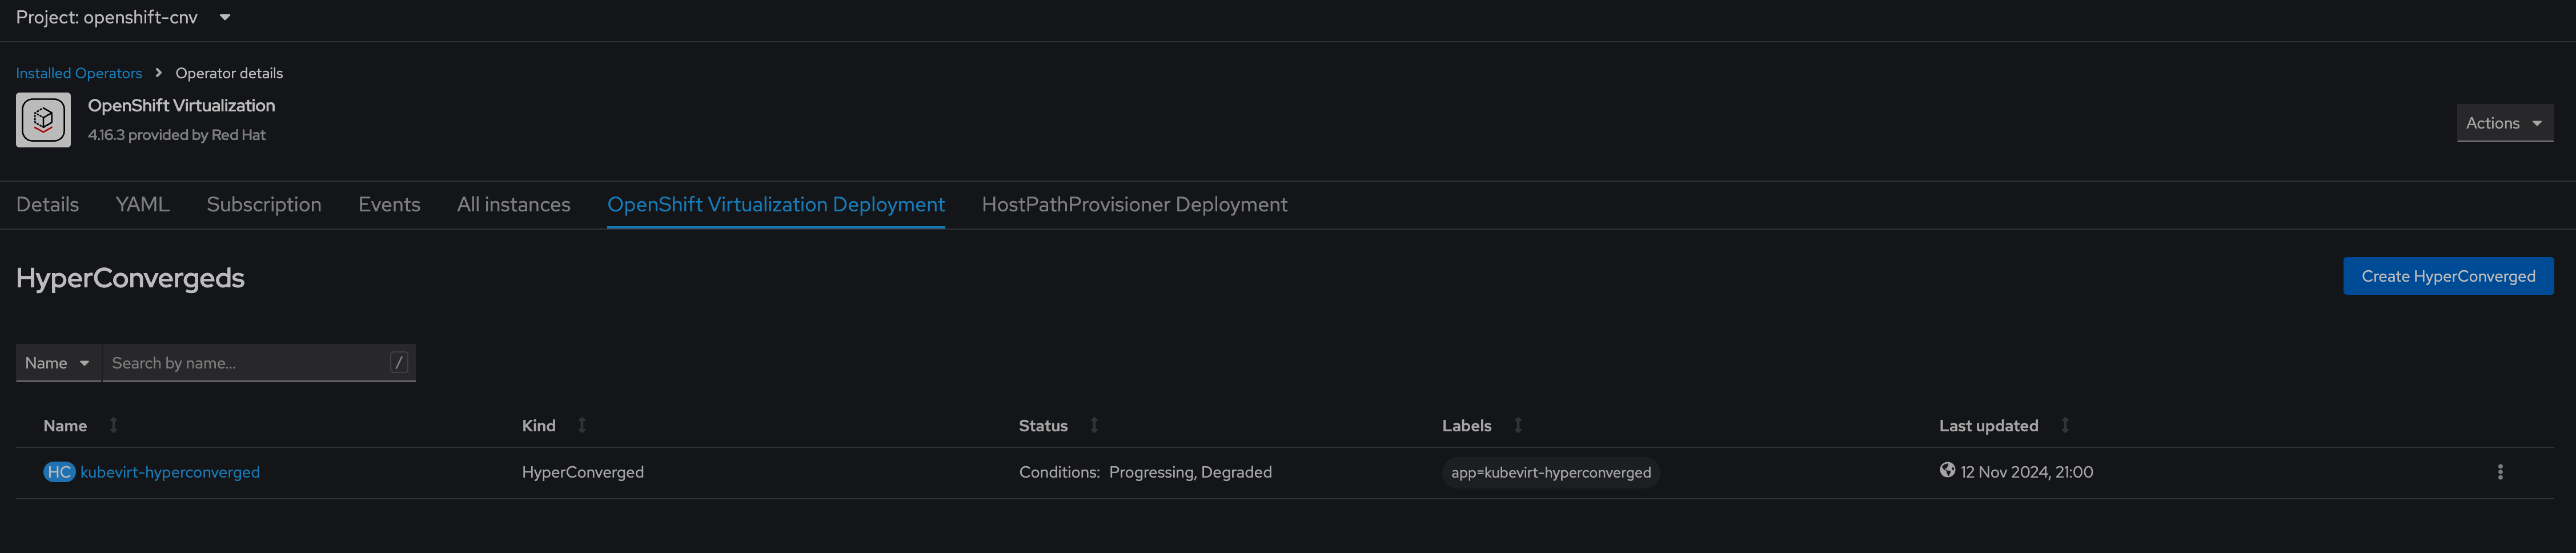
10. HyperConverged component was created.
On the left side, you can find a new Virtualization section.

3. Creating a VM from template
1. Create a dedicated Project for the Virtual Machine(s).

2. From the new Virtualization section choose VirtualMachines. Click on Create VirutalMachine From Template to start creation wizard.

3. This is the list of all available, predefined virtual machines templates. Let’s choose CentOS Stream 9 VM template.

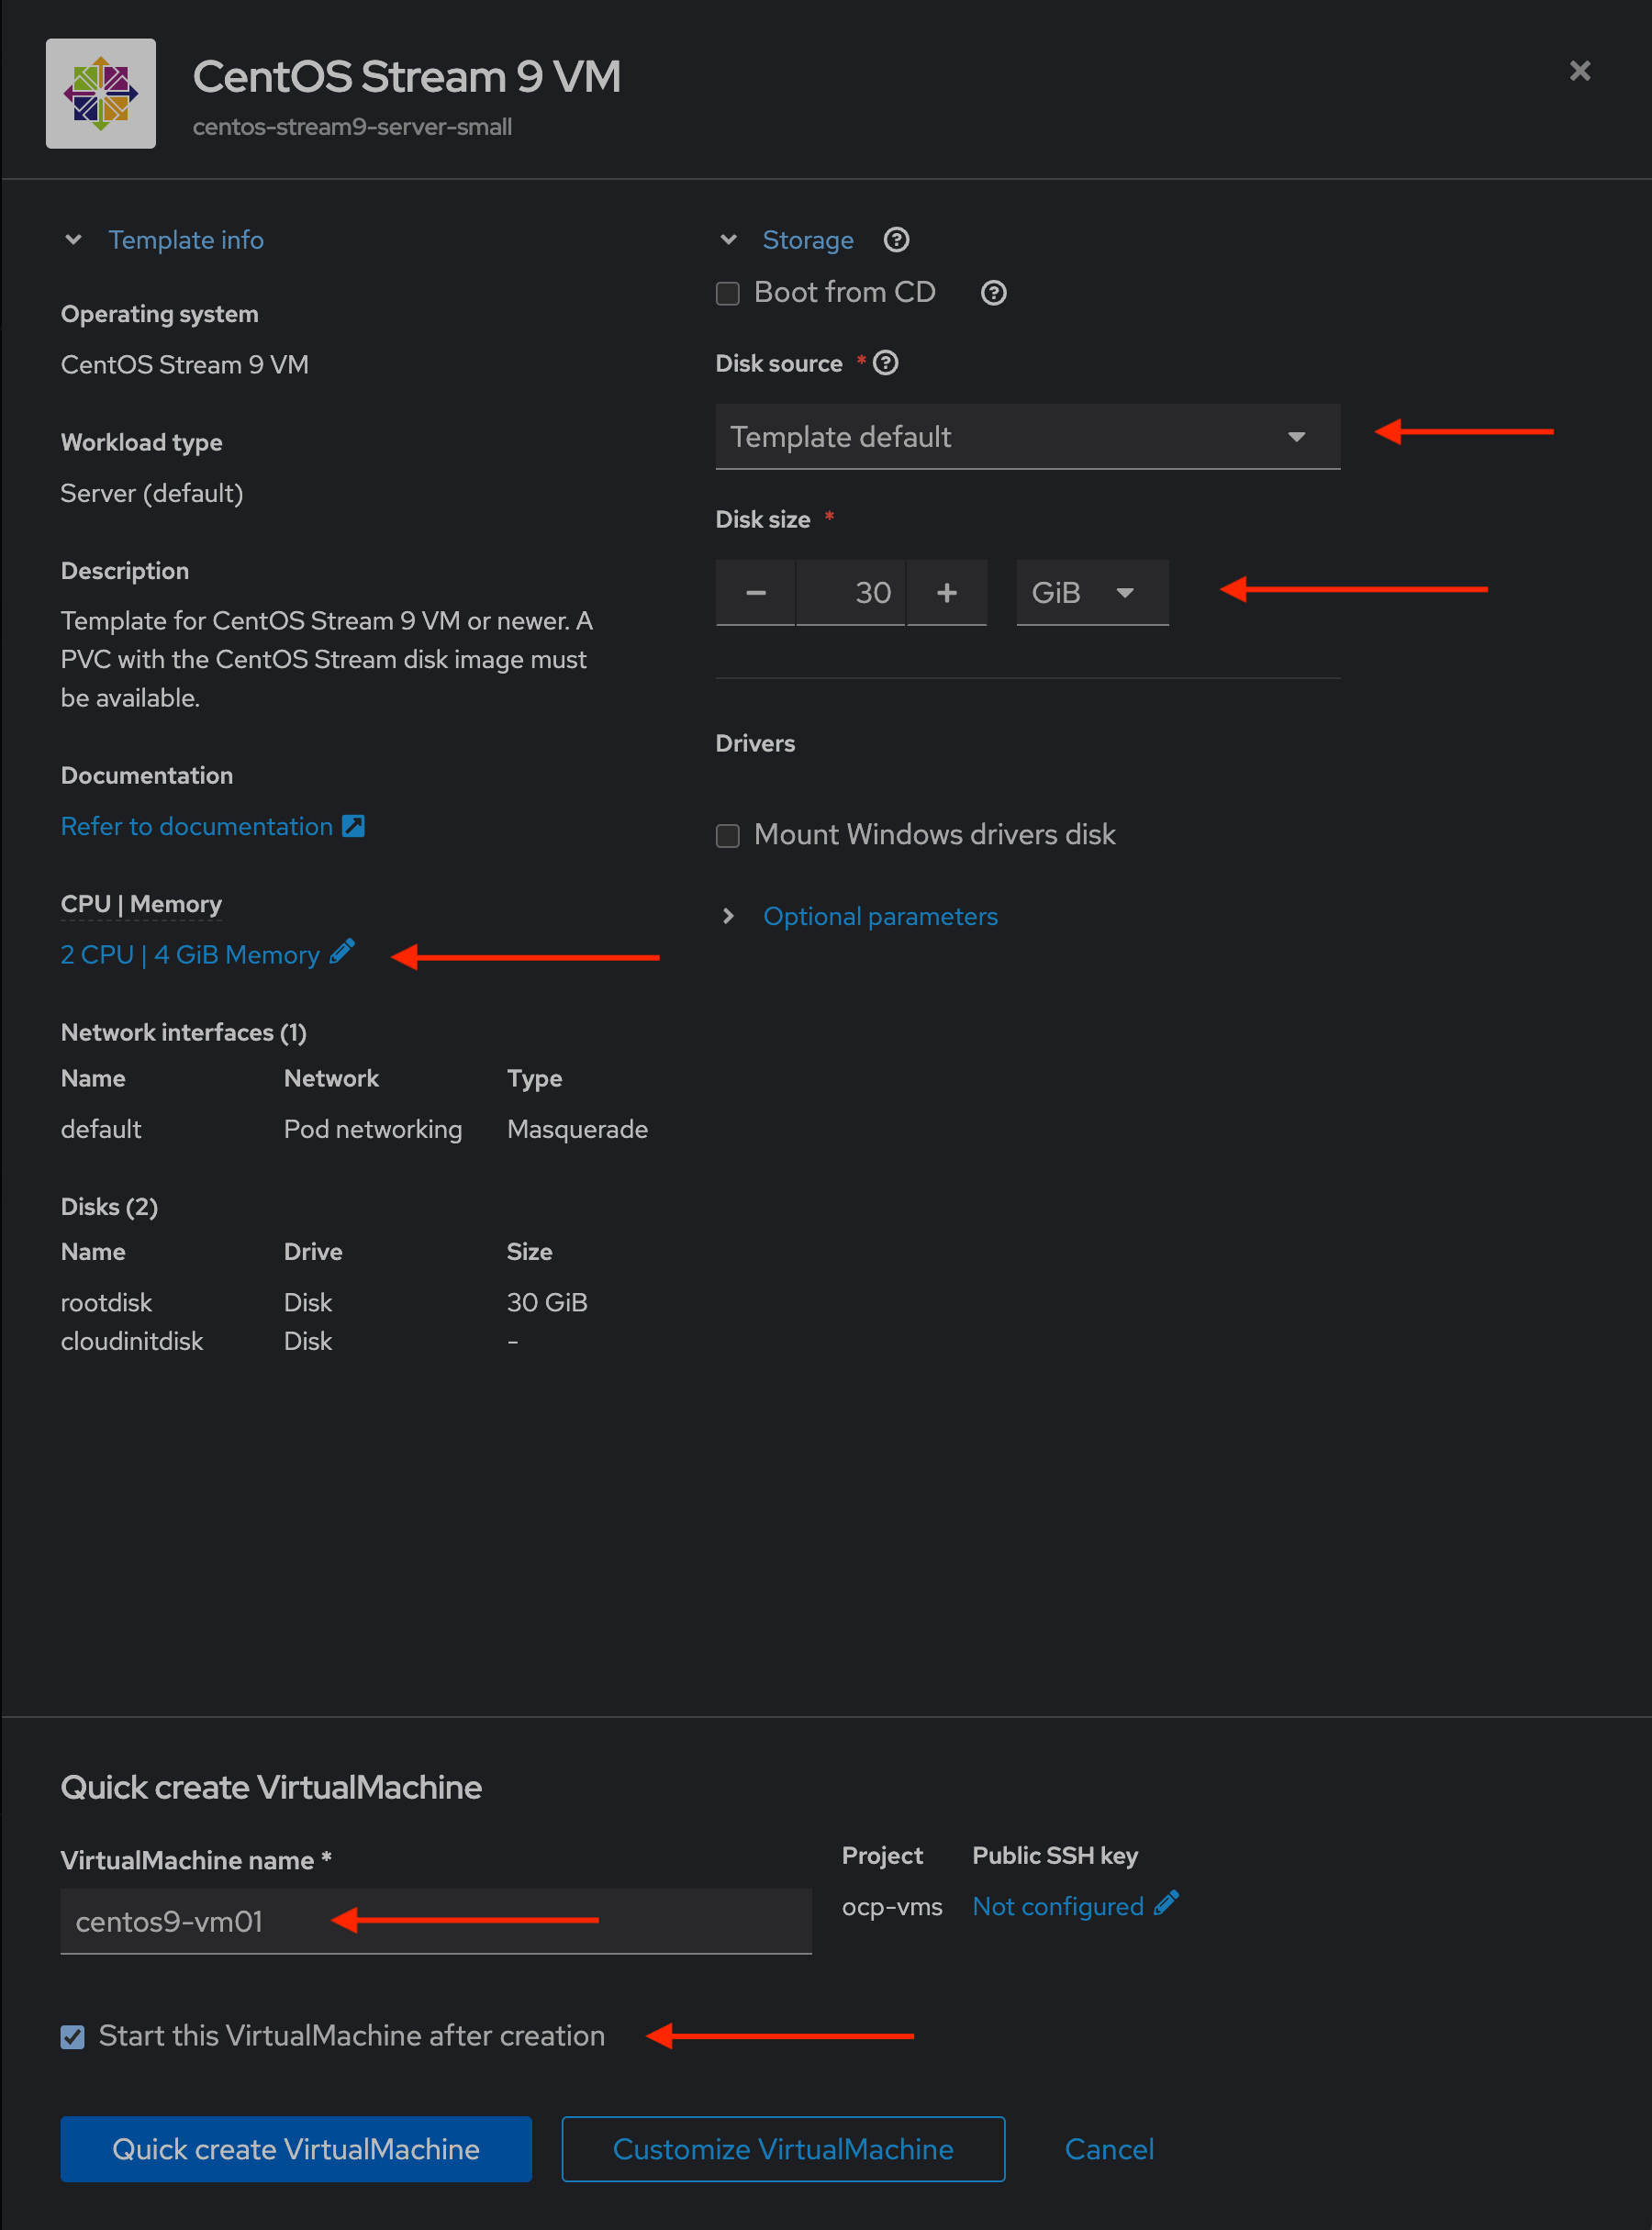
4. Here, you can configure the basic settings of the new VMs like value of the CPU/RAM, Disk Source, Disc size or a name. Here, I only increased CPU, Memory, changed a name and tick the option to automatically start VM after creation. To edit more parameters choose Customize VirtualMachine. If not, go with Quick create VirtualMachine.
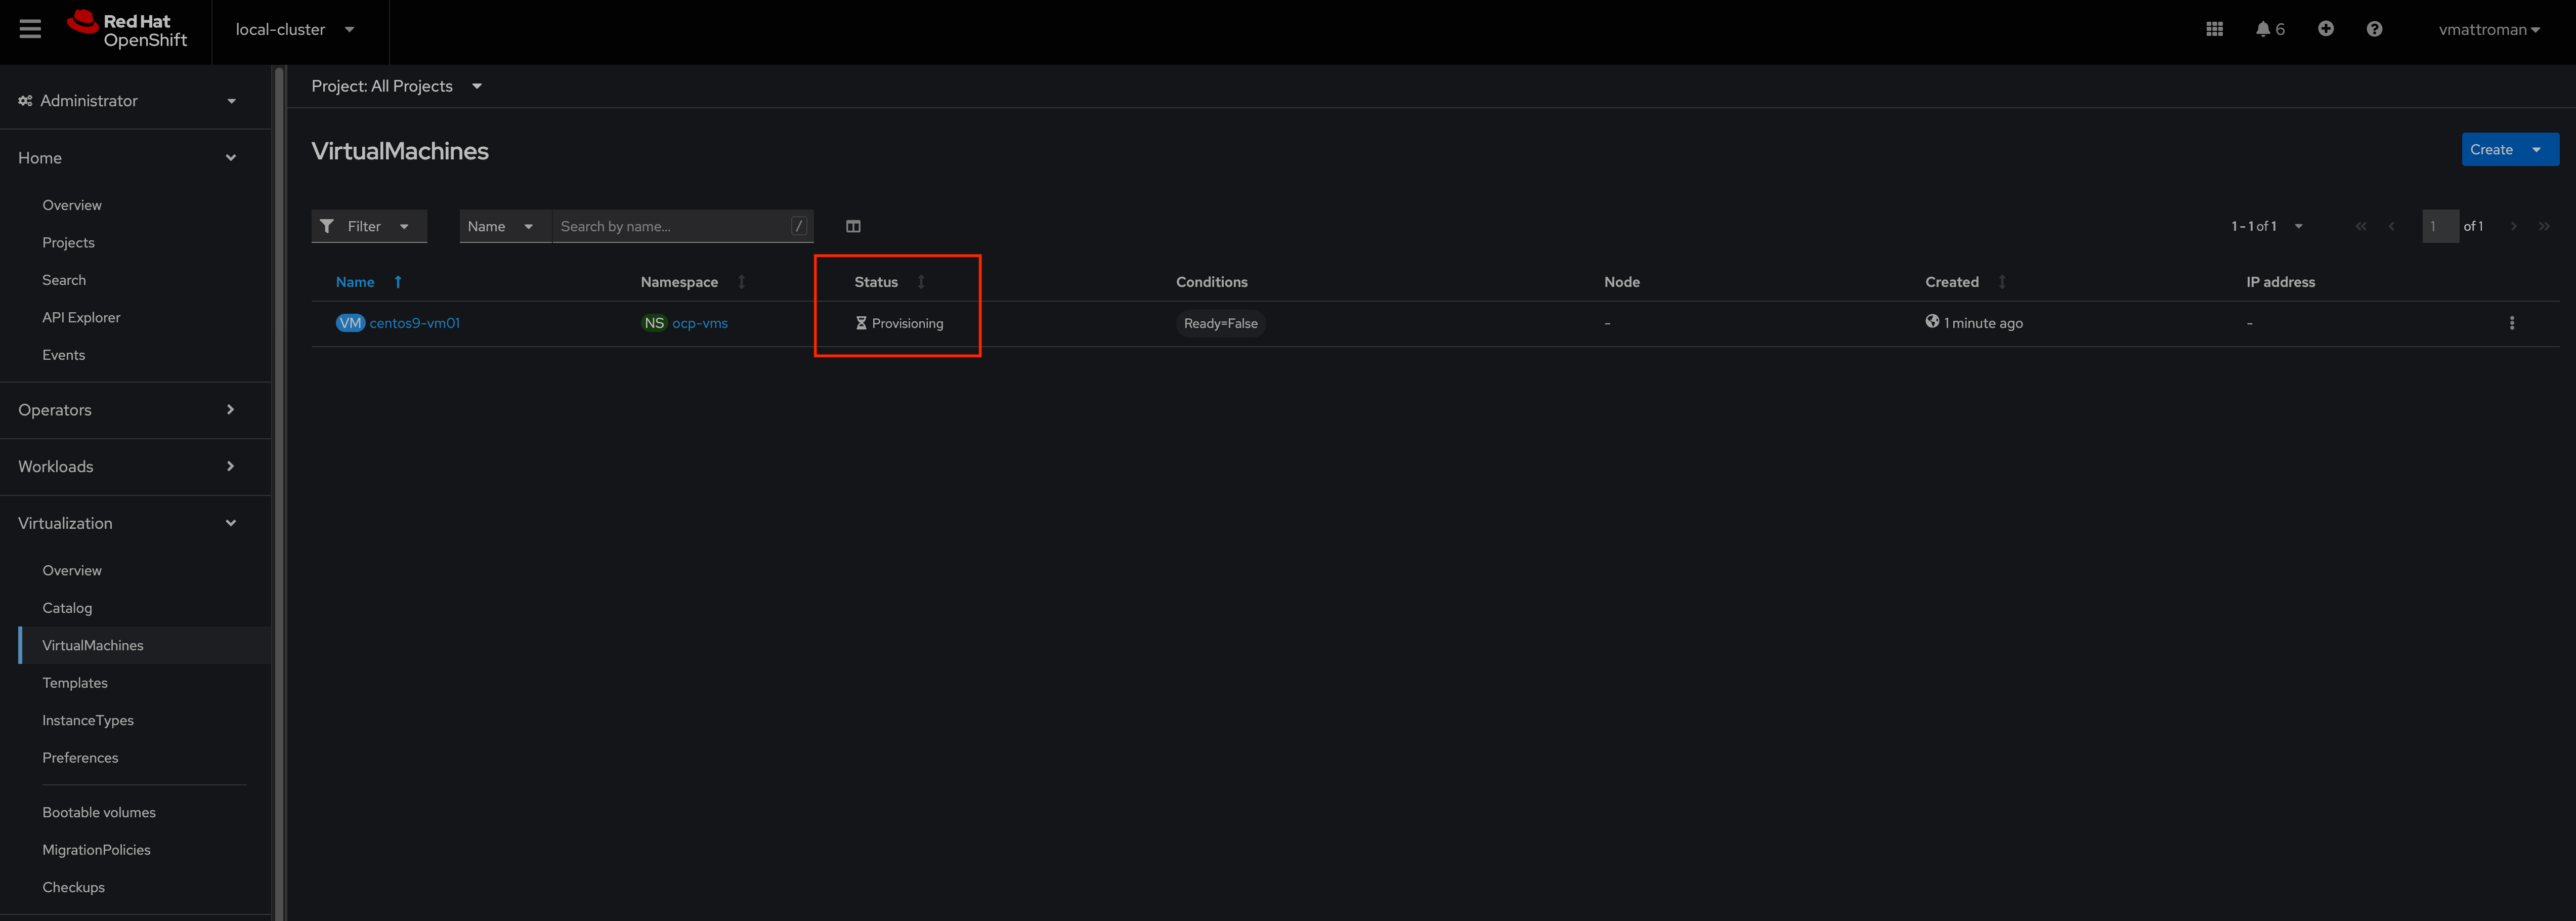
5. Provisioning VirtualMachine in progress. Look in to the VirtualMachine and PersistentVolumeClaim section. During the VM creation, tmp PVC was cloned to the new VM from the source VM template.


6. New Virtual Machine based on CentOS Stream 9 is up and ready!;)
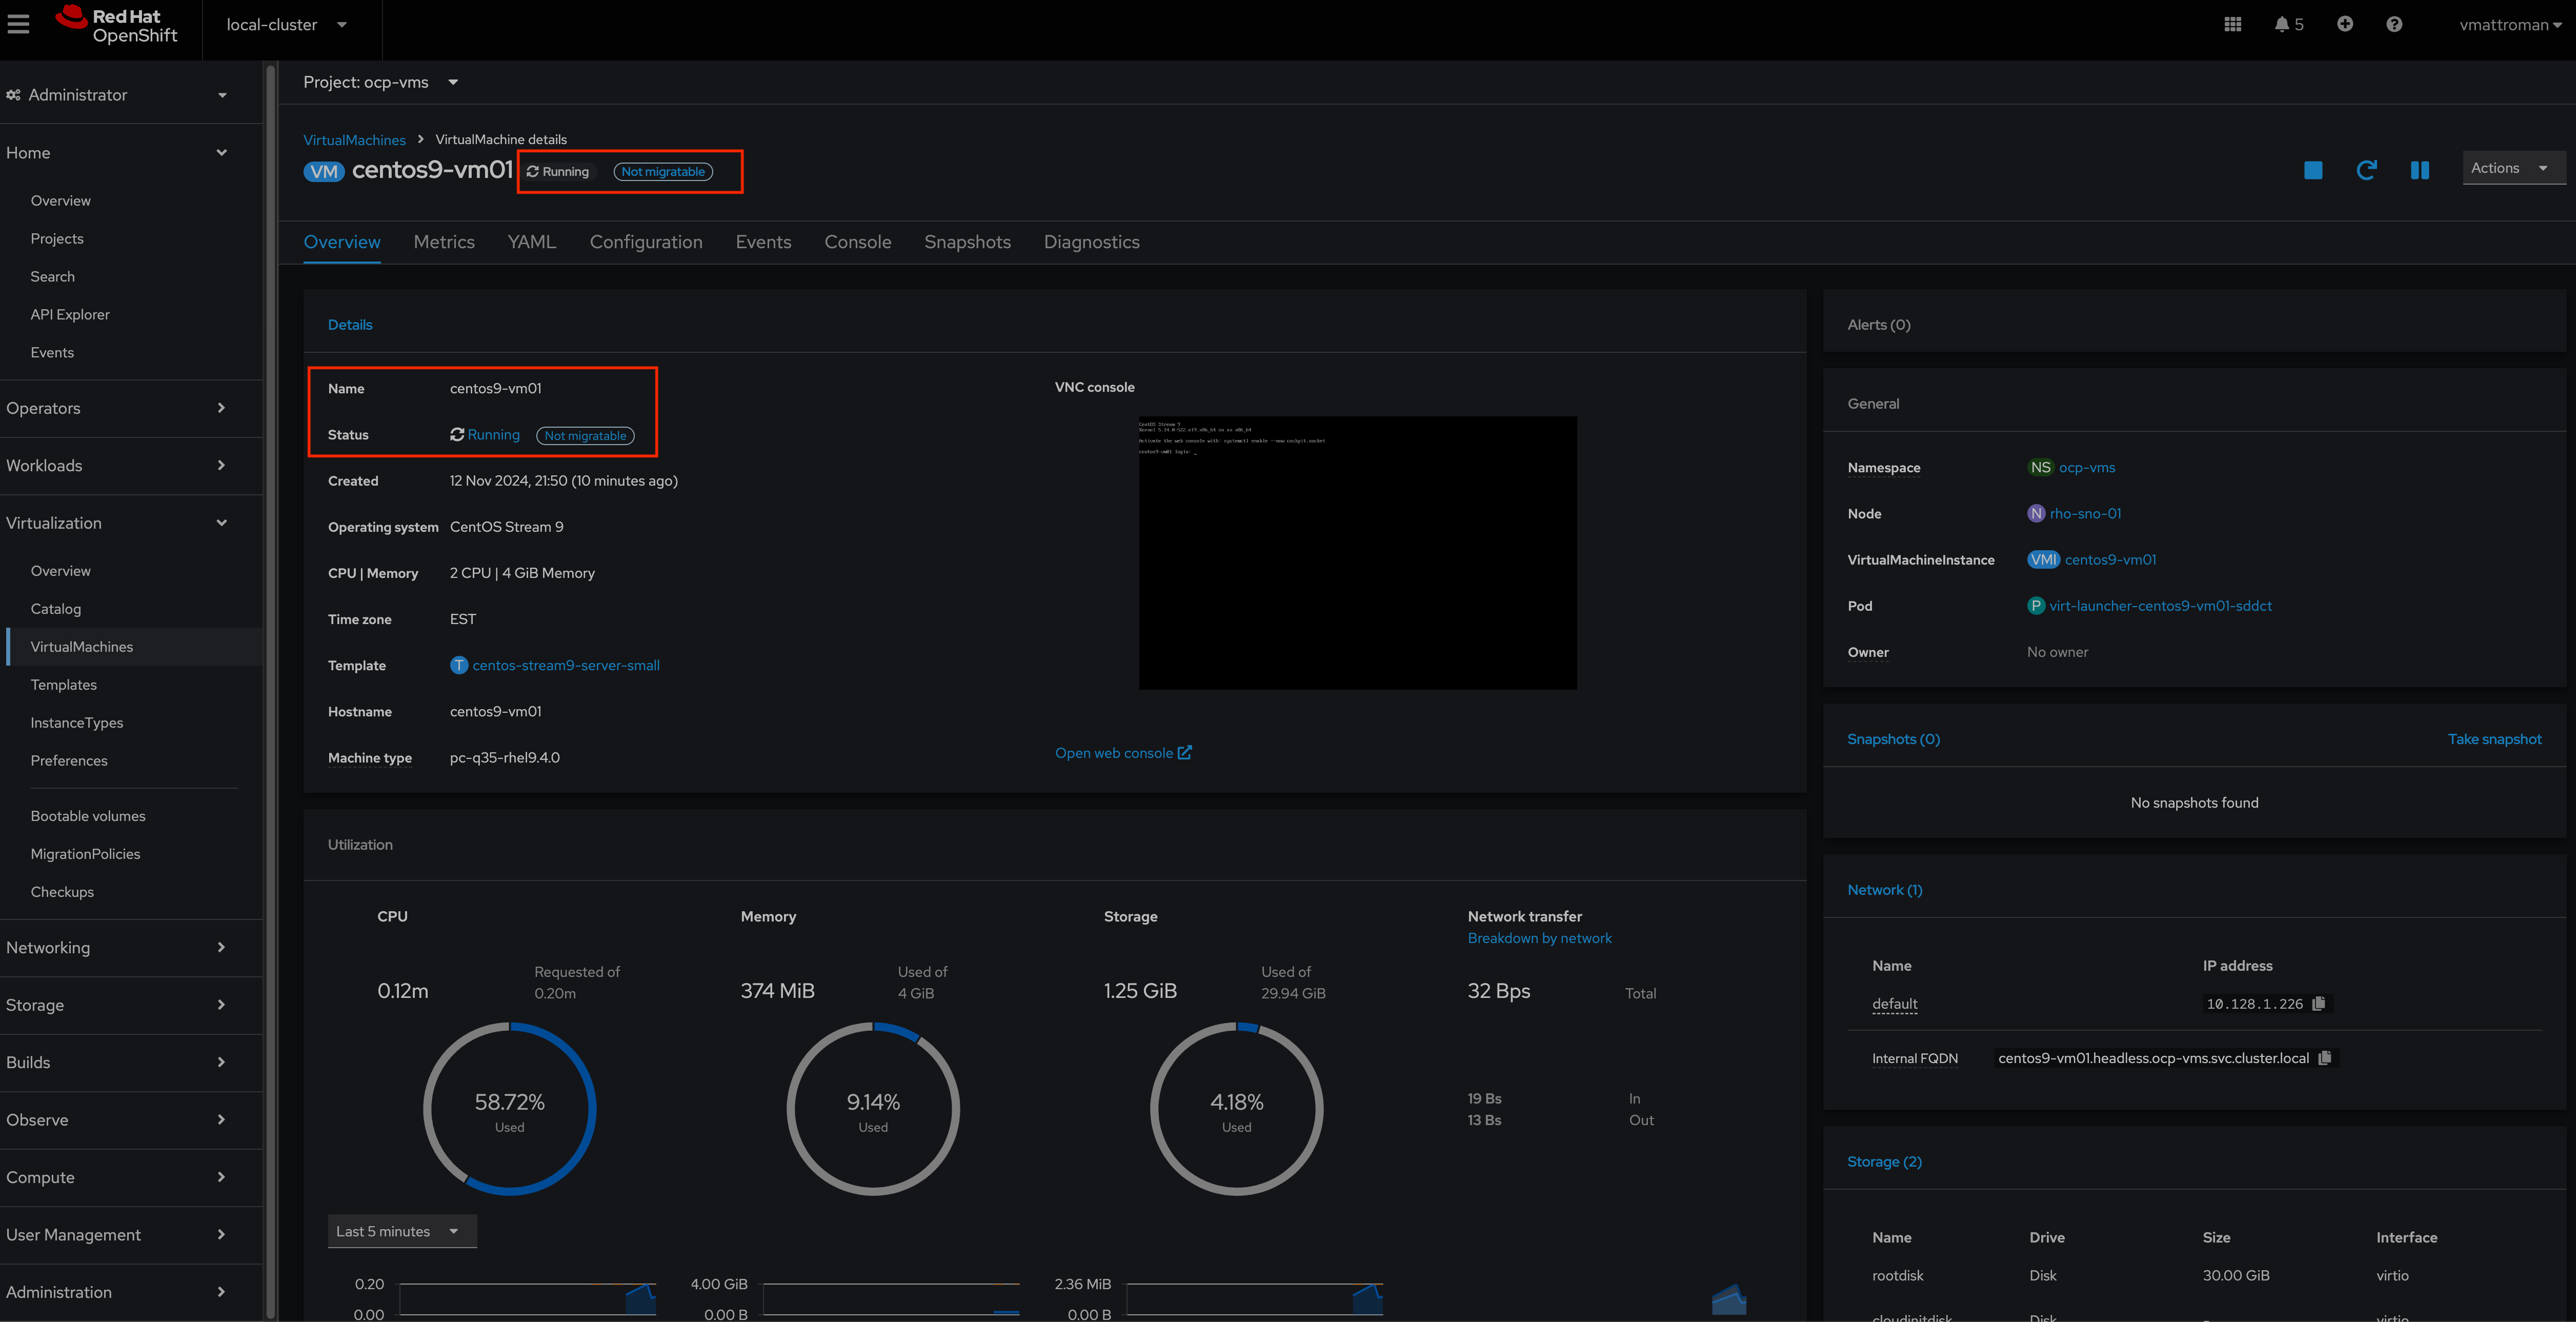
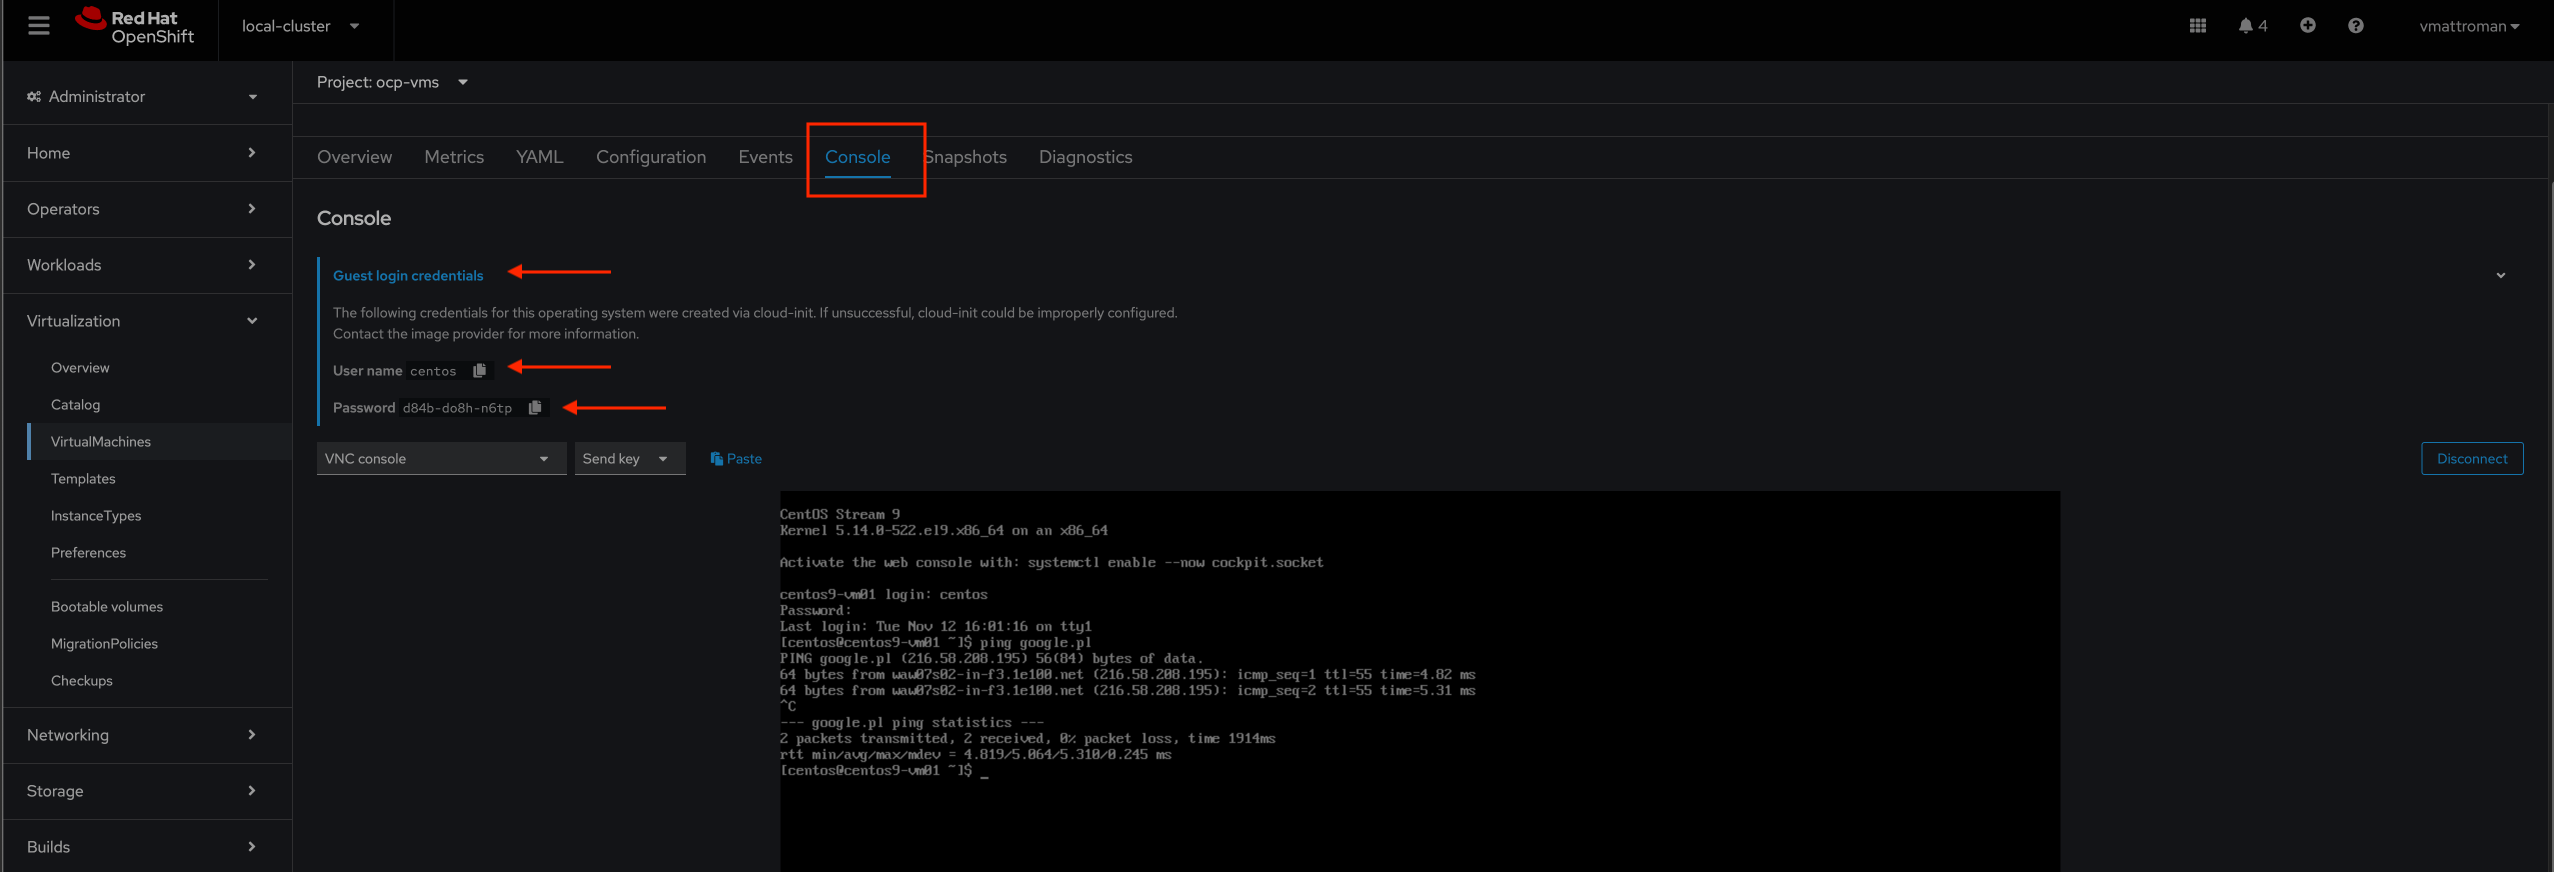
7. Finally, let’s access the the new VM from the Console tab.
Summary
Red Hat OpenShift Virtualization offers a compelling solution for organizations seeking to modernize their infrastructure while preserving existing investments in virtualization technology. By enabling the coexistence of VMs and containers on a single platform, it helps streamline operations and accelerate application delivery in today’s fast-paced digital landscape.
Keep looking at my blog, new posts are coming! There is so much more great features to explore 😉


One Comment